
Alexander Grabovetskiy, woodcarver, School of Woodcarving · Published 2017
Part of Carving Antique Style Rosette

The full video lesson is inside the school.
Alexander Grabovetskiy, woodcarver, School of Woodcarving · Published 2017
Quick answer: A high outer line is an old habit of ornament carving: each leaf edge stays high, and the inside drops into a concave. For my antique style rosette, I carved every leaf edge first, then inward, with a small Dockyard tool and kept paper on the edge until the end.
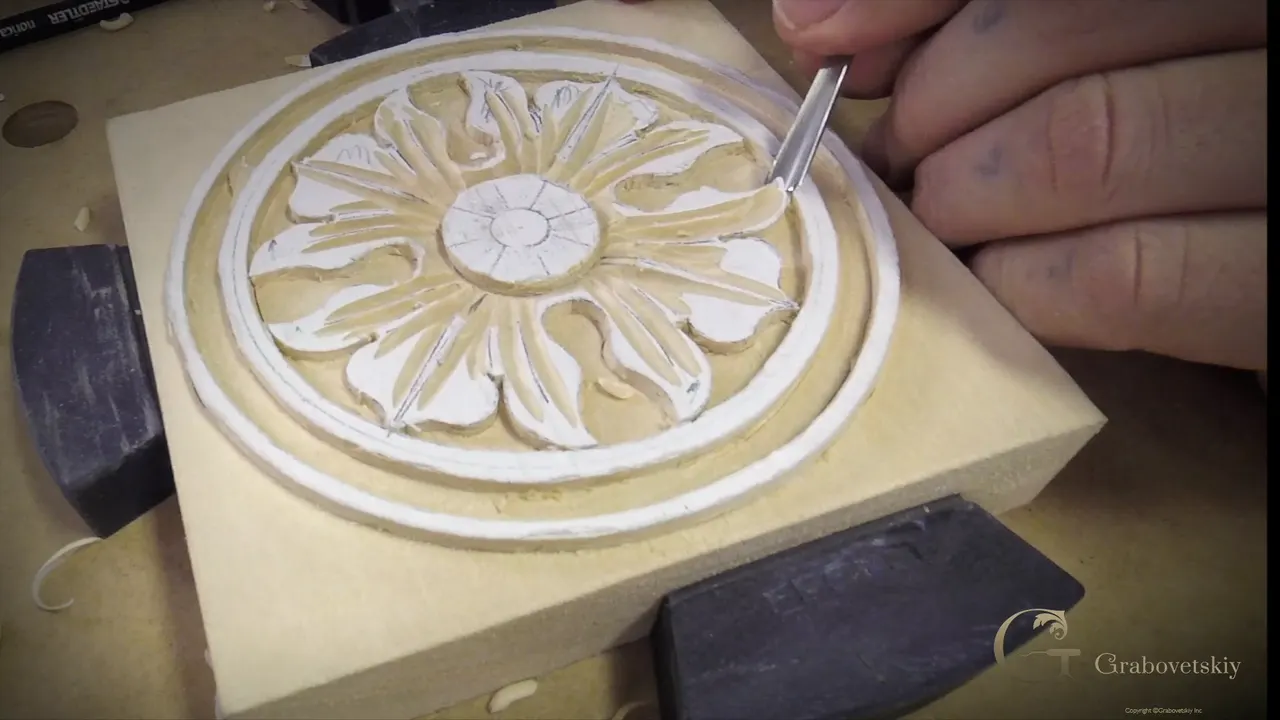
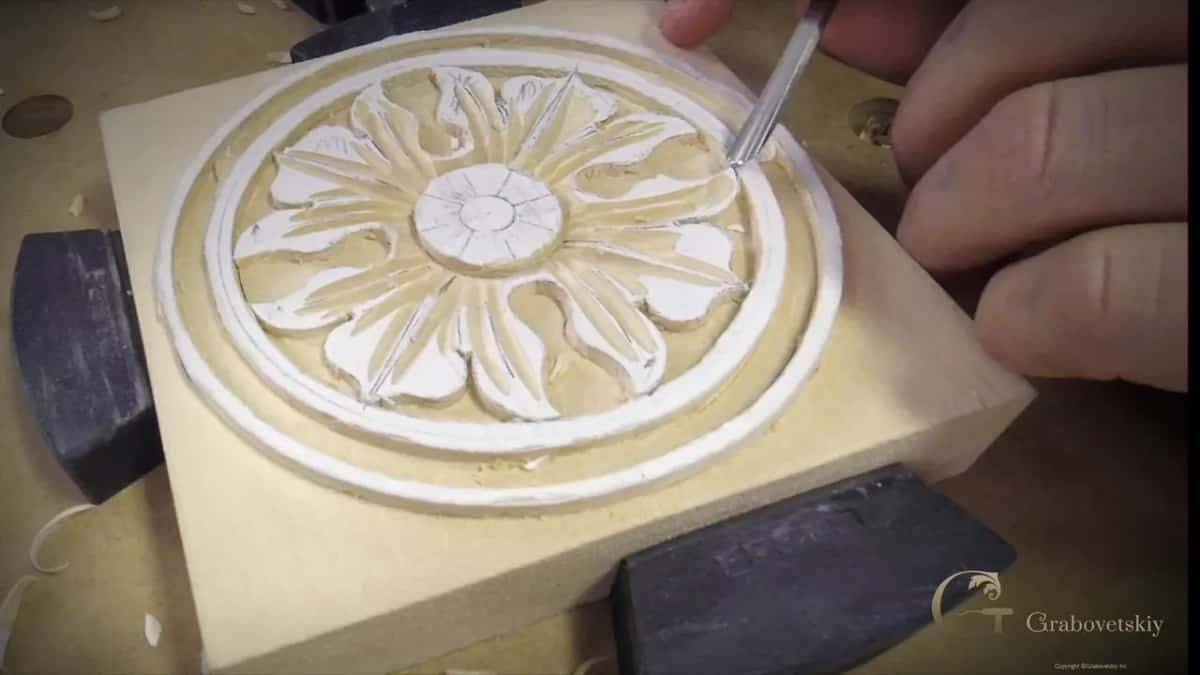
A carved leaf keeps its outer line high because that is how the old carvers left it, with the edge of the leaf as the high spot while the inside goes down into a shallow concave. I worked every leaf on this rosette from the edges in. And I kept the paper pattern on each edge until the very end, when sandpaper took it off.

Ever finished a leaf and found it looked flat? Lost the edge? Then watch where the tool goes on this rosette, because on every leaf it starts on the outline and travels in toward the middle.
It was common practice. In the Romanesque style of stone carving and wood carving, the edges of a leaf would be higher than the inner section, and I left mine the same way on this rosette.
Inside that edge I'm just creating a concave, if you wish. I work from the edges in. The edges stay high, and I rotate the block and carry on from the other side.

The edge also tells me how deep to go. On one concave I looked at the edge right there and kept the depth somewhat similar along the whole leaf. That's the only way I can control it.
In one small section I didn't take a gouge at all. I used a flat number one chisel there, and I said I could even use a knife. Still the paper stayed right at the edge, because I have to maintain that edge as a high spot.
Not every place gets one, though. In one section of this rosette there is no high spot, so I made it somewhat rounded, but not much, with just a number seven. And I'm going to be honest with you. Right after that I said out loud that I wasn't sure I had clearly expressed what I tried to say.

In my Roman Acanthus 5 lesson I said it another way. When the Romans carved an acanthus leaf, they would create a concave on the inside of those leaves, sometimes like a V cut, sometimes like a concave.
Later, in Roman Acanthus 12, I went a step further. On most of the Romanesque leaves you will find a concave on the side. With a smaller gouge, maybe 1/16 of an inch (about 1.5 mm), you can make an extra, deeper concave right in the middle of it. It's barely noticeable, but it creates the shadow again. Don't overdo it, because it's possible.

Culture shows up here too. When I was teaching at Marc Adams School of Woodworking, a student from South America carved exactly the same piece, the same grape, but his background still used a lot of the Romanesque style. In his case that meant concave cuts on the inside of those leaves. It looked really beautiful. I told that story in Roman Acanthus 6, and I meant it. Nothing wrong with your own style, your own accent.
A pipe is the raised section that runs along each leaf. I call it a pipe because it looks like a pipe, and it has to rise above everything around it.
For the sides I used a small, tiny palm gouge, a number 11. You can use a number 9, a 10 or an 8, but I'm using the 11. It's also called a veiner, because it's a really handy tool to make veins on a leaf.

I like the palm size because I really like to control a small tool. A normal size gouge will work as long as it's a tiny one, like 3 millimeters (1/8 inch).
Look how I hold it. Two fingers support the gouge, and I guide it with my left-hand finger, just holding the position. That way I'm controlling it.

Be really careful by the middle circle. If you push too hard, the edge of the gouge will butt into that wall and make a ding, and I don't want to see those. If you've done it, that's not a big deal at all. It's expected, should I say.
I left a little space beside each pipe on purpose, and later the sandpaper takes out the leftover paper. In Rosette Workshop 4 the same 11 had already gone along both sides of each pipe, so here I was only going around them again.
| Stage | Tool | Amount | Note |
|---|---|---|---|
| Going around pipes | Number 11 veiner, 3 mm, 1/8 in | both sides | Don't push it into the wall. |
| Softening the ridges | a smaller number seven, or a five | light passes | Mine needed sharpening, then much better. |
| Hollowing each leaf | Dockyard gouge, a small one, edges first | shallow concave | Paper stays on the edge line. |
| One flat section | flat number one chisel, or a knife | that section | Even there, I kept the edge. |
| Taking paper off | 150 grit sandpaper on a wood block | very end | Then a seven around everything again. |
A few of you asked what glue I use for the paper. Just normal wood glue, yellow glue. You can use pretty much almost any glue, because most of that stuff is going to be gone.
As long as it's not a penetrating glue. Some glues are really thin, and they get into the wood fibers, and I wouldn't use one if you plan to finish the piece with some type of stain or lacquer. You'll notice it.

Yellow glue is kind of thick, and it stays out of the fibers. It will do the job.
I explained what I found in the Greek Acroterion 4 lesson. When you dilute glue with water, it tends to soak deep into the fibers, and if you plan only a clear coat, I don't think that's a problem. Once stained, even after sanding you can see some spots, blotchiness or whatever you want to call it. Straight out of the bottle, the glue stays right on top of the work piece, and it's a lot quicker.
The next step is to soften those ridges. I removed most of that paper with something like a number seven. I checked whether the seven would do, then went with a smaller seven, or even a number five.
Oh, I missed a spot. A couple more pipes, so back I went with the 11.

Then it looked like I needed to sharpen that tool a little bit. I checked it afterward, and yes, much better.
I make a sweep cut while I'm carving, and the tool moves through the wood as it goes. I thought about a number nine for one place. No, it wouldn't be good.
For the hollows I really like what a small Dockyard gouge does. But any small gouge will do the job.
On the Venice Room 22 panel I did the same thing on a bigger leaf. I took a number 11, a quarter inch (6 mm), kept the ridge high and went all the way to the pipe, and I could dig a little deeper close to the pipe. My goal was to keep that edge high. Then a number five, 8 millimeters (5/16 in), blended everything, and the tool must be sharp. It absolutely must be sharp.
Much later, in Venice Room 130, one edge of a concave was higher, and that side was no more than a quarter inch, about 6 millimeters, from the surface.

Before one concave I stopped to think about direction. I have to make sure I'm carving the right direction, and I decide which side will be my clean side.

If the grain goes one way, the high spot of the grain is at one end. I start from that point and go in the other direction, and it applies on both sides. That wasn't a big concave anyway.
Later on that leaf I had to change direction. Now my high spot was on the other side, and the clean side was the opposite one. So I started from the high spot going down, took a couple of passes because I want it to look accurate, checked the height and double-checked.

Back in the Roman course, I put the clean side this way. One side of a gouge is always a clean cut and the other is rougher, and when the grain changes to the opposite direction, sometimes you have to attack from two sides. Keep an eye on the clean side, work that side first, then come back from the opposite direction. And don't forget to rotate or sweep while you're carving.
On the Carving Furniture Panel, in lesson 19, I left an edge as a high spot too, using a number seven. The small curls I cleaned with a number 11, 1 millimeter. The grain ran one way there, and if you push too hard you can destroy that small element. I got approximately 1/32 of an inch deep, under 1 mm.

In the Grinling Gibbons class in Maine, I blended a concave all the way to the edge and brought that edge higher. That's supposed to look much better, at least that's what I imagine, and it gives the feel of movement. I couldn't press, because that piece was so fragile.
Last. Now I have to remove the paper, and we are almost done. Sandpaper, number 150 grit, on just a block of wood, takes it off, and the leftover paper beside the pipes goes with it.

Once there's no paper left, I can work on refining it. My cleaning gets done with the number seven. I get closer to the edge again and just go around everywhere.

There was a question whether I listen to anything when I carve all day and I'm not filming. I really don't like to be in quiet. I listen to audiobooks, I listen to teachings, and I've taken university courses.
I took a whole university course while I was carving some projects, just watching videos. It used to be tapes, later DVDs. I didn't want to waste my time just digging wood, because after a while it becomes an automatic mode. You're just carving and carving, and you have to fill your brains somehow. Honestly, I can get lost in time when I'm doing it.
In Venice Room 56 I said the same. Your hands become really auto mode, but your brains are still free, so you can listen to audiobooks. Some of the courses I took without any credits. It wasn't for the credits. It was more to fill my brains.
There are quite a few books about wood carving, but not a lot about the history, and the best books I found about it are actually university books, like from Yale and Oxford.
One I like is about German wood carving history, and it's called Sculptors of Limewood.
Michael Baxandall wrote a book titled The Limewood Sculptors of Renaissance Germany, published by Yale University Press, and limewood is the British name for linden.

For Grinling Gibbons there are a couple of old books that used to be printed only in the 1950s and 1960s, and they're really good. Go on Amazon and enter Grinling Gibbons as the search word, and it will give you some results.
Another man wrote a couple of books about Gibbons, and I really like what he wrote. He used to restore Gibbons' work. My own Grinling Gibbons class is here on the site too.
I mention the European way a lot, and Europe is actually big. When most people say Europe, they only think of Western Europe, like Germany and France. But there are Eastern European countries too, like the Czech Republic, with a long, ancient history and ancient people, and Slavic countries like Poland, Ukraine and Russia. It's also Europe.
Of course, I don't know about all of Europe. I do have friends living in Germany and Poland. But I grew up in Russia, and it's different from the rest of the European cultures. Russia has its own unique cultural background, especially during the Soviet Union, the Iron Wall. We were locked. We couldn't communicate with the rest of the world.
I don't know if it was good or bad. Of course it was bad, because of the regime and the communists. But on the other hand, people learned how to survive.
When I came to the United States, I saw a lot of opportunities just because of my background. I didn't read the newspapers, and I didn't watch American TV. I was working, working, working. I built a business, made money for my family, and employed multiple people.
After five years, when I already was successful in business, I read the newspaper and found out the economy had been bad during those years. But I didn't know that.
Zig Ziglar told a joke about it, and I think it's a true joke. The joke asks why immigrants are so successful in the United States. The punchline goes like this. When an immigrant starts to speak English, suddenly he finds out there is a bad economy. For my mindset, what you call a bad economy is a really good economy. All you have to do is work and see those opportunities. Don't be afraid.
Would you like to see the 11 go around every pipe and the edges stay high on the whole rosette? The video sits in Carving Antique Style Rosette, right after Rosette Workshop 2 and Rosette Workshop 3, and tuition opens every lesson of it.
Old carvers did it. Leaving a leaf's edge high was common practice in the Romanesque style of stone and wood carving, and those edges sat above the inner section. I keep the paper on that edge almost to the end of my rosette, so I don't lose it.
I use normal yellow wood glue. Almost any glue works, because the paper disappears anyway. Just not one that soaks into the fibers. Thin glue that goes into the wood can show later under a stain or lacquer, so I wouldn't use it then.
A veiner is a number 11 gouge, and the name comes from making veins on a leaf, where it's a really handy tool. Here I used a small palm one for the pipes. A tiny normal size gouge, around 3 mm (1/8 in), works as well.
First I decide which side has to be my clean side, then I find the high spot of the grain. I start there and go down toward the other end, on both sides. If the grain turns, my high spot moves to the other side, so I change direction too.
Measuring wasn't how I set the hollows on this rosette. I watched the edge and kept the depth somewhat similar the whole length, which is the only way I can control it. On one furniture panel flower, the hollow beside a high edge came out about 1/32 of an inch.
My choice is 150 grit sandpaper, used on just a block of wood. Once no paper is left, I go back with a number seven, get closer to the edge again and go around everywhere. Leftover paper beside the pipes comes off the same way.