

Alexander Grabovetskiy, woodcarver, School of Woodcarving · Published 2018
Why is the inside of a Roman acanthus leaf hollow?
Quick answer: The concave inside a Roman acanthus is a deep hollow carved down each section between the pipes. Every old leaf I could find, in history books and in pictures online, has one. A leaf doesn't strictly need it, but I carve it to stay true to that history, with a number 9 gouge first.
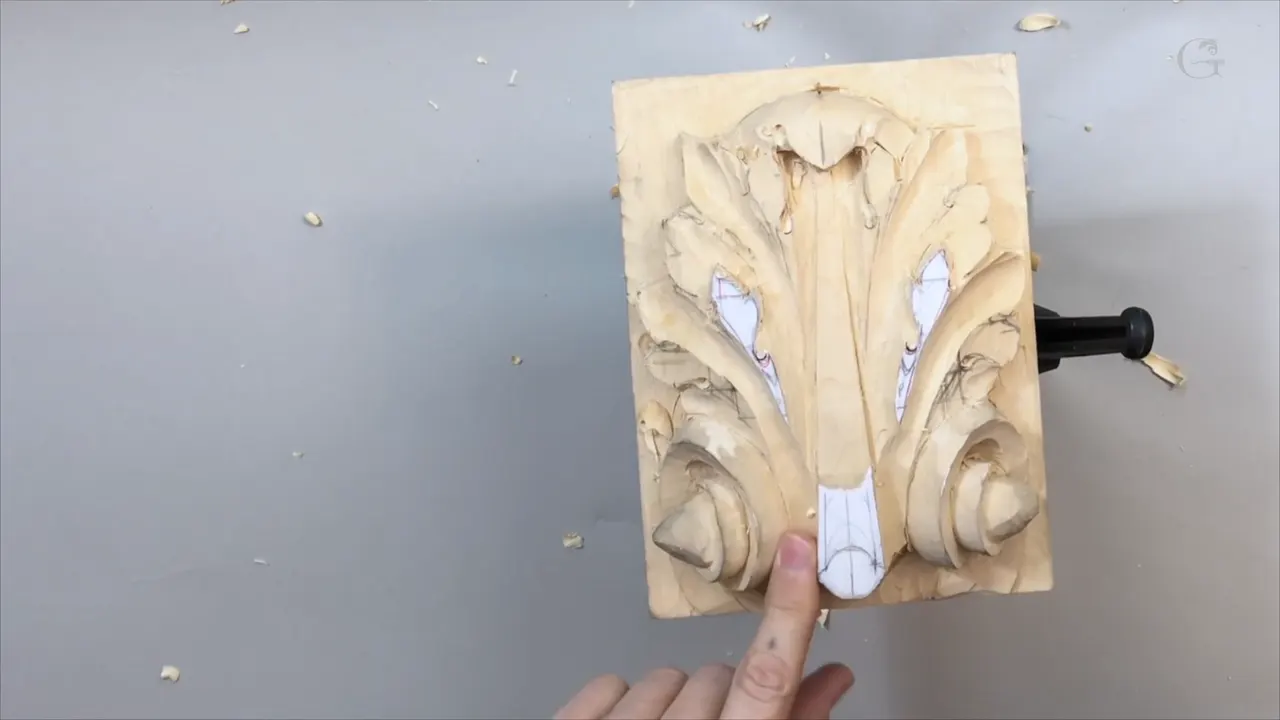
The hollow inside a Roman acanthus is a concave cut that runs down the inside of each section, between one pipe and the next. I carve it again and again on this panel. My reason is plain. The old leaves have that concave inside, as far as I could find, and I want this piece to stay true to that history.

Have you ever looked at an old acanthus leaf in a book? Did the inside of each part seem to sink in, like a little channel? That sinking is the concave. Here you watch me carve it with one gouge, then a smaller one, then a smaller one again.
I opened this lesson with new intro music and a fresh haircut. I do my haircut about once a year, at least this year. Then we went back to work on the same leaf, and the first goal was one section of it.
The concave in six short lines
- Take a section straight down first, and only then scoop it.
- A 10 mm number 9 did most of it, though an 8 works, and even a 7 will do.
- Near a pipe the tools get smaller.
- With your hands locked together, carving toward you gets safe, if you stay careful.
- Give the inside of every gouge a lot more stropping than the outside, because a round outer bevel fights you in the wood.
- Clear small chunks first, and don't touch the last of the paper.
Why does a Roman acanthus need a concave?
History, as far as I can see it. Near the end of the lesson I said a Roman acanthus has to have a concave on the inside of its leaves. But I took it back a little. It doesn't have to have it, don't get me wrong. I would just like to stay authentic to the history on this piece.
I can't even say most of the old leaves have it, because I didn't see all of them. What I can tell you is what I found. Whatever I could find in the history books and the pictures online, the old pictures, they all carry a concave cut on the inside of those leaves.
Earlier in the lesson I said the old carvers did a really similar thing on grape leaves as well as acanthus. They always used a concave inside. Later European acanthus is another story, more modern, and we carve that kind in other lessons, like the 1903 design in Carving Modern Acanthus.

What comes first, the drop or the hollow?
The drop. My goal was to take this section down, straight down, just like that. Only then did I set a semi-arch, a concave movement, on the inside. Later on I come back and attack that section again. For now I just set the concave.
I kept the same gouge in my hands and made one continuous cut. Keep an eye on how your grain behaves while you do it. One side of a gouge works with the grain. On my panel the left side came out really clean, and the opposite side worked against the grain.
That's also why your tools must be sharp. I said it three ways on camera. They must have to be sharp, they have to be sharp, they must be sharp. The last one is probably the right way to say it. I made that concave really deep.

Which gouge carves the concave best?
A deep one. I used a number 9 at 10 mm, about three-eighths of an inch, only because it was handy in my hands. Use a slightly different gouge if you like. An 8 will work, and even a number 7 will do.
Ask me why I use a 9 or an 8 so much, and I'll say it works on both sides of the sweep, and I can control it. I can use just one side, the whole sweep, or the other side. A really handy tool.
If you have a bigger tool, you can always make a clean cut. Mine is a number 9 at 20 mm, three-quarters of an inch, and I took it over the first rough concave on both sides, just to clean it a little.
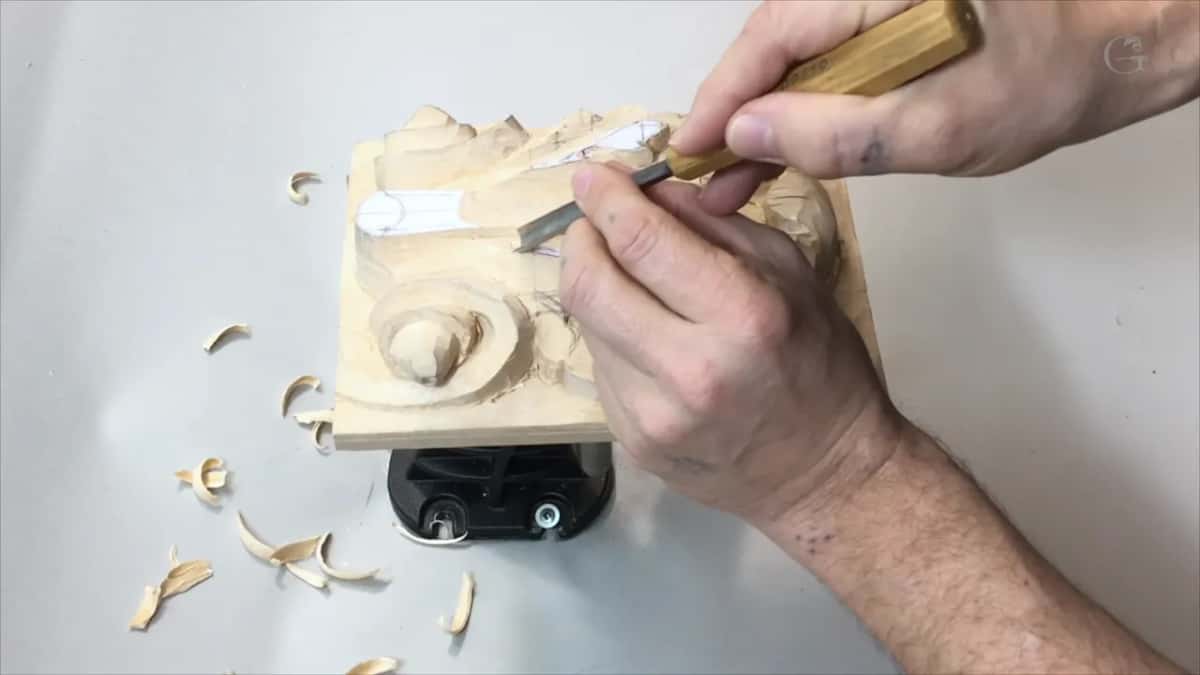
Beside one pipe, my 10 mm number 9 was a little too big, and I needed a smaller one. I took a number 8 at 5/16 of an inch, just slightly smaller than the one before, and carved with it. Maybe even smaller, I thought, so I tried a quarter-inch number 9. Just a perfect fit.
Where a ridge had to come down, I went the other way. Not flat, but less sweep. A number 5 at about 5/8 of an inch made a gradual movement on each side.
| Tool | Where | Note |
|---|---|---|
| Number 9, 10 mm | taking each section down and setting the first deep concaves | about 3/8 in, the one in my hands |
| Wider 9, 20 mm | going back over the first rough concave on both sides | three-quarters of an inch, a clean cut |
| 5/16 in number 8 | the side of one pipe, where the 10 mm was too big | slightly smaller than the one before |
| Quarter-inch 9 | the same pipe, then the concaves toward the pipes later on | just a perfect fit there |
| Shallower 5, 5/8 in | bringing a ridge down gently, without overdoing it, on both sides | less sweep, a gradual movement |
| Dockyard, 1/8 in | setting the eyes with one straight down cut each | a slight, small wiggle |
| V tool, 3 mm | cleaning a little bit inside, here and on the other side | number 15, 45 degrees |
How do you make both halves the same depth?
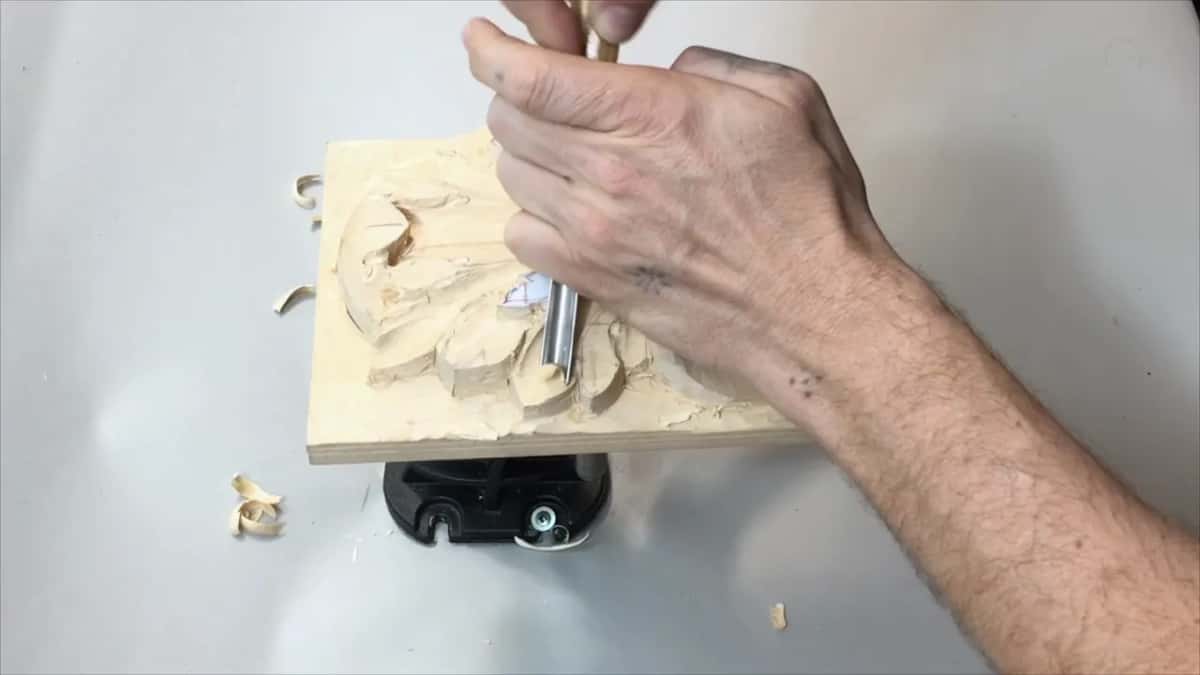
You transfer it. On the first side I left about 10 mm, approximately three-eighths of an inch. There is also a technique you can use. I place a 10 mm gouge close to the edge, see how much is there, then transfer that and do exactly the same. Whatever works.
Don't forget, the board carries two lines now. One is my clean line and the other is my preliminary line, so I have to pick the right one to measure from, all the way up.
A plain piece of paper works too. I mark the high point of the leaf on it, rotate the board, and lay the same paper on the other side. That mark shows me my low point.

My vise helps here. I can work from different angles, and since my line is on the wood, I can see where it is and work from the opposite side.
You could measure, but you can't spend all your time measuring and measuring. Try to develop the feel. If it's not perfectly the same, that really should not bug you. On mine I could see one side needed to come down a little more, so I took it down.

How do you lock your hands to carve toward yourself?
Let me tell you a story. The year before this lesson, I taught one big class at the Marc Adams School of Woodworking. When I filmed this, I had just finished waxing and staining a piece from that class, grapes and acanthus movement.
In that class I told my students it is always dangerous to carve toward yourself. You can slip with your tool and poke yourself. I've done it. Some days, I remember, I cut myself over 100 times. It was complicated carving, flowers with leaves so paper-thin you could see through the wood.
One of my students was a dentist. He worked all his life as a dentist, and he knew how to lock his hands. He showed me, and I thought it was an excellent technique. I watched him use it on a carving and said, well, that works for all types of carving.

He locked his hands together and used just the palms for the short cuts. Locked like that, it is really hard to slip. Almost impossible.
So yes, it's possible to work toward yourself. You still need to be really careful. But if your hand is not hanging in the air, if it's locked, it is safe.
You also have to watch the grain direction. For me it's easy, because my vise lets me rotate the piece any time and move it any direction. Some of you work on your dining table, and that limits how you can rotate. You clamp it down, then unclamp it, rotate, and carve again, and it's a hassle all the time. So carving toward yourself, away from yourself, or sideways is fine.
Later in the lesson you can see my hand locked, like I told you before, and it works just fine. Long, continuous cuts, no problem.
Why strop the inside of a gouge more than the outside?
Leather rounds the bevel you strop. I showed it on a straight chisel. It has an outside bevel and a small bevel on the inside. Strop the outside on the leather and that bevel goes round, instead of staying straight.
With a rounded outside bevel, carving gets much, much harder. Believe me, it's much harder to push through the wood. The inside bevel can go round. Keep the outside straight and it's absolutely no problem.
So when I strop, I always try to strop on the inside of my gouges. A lot more on the inside than on the outside.

It's a really good idea to keep a strop on your workbench. Mine is a stropping block, made commercially, and it has different parts for the gouges and for the V tools. Sometimes a couple of strops is all it takes, and your tool is back in play. After stropping I said the gouge was really, really sharp now. More on edges lives in Carving Tool Sharpening, and on sharpening in general.
When do the eyes get carved?
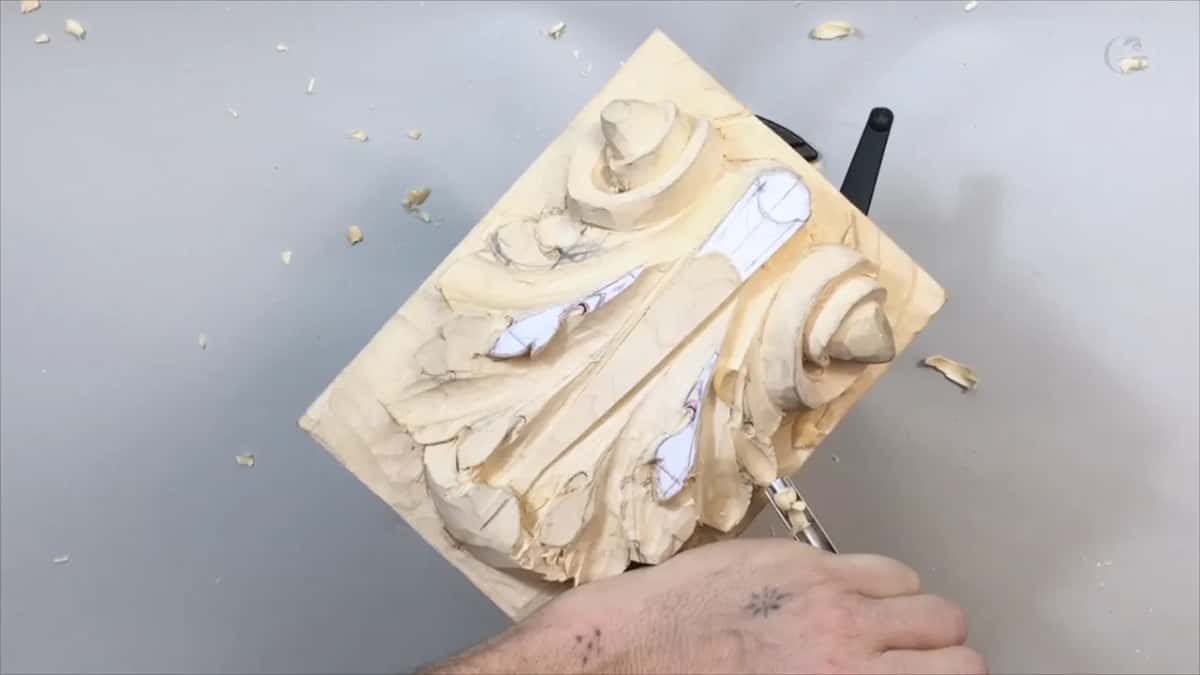
Right after the concave between them. In this section there are two eyes on each side, and the pipes go from the eyes. I made my concave cut between those eyes first. In one spot I had to be careful and attack from one side. I rotated the board for the other side.
Next came a really small gouge, a tiny Dockyard, one-eighth of an inch (3 mm), and I set each eye with a straight down cut and just a slight, small wiggle.
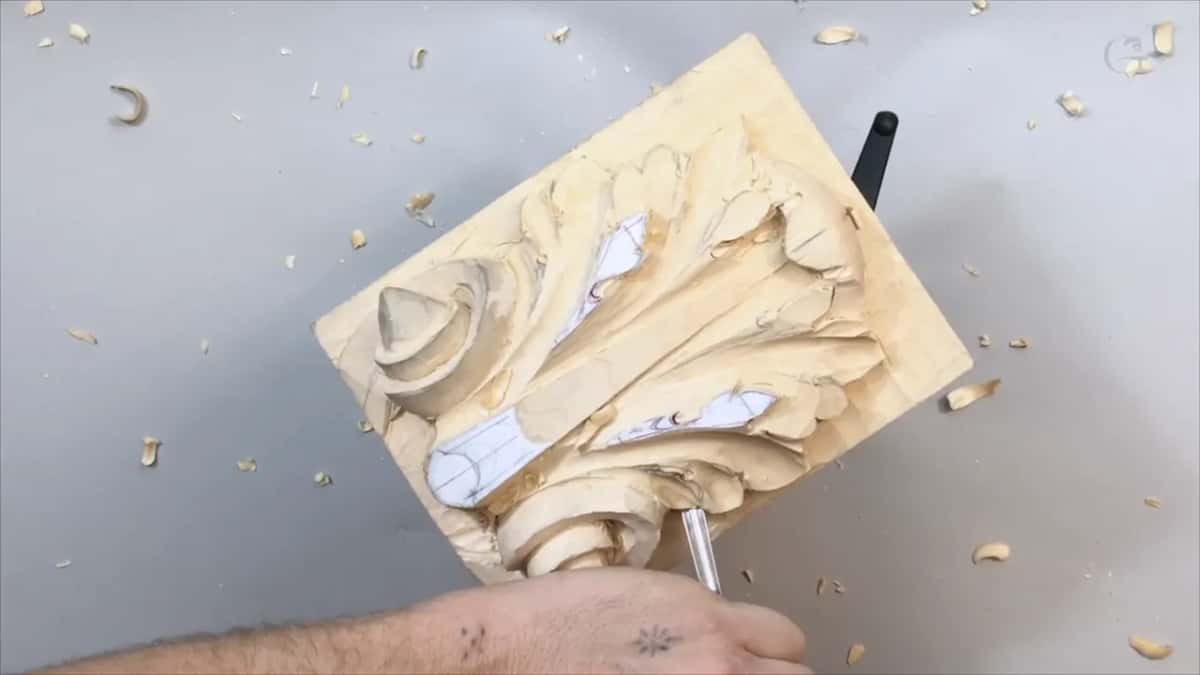

You could make the eyes different. A different sweep, a smaller one, in different spots. Some eyes could be smaller and some could be bigger. I didn't do that here, because I didn't want to make it too complicated. But you could.
Next, a number 12 chip carving knife made my cleaning cut. The chips didn't worry me yet. This was still the preliminary setting of the form.
What does the law of flow ask of the concave?
Flow in every direction, not just one. In part four I said everything has to have a flow, on this axis and also on that axis. It's a three-dimensional world. Look from the side. The flowing lines have to flow in that dimension too.
On my leaf one high point ran too long, a high ridge that should not be there. The high point should sit just at those spots, and the rest of it has to flow downhill. So I worked my gouge upside down to take it down.

Before that I was careful not to overdo it. With the number 5 I made my gradual movement on each side. I didn't worry about the final form yet, since those were preliminary, just to feel the overall shape.
And I kept checking and rechecking both sides. They must be symmetrical. I took a pencil and fixed some of the lines. I'm just eyeballing, but you can skip that and simply refer to the original drawings.

Then one pipe needed a little more taken from its sides, right here and right there, to look more symmetrical. Again a number 9, and this one is just a quarter of an inch number 9 by Ashley Iles. "I like this pipe," I said when it was done.
When does preliminary work become final?
In part five. From there on I said I was going to be more careful, and make my cuts as long as possible, because some of them would be almost finished. I'm not going back to some of those surfaces. They stay wherever they are right then.
One section of the leaf goes underneath, so I set that side of the pipe with the same tool. After that I removed one side and made a really nice, smooth movement downhill. For that I took a small gouge again, the one-eighth of an inch Dockyard.

Any small gouge will do instead of a Dockyard. I also have a number 9 by Ashley Iles that works the same way, just with a longer handle, and you can still control it on small work. This is my personal opinion, and you don't have to think my way. But for some reason I can control the smaller tool much, much better on work like this. I hold it almost like a pencil, for my micro cuts.


Then a number 5 at a quarter inch, worked upside down around my pipes. I said any number 5 or number 7 will work there. It should feel like it goes downhill. Really smoothly. Then I cleaned a little more on one side to take those ridges out, because I still had my concave cuts to make toward that pipe, on both sides.

Why leave a little paper at the edge?
Both halves come out equal that way. Late in part five you can still see some paper left at the edge of my leaf. My goal is not to touch it. That way this side comes out equal to that side, if I'm really careful.
I carried each concave all the way to the pipe, both sides, and kept a little of that paper untouched. The paper went on the block before the drawing, back in lesson 1. Then my knife cleaned the inside a little. In one spot I said I probably should even use a micro gouge. But that's fine.

How much wood should one pass take?
Less than all of it. My teacher, my master, told me: never try to cut just with one cut. Don't take all the material with one single cut.
You can still make really nice long strokes, but first take small chunks out. Then it's much easier to make it look cleaner, neater, nicer. If I were doing this in slow motion, you would see me sweeping. I rotate the tool while it moves.

I have to caution you. Yes, I carve really deep, but be careful with that. Wood carving is an art of subtraction. If you subtract too much, that's going to be a problem. On a piece like this, if you want to be authentic to the carving, you can't glue that back. Whatever you take stays taken.
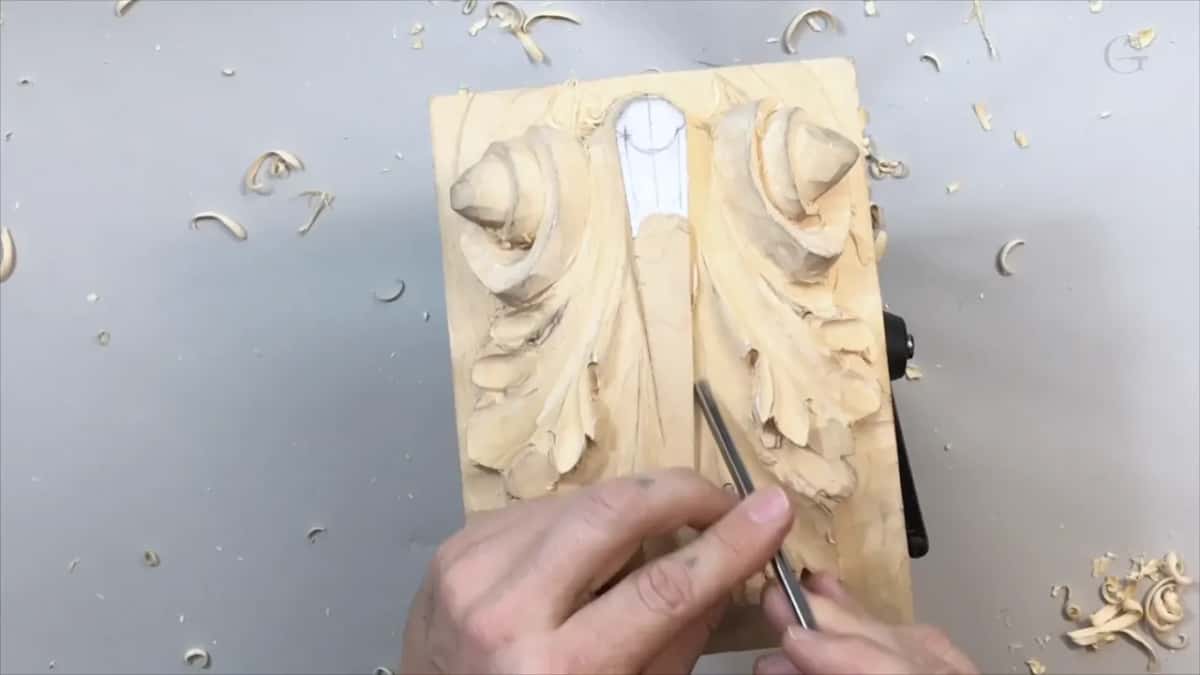
In the last part I picked up a 45-degree V tool, a number 15 at 3 mm (1/8 in), and cleaned a little inside on both sides. That way I see exactly what's going on.
Why did my student from South America carve the same grapes differently?
His background showed up as concave cuts inside the leaves. In wood carving there are cultures, and I talked about them near the end of this lesson while I worked. European culture is divided too. There are English wood carvers, German, Swiss, Russian, and so on.
We all use the same tools, but we bring different approaches and a different feel. Carve the same design, an English carver and a German carver, and you will see a big difference. The overall design stays the same. The movement of the tools, the tool marks, is where you can spot it.
At the Marc Adams school I had a student from South America, and he carved exactly the same piece, the same grape. But his background was more Latino culture, and they still use a lot of Romanesque style. In this case that came out as concave cuts on the inside of the leaves, even on the same design.
It looked beautiful. Really beautiful. There's nothing wrong with building your own style and your own culture into the work, your own accent if you wish to say it that way. I know some of you struggle with my accent, but I don't think it should be a problem.
Want to see where this panel goes next? Carving Roman Acanthus 7 picks up on the same leaf. Every lesson of this Roman acanthus course is open with tuition, and if you are new, you can start here.
How it's done
- Drop the section. Take the section straight down with a deep gouge before any shaping.
- Scoop the inside. Set a concave movement with one continuous stroke, and notice which side of the sweep goes with the grain and which side fights it.
- Match both halves. Transfer the high point on a strip of paper, or read the margin off the gouge itself, then repeat on the opposite side.
- Go smaller near pipes. When the 10 mm is too big, change to a 5/16 inch number 8 or a quarter inch number 9.
- Set the eyes. Press a one-eighth inch gouge straight down with a slight wiggle, then clean with a chip carving knife.
- Let ridges run downhill. Work a number 5 upside down until each ridge falls away from its high points, checking both sides as you go.
- Small chunks, then long strokes. Take small chunks out before the long clean pass, rotate the tool through the stroke, and stop short of the leftover paper.
Frequently asked questions
Does every old Roman acanthus have a concave inside?
Every one I looked up has it, in old books and in pictures online. But I didn't see all of them, so I can't promise you every leaf. A Roman leaf doesn't strictly need the concave. I carve it because I want this panel faithful to that history.
Which gouge works best for the concave on an acanthus?
A deep sweep, like a number 9 or a number 8, works on both sides of its curve and stays easy to control. My first hollows took the 10 mm one, about 3/8 inch. Where a pipe sat close, a quarter-inch 9 was a perfect fit for the space beside it.
Can locked hands make carving toward you safe?
Lock them together and work off the palms for short strokes, the way a dentist in one of my classes showed me. Once the hand stops hanging in the air, a slip becomes almost impossible. Stay really careful anyway, and watch the grain direction.
What to carve next