

Alexander Grabovetskiy, woodcarver, School of Woodcarving · Published 2018
Where do you start when drawing a symmetrical acanthus?
Quick answer: Starting a symmetrical acanthus is a matter of two middle lines before any leaf. On a block about six by eight inches, I halved it both ways, split it into ten equal parts each way, ruled a border I would not cross and numbered the lines. Then the eyes went down.
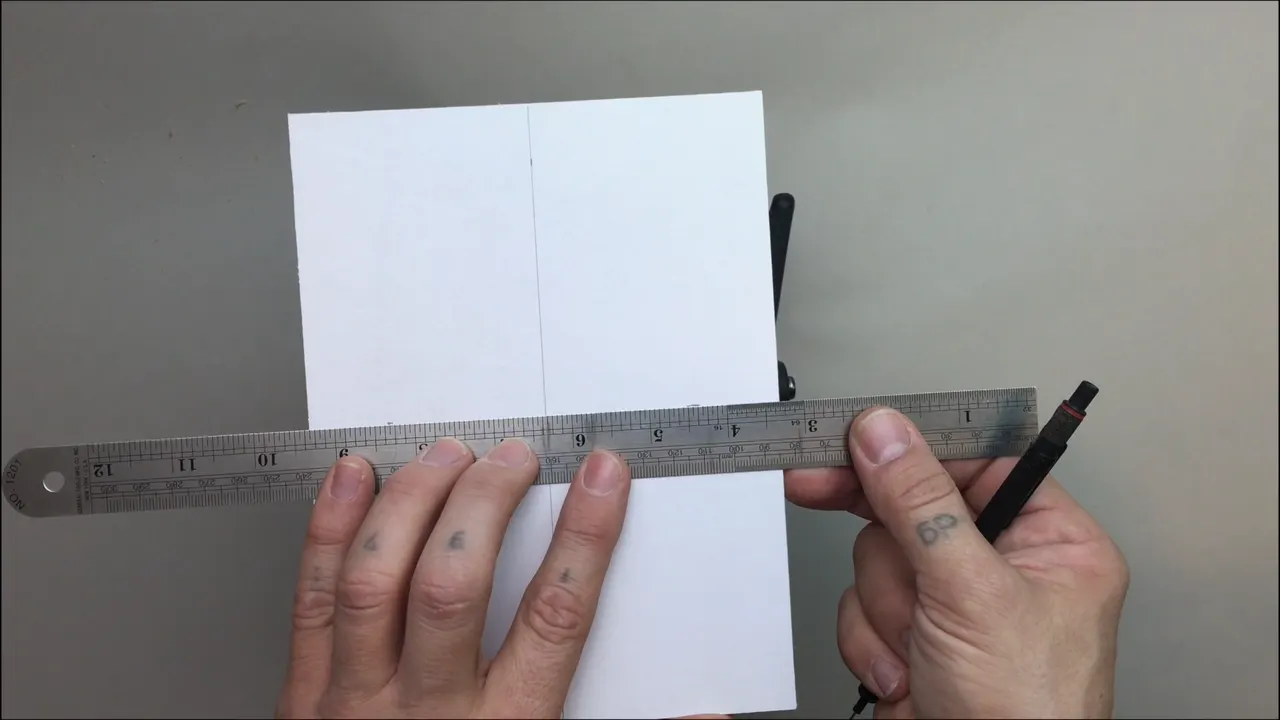
The first mark on a symmetrical acanthus is the middle line, and the leaf comes later. My block was about six inches by eight, with paper already on top of the wood. I marked my middle lines first, four inches and four inches. A grid of ten parts each way came next, then a border, then a number on every line. Only after all of that did a single eye go down.
Do you have a block on your bench and a Roman leaf you would love to carve? Would you like the left half to match the right half when the drawing is done? Then start with a ruler and a pencil, the way I did. Below are my first marks in the order I made them, what each one is for, and what the drawing download in this course gives you.

My first marks, in order
- Paper goes over the block before any line.
- Middle lines come first, one down the length and one across.
- Ten parts across and ten down make the grid.
- A border of 10 mm (3/8 inch) sits at the top edge, with 3 mm (1/8 inch) at the sides.
- Every line gets a number.
- Then the eyes and the main points, or on another day the flow line.
Why do the middle lines go down before the leaf?
This leaf is symmetrical, and every movement on it gets placed from those lines. I said it on camera while I was drawing. The design is symmetrical, so I have to figure out where my movements go based on those lines and the subdivisions we made.
When the camera started, the paper was already applied on top of my block. There are a couple of approaches you could take, but this time I decided to draw right on the wood. And I think that's a really nice practice, to draw two equal parts, two symmetrical parts, on a piece of wood.
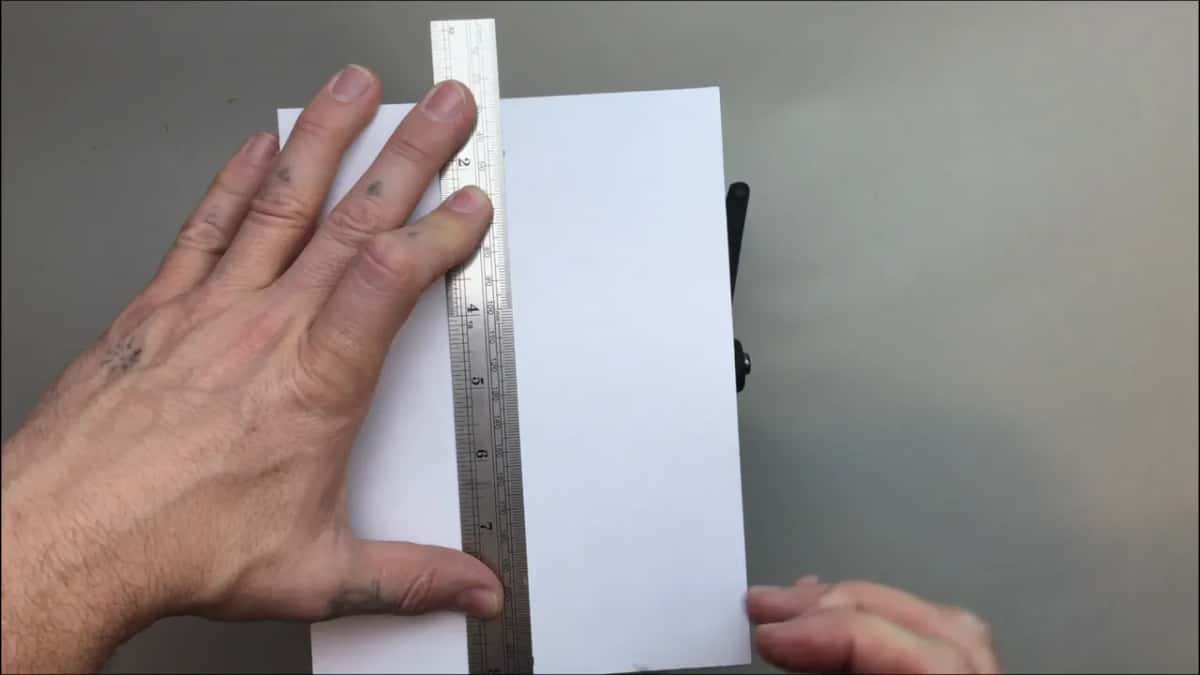
Four inches and four inches. My middle line fell there on the long side, and it went down before anything else.
It looks complicated at the beginning, I know. It's not as complicated as it looks, because the whole thing is about the symmetry, how symmetrical the leaf will look, right side to the left side.
How do you split the block into ten parts?
Mark the division in ten on your ruler, then carry it across the block one way and then the other. I call this the 10 parts division. We divide, or should I say subdivide, the wood in 10 equal parts vertically and 10 equal parts horizontally, and we just draw a grid, 10 by 10.

Look at how I marked it. I put the marks on my ruler approximately, whatever the division came out to be, and went on. I think it's an excellent approach. It's almost mathematical, and so easy.
Graph paper works on the same idea, except here the spaces are sized to your own block. On mine each space comes out near 0.6 by 0.8 of an inch, about 15 by 20 mm.

| Mark | Where | Why |
|---|---|---|
| Middle lines | Halfway along each side, so 4 inches on the long one | Marked first, before the grid |
| The 10 by 10 grid | Marked on the ruler, then ruled across as a grid | Almost mathematical, and so easy |
| Top border | Near 10 mm, or 3/8 inch, down from the edge | A line my design won't cross |
| Side borders | Roughly an eighth (3 mm) in from each side | Same rule as the top |
| Base line | The same three eighths again, so the bottom repeats the top | The volutes stop there |
| Line numbers | Along the edges of the grid | To find the right space again while drawing |
Where does the border go?
About 3/8 of an inch, or 10 millimeters, along the top, and maybe an eighth on the sides, about 3 mm. Those are my boundary, the line which I'm not going to cross with my design.
The base gets the same as the top. When I came to the volutes at the bottom, I said my base would be about three eighths of an inch, so I should not pass it with my volute. The bottom repeats the upper part, exactly the same. A little before that I added one more line, about an eighth of an inch away from the base, and told you that later on you'd see exactly what those lines are, once we start carving.

A border first is how I started a beginner's board too. In the second workshop of my first cuts course I drew straight onto the board, a line about a quarter inch (6 mm) from the edge, then a second line about an eighth of an inch, the same on both sides. The leafage design does not cross it. This is my boundary line, if you wish to call it that.
Why put a number on every line?
To find the right space again while you draw. I number my lines because for me it makes it a lot easier to find the spot I want when I draw the design.

What does counting six of the ten give you?
A marking point inside the space. Each of those spaces I subdivide in ten, approximately, and from those ten parts I count about six and mark that. After that I drew the middle line on that side, again just eyeballing about six parts out of ten.

Four lessons later, in lesson 5, I was bringing back a pipe I had lost on one side, and I counted six of ten again. That, I said, is a really good representation of the golden ratio, or golden rule. Take a line, divide it in ten parts like we did before, and count about six parts down.
My grape leaf vase lesson puts it in plainer words. If you know a little bit about Fibonacci, you know the golden ratio, and the easy way to see it is a 60/40 rule, six of every ten. The design course shows the same 60 and 40 inside an acanthus leaf itself, where a division falls on one of the golden sections. Italians put that division one way and the French put it the other way, and both are still beautiful. They just communicate a different idea.
What is the first mark of the leaf itself?
On this leaf it was the eyes, along with the main points. I was trying to calculate how many eyes I would have, based on the original Roman design of the acanthus leaf, and then figure out pretty much where those eyes would sit. I know it doesn't make sense, just watching me at that point.

That's one of the approaches. Sometimes I start with the flow line, sometimes I start with drawing eyes. Next I set the upper part, which I call the curl part. It curls forward, and that becomes our high point.

From there I sped everything up. Flow lines going to the center, pipelines, leaves that overlap, the volutes and the charcoal all come after these first marks, and lesson 1 shows every one of them on the same drawing.
Does every acanthus start from a grid?
The two older leaves I teach first, the Corinthian and the Greek, begin from a center line or from a couple of points instead.
On the Corinthian leaf I put the block on a sheet of paper and established the center line, nothing complicated, but still the center line. Every acanthus leaf has to have some type of movement, and I divided that line in three main movements. The eyes always go between those main movements, and the pipe always goes to the center line. I called the Corinthian form the most ancient one, the architectural form of the leaf, and then said even that might not be 100% truth, because older Egyptian drawings of the leaf were found.

For the Greek leaf I said I could probably just draw on the wood itself, and that should be fine. But I went the old way, what we did before, and set my block down on paper and traced around it. I divided the paper in three parts next, to find two main points. A real simple way to find some golden ratio, I said, although it's not the true golden ratio. Then came the first curl, which I said is better called a volute movement, and that was the main flow.
The Roman leaf started on the wood. The paper was already applied to the block, and I drew both halves right there.

What is the drawing download for?
It gives you my drawing of this leaf to print, so you can glue it on the block and carve whatever I designed. While I drew, I told you I'm going to provide you the drawings to download. But you should get my idea, actually.
Inside the course this lesson is the download itself, the Roman acanthus pattern, and the picture on it shows the finished drawing on paper over a thick block.
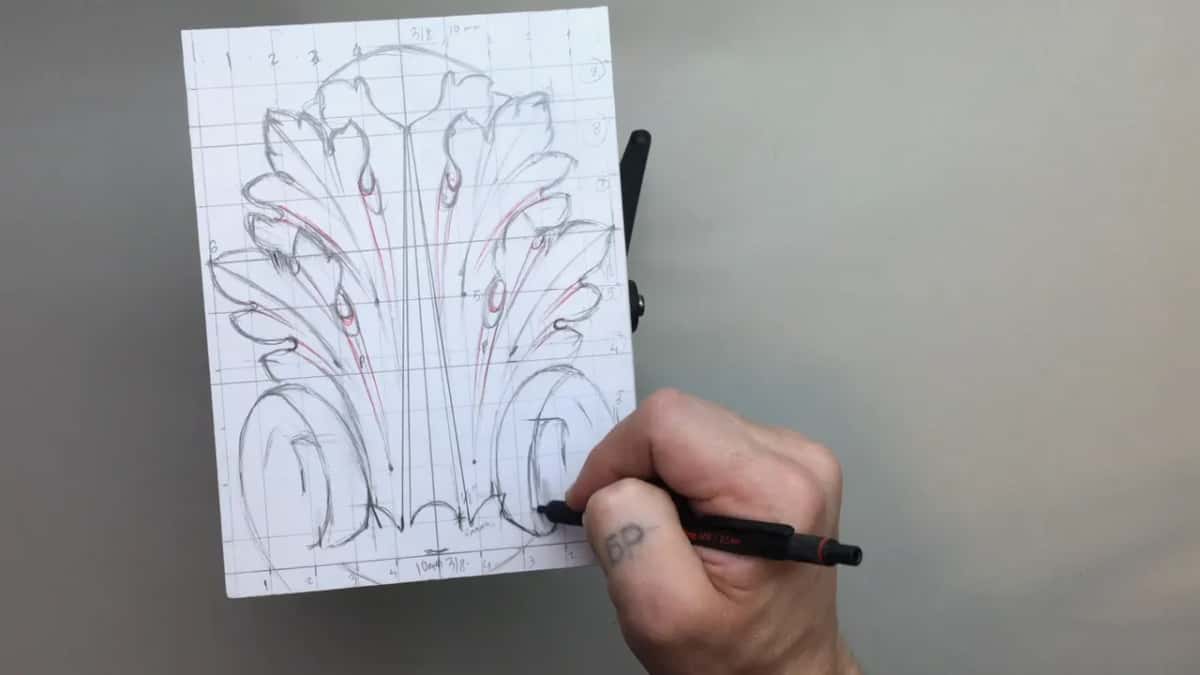
Print two. A wonderful idea, I called it in lesson 5. One drawing you can lay right beside you, and the other you glue on the wood, work, and remove the paper as you go. Then you can always reference those lines and recreate them, even in a three-dimensional world, approximately. On my own block you could still see the original grid lines in the places where I had not removed the paper.
The drawing helps later too, once the tools are out. In lesson 8 I was eyeballing the pipes and said you can always look at the drawings while you work. I didn't have them with me, because I don't need to make 20 of them looking the same, and if I make a mistake it's not a big deal for me, as long as it looks really close to the original Roman acanthus. Two lessons before that, checking and rechecking both sides, I told you that you don't have to eyeball, you can just refer to the original drawings.
Nothing in these lessons gives a printed size for the pattern.

How does the paper go onto the block?
With spray glue, the way I did it for the Corinthian leaf. Any spray glue can work, I said, even photo mount glue, I believe, and that day I used 3M 90 because it was what I had handy.
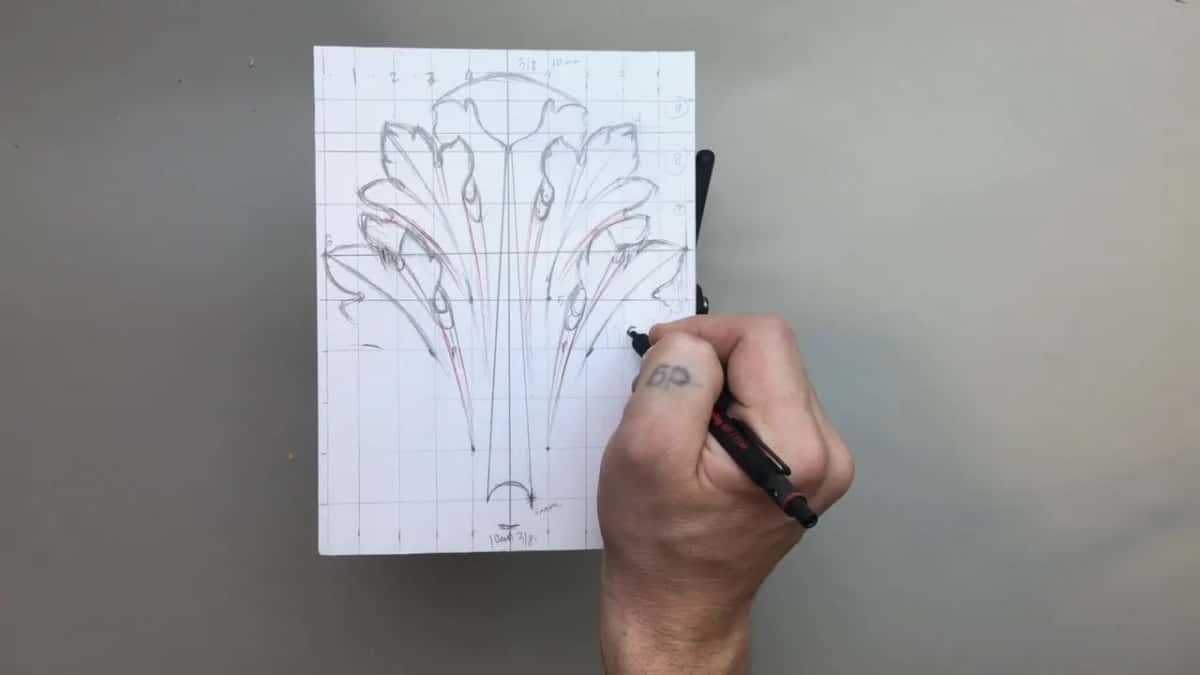
I put glue on both surfaces, the block and the back of the drawing. Then I waited a couple of minutes, until I could touch it and it was not sticking to my finger. That's the time to lay the paper down, carefully. You can watch the whole thing in Corinthian lesson 2.
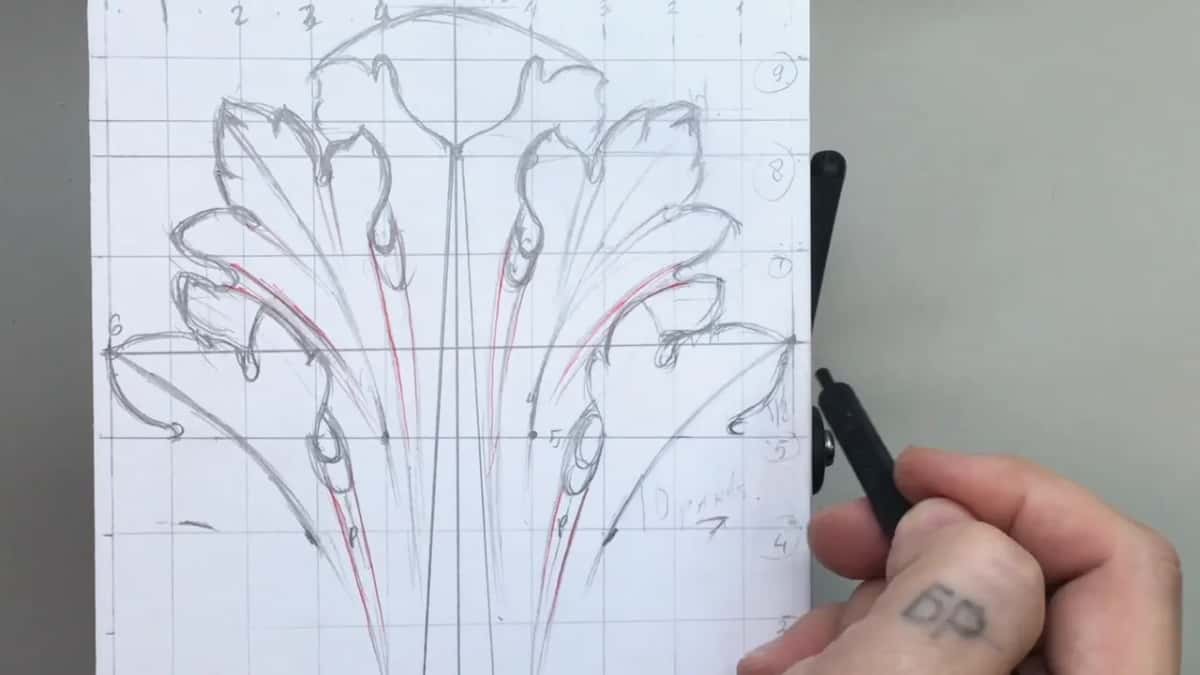
Gluing my Roman drawing on the block is not a big deal, I said, and you can carve whatever I design. Lesson 2 gives the thickness of my block, one inch and 7/8, which is 47 and a half millimeters. The first job there was the background line, about a quarter inch (6 mm), marked on all four sides with a woodworker's marking gauge.

Should you draw it yourself or glue mine?
Try to draw it yourself, if you can. I would suggest not just to glue that piece on top of the block, although you could. Subdivide it in ten and draw it, a really good practice.
Even if it doesn't look exactly like mine, that's absolutely no problem. That's not the goal. If you get a close enough drawing, if you get the main idea, that would be sufficient.

And you could probably notice I'm just eyeballing everything. I'm not that accurate, because most of that material will be gone anyway, and I have to redraw and figure out all my movements again. Lesson 5 is where I put it straight. My personal approach is eyeballing, because it trains your eyes to see in a three-dimensional world, so don't worry if it's not that accurate. You still have to be accurate, just not to the extreme.

At the end of lesson 1 I shaded the drawing with charcoal pencil, black for my low and white for my high. Not a necessary step, I told you, and sometimes I just like to do it for myself.

I would like to see this school work like an apprentice and a master. You watch me and then you do it, just the same as you would have done 300 years ago in any woodcarving shop, where the master works and you repeat what he does.


So, is there a block in your shop about that size? Could you rule two middle lines and a grid of ten each way on it tonight? Then come and draw the rest of the leaf with me in the Roman acanthus course, where Tuition opens every lesson.
How it's done
- Put paper on the block. Paper goes right over the wood before any line. My block measured close to 6 inches by 8.
- Halve the block both ways. Find the middle of the long side and of the short side, and draw both lines.
- Divide each way into ten. Put the division in ten on your ruler by eye, then rule ten across and ten down so a grid sits on the paper.
- Rule the border. Leave 10 mm at top and base, roughly 3 mm at each side. In inches that comes to three eighths and one eighth, and nothing in the design crosses it.
- Number the lines. A number on each line makes any space easy to find again.
- Count six of ten. Split a space in ten by eye and mark near the sixth division. Your marking point sits there, close to the golden ratio.
- Place the eyes. Count the eyes the leaf will carry, as the Roman design has them, and decide where each one sits. Another day the flow line might come first, and lesson 1 carries the drawing on from here.
Frequently asked questions
How big is the block for the Roman acanthus drawing?
Mine was roughly 6 by 8 inches, near 15 by 20 cm. Its thickness, given in lesson 2, was one inch and 7/8, or 47 and a half millimeters. Paper went on top before a single line, so the drawing sat right on the wood that gets carved.
How much border does the Roman acanthus drawing leave?
Roughly 10 mm up top, my three eighths, with the base getting that same strip again. Each side keeps maybe an eighth, around 3 mm. My design stays inside them, and the volutes at the foot stop on the bottom one.
Can you carve straight from the downloaded pattern?
Gluing it down and carving whatever I designed is no big deal, I said on camera. Still, my suggestion is to subdivide the block in ten parts and draw it on your own. Close enough is fine, as long as you get the main idea.
What to carve next