

Alexander Grabovetskiy, woodcarver, School of Woodcarving · Published 2023
How do you carve a volute in low relief?
Quick answer: A volute in low relief is a classical scroll carved with almost no depth to spare. On my walnut panel I had about a sixteenth of an inch, 1.5 mm at the most. The upper part stays slightly raised and then goes down slowly. To try for more shadow, I planned one outline cut tilted inward instead of flat.
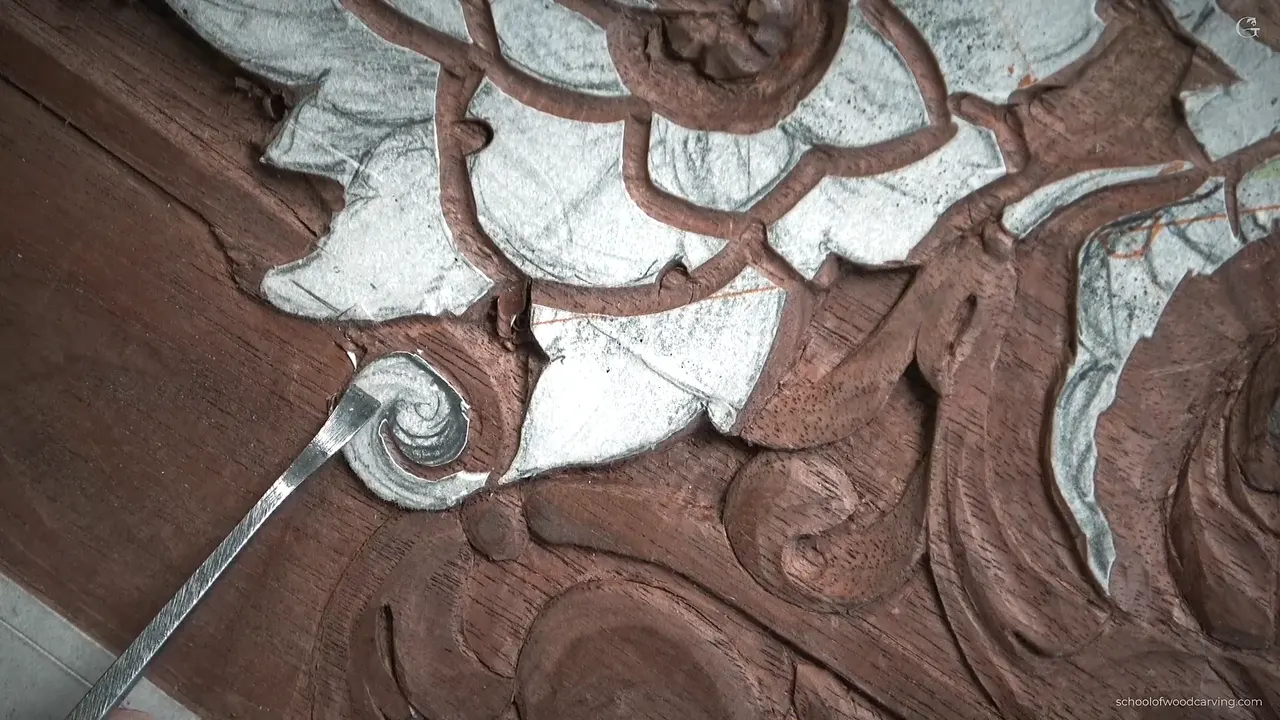
A low relief volute is a classical scroll carved in very shallow wood. On my walnut furniture panel the volute in lesson 30 had about 1/16 inch of depth under it. One millimeter and a half, that's the most. Its upper part stays raised a little, and from there it goes down slow, slow, slow.
Have you seen a small scroll curling where a carved molding ends? Did it look round to you, even on a flat board? Here that round look had to come out of one and a half millimeters of wood. You can carve one like it with a veiner, a number 3 gouge and a number 7.
What lesson 30 shows about this volute
- The volute carries a molding on, with barely 1.5 mm (1/16 in) of depth.
- My 2 mm veiner outlined it, and a number 3, 3 mm (1/8 in) wide, lowered it.
- For more shadow I planned one outline cut tilted inward, so one side would sit a little lower than the other side of it.
- I redrew one line in pencil, and an area that came out too wide went back, first by a number 7, then a bigger one.
- Next to it the ground was deep, and the 7 mm veiner went nearly down to the background.
- The first leaf got its raised middle on a line at six of ten, with a concave on both sides.

What does a classical volute look like?
The upper part is raised up slightly, and then it goes down, down, down, slowly. More like a classical volute, I said.
When the lesson opened, I showed you the whole panel from above first. Then I pointed at today's detail. That's going to be a volute, the continuation of that movement, of that molding. Wikipedia describes a volute as a spiral, scroll-like ornament, the one on the capital of the Ionic column.
The volute in lesson 3 of my Floral and Molding course dropped about three millimeters in one concave alone. Here the most I had was half of that. I drew volutes for this panel in design lesson 3 too.

How much depth was there for this volute?
Very little. I've got only about 1/16 of an inch of depth right there, from that part all the way down. In one spot the cut from above was only about half a millimeter deep (0.02 in), and the other side was exactly the same.
The board itself is a walnut from the first design lesson, only 10 mm (3/8 in) thick. In lesson 18 I called it not really a deep panel. The whole volute, its slope and its outline, had to happen inside that sixteenth.
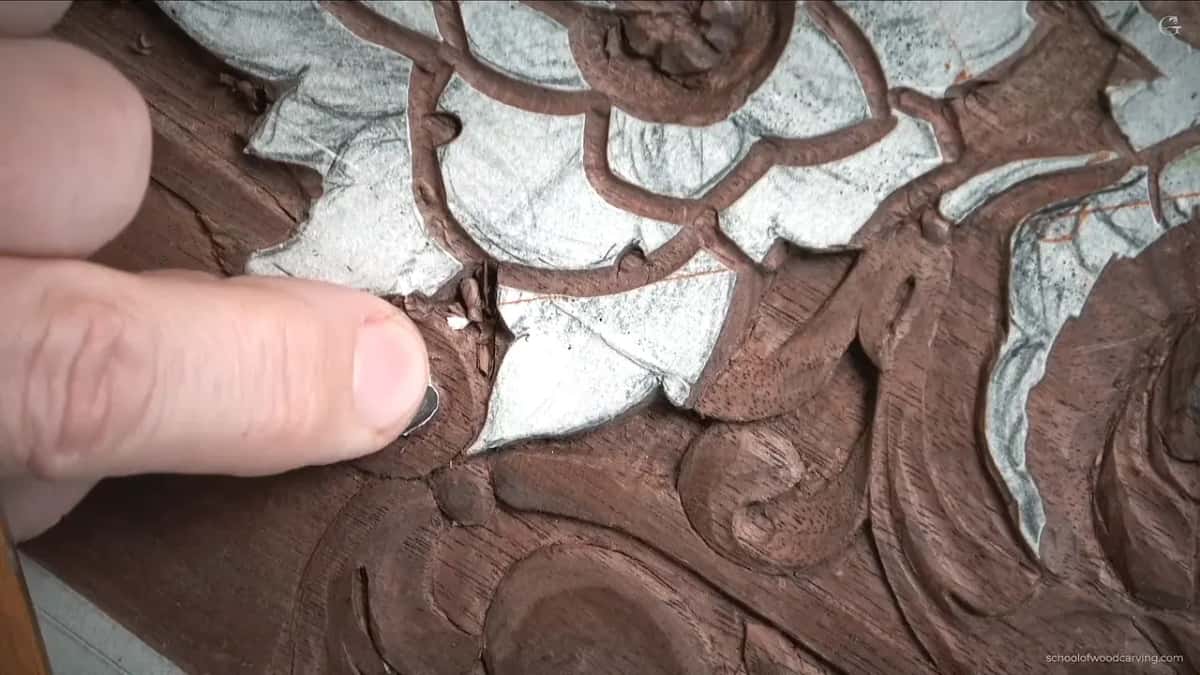
Can you get a shadow with almost no depth?
I wasn't sure I could. That was the only problem in that area. I'm not sure if I'm going to be able to exaggerate that shadow around this cut, I said. That could be a little challenging, and then I said it again.
So I guessed at a way. Instead of a cut that is flat, parallel to the background, I could go slightly inward, and make this part a little deeper than the opposite side of it. That is probably what I'm going to do, I told the camera.
Next I outlined a little deeper around it. Maybe I should use the number 11 for this again, I said, the two millimeter one. A good idea to use the mallet for this, too. Right in that area I could match the depth right beside it, 1/16 in, and blend it to the background.

But I did not go as deep as the cut that was already there. I wanted to make sure it blends nicely, so I didn't carry that cut across. My number 3 came back and blended it. It wasn't clean yet. You could get an idea of the shape, though.
Which tools did the volute take?
A number 11 veiner, number 3 gouges and two number 7s, plus a blade for scraping. The outline had been done earlier with the veiner, two millimeters (about 5/64 in) wide. After it came the flatter number 3, one eighth of an inch. Here is the whole list for the volute, in the order I used it.
| Spot on the volute | What I did there with the tool | Tool |
|---|---|---|
| The first outline | Went around the whole shape, done earlier on | Veiner, number 11, 2 mm |
| Lowering the scroll | Took it down, and later blended the deeper outline into it | Flatter number 3, 1/8 in |
| A deeper outline | Tapped in with the mallet, a little deeper | Same narrow veiner |
| Paper and glue | Scraped off, and the same blade blends the movement | Blade from a utility knife |
| Line that must continue | Fixed it so the line runs right through | Spoon gouge, number 3 |
| Area too wide | Straight down, nearly to the background, without damaging it | Number 7 under half an inch |
| Finishing that area | Same idea with a bigger one | Larger number 7 |
The spoon gouge, a number 3, fixed one line. That line has to continue all the way through, just like that, so the spoon took care of it.
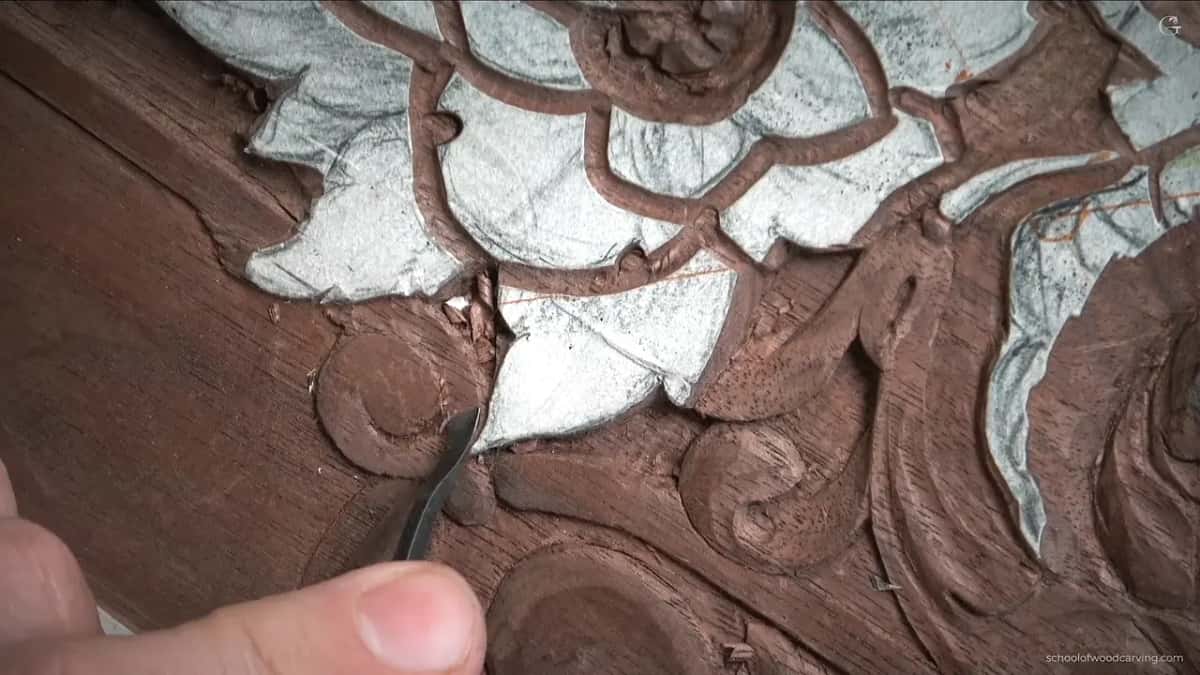
What went wrong with the first version?
It didn't look right to me. When I had my volute, I wasn't sure if I was happy with it or not. It doesn't look right, in my opinion. So I got the pencil and carried the line a little farther, to make it a little better. Maybe yes, maybe no. Maybe that is a little too much.

The cut was not as deep there, so that part didn't need an outline. My number 3 did it alone.
I pointed at the problem next, and I wasn't sure you could see it. The problem was how wide one area was against the part next to it. That part doesn't look correct, I said. It has to be fixed, and that area has to be less.

I grabbed a number 7, about half an inch, a little less, and made a straight down cut, nearly to the background. But I didn't want to damage the background. I really don't want to damage the background. After that I needed a different number 7, a little bigger.
Now it looks somewhat how it's supposed to look, and I'm really happy with that. I still had to clean it a little more. But for now it was good.
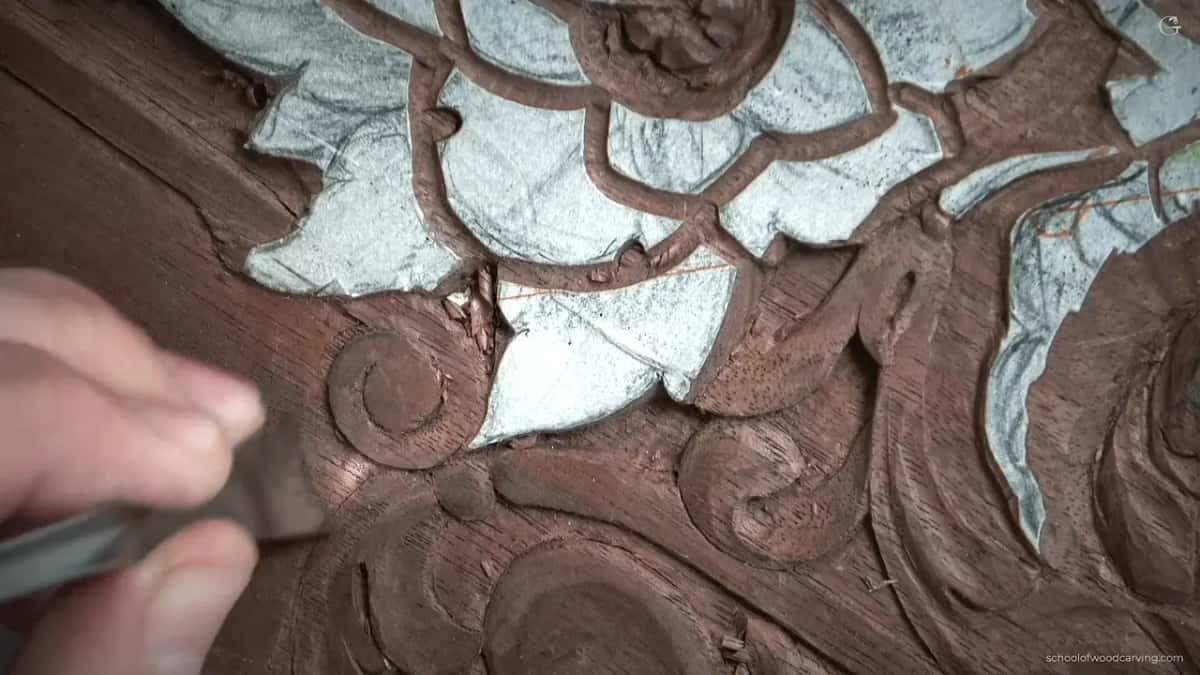
Why does the paper pattern matter here?
Paper left on the wood marks the high spot for me. At the very end of the lesson you can see a white line in my paper on one leaf. That is the high spot, and I can take it to the edge. I kept that area really high, and still I gave it a 3D look.
Once the volute was carved I could remove the paper, because I didn't need it there anymore. I scraped slightly to get rid of the glue left under it. What I call a scraper is actually just a utility knife blade. A good scraper, by the way, and with it I could probably blend the overall movement with no problem.
In the third video I called it the most beautiful tool, the utility knife scraper, and then I corrected myself. Utility knife blade. It can blend the whole thing if I need it to.
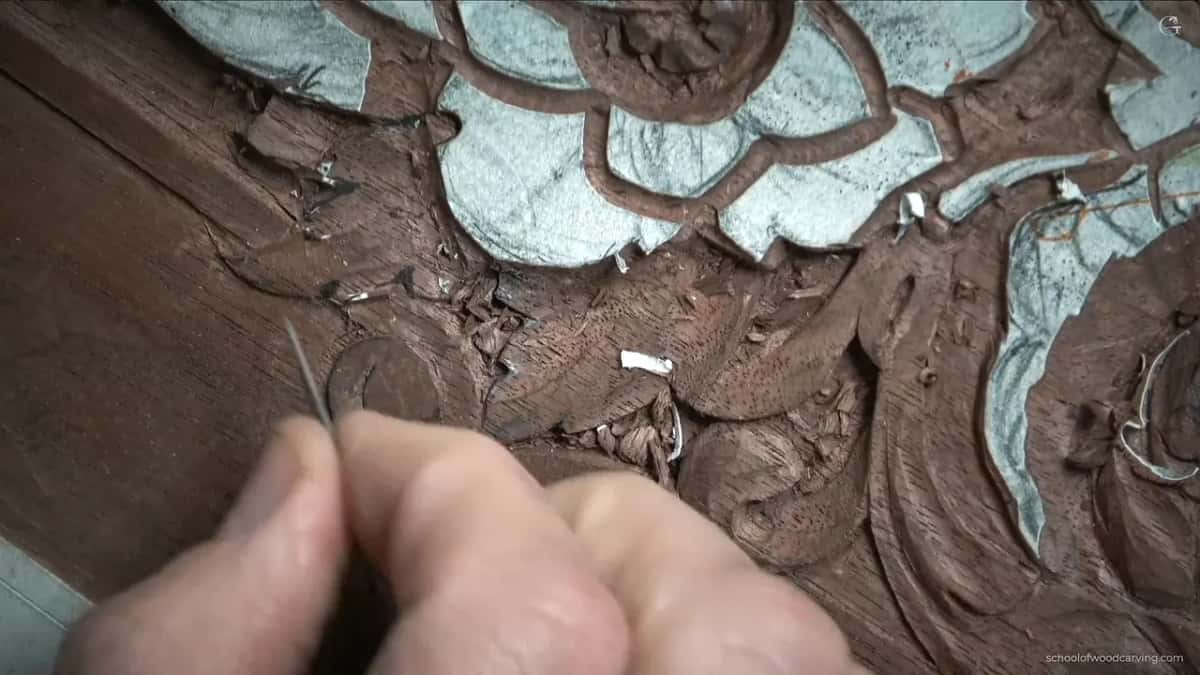
Later on I will undercut underneath that high spot, and lesson 19 shows how I undercut on this same panel.
What changed when the ground got deeper?
I jumped to two leaves after that, and there I had plenty, plenty of depth, from that point downhill. It's a much deeper area, so I could go ahead and use that space.
First came a number 11, to get the outline much deeper. About five millimeters, maybe seven, I said, and I took the 7 mm one, a little bigger than a quarter inch. Using the mallet, I went almost to the background. That gives me a really good chance to do 3D development of the flower there later.

One thing I had to remember. That part is an overlay right on top, which means I can't mess up.
For blending I used just the side of the same tool. So can a number 7. Turn the flute to the side, and you can use it as a flatter tool. Later a number 7 at 14 mm (about 9/16 in) went in, and the paper there came off.
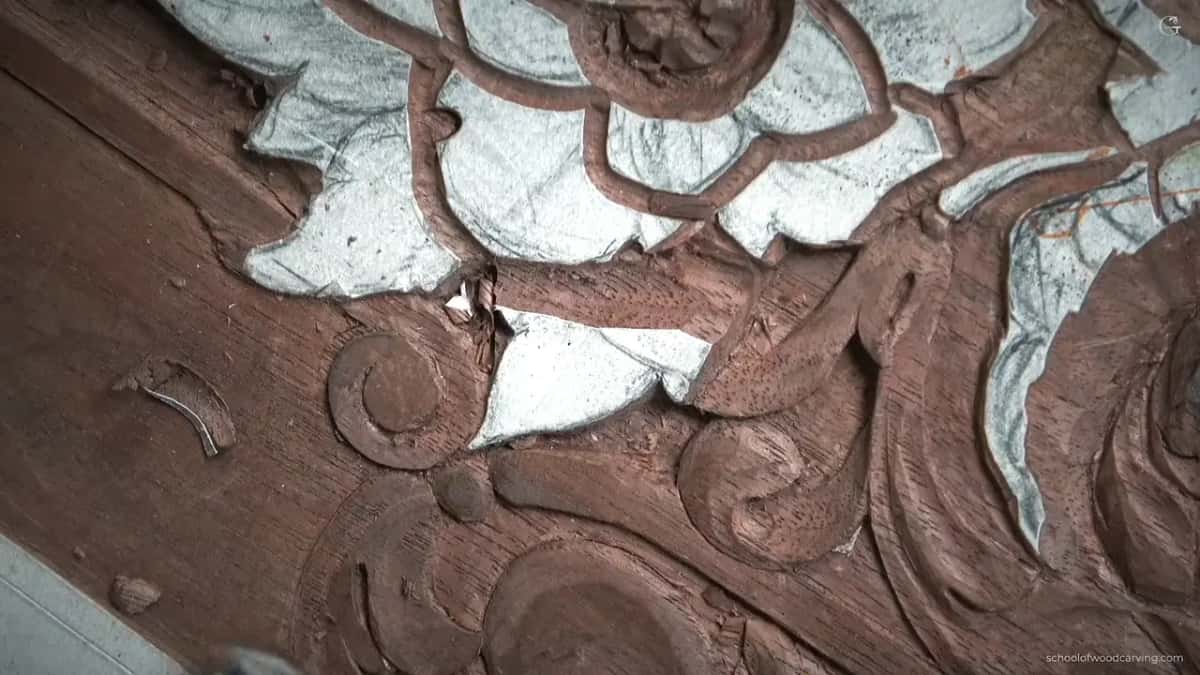
Where does the center line of a leaf go?
On the first leaf it went at six of ten. Like always, I wanted the middle raised up, bulging, with two concaves on the sides. Not that I have to do it, but I think it's going to look much better, and I wanted to give it a really good movement.
My center line follows what I have mentioned many times, the 60/40 rule, the golden ratio, 62% against 38%, or six parts out of ten. The convex goes on that line, and I carry the concaves away from it on both sides. All through the design lessons of this panel I leaned on the same proportion.

The concave cuts came from the 7 mm number 11 again. A concave there doesn't need to be really deep, but maybe on this side I could go a little deeper. And I did. Why not? I can use all that material, because I've got a really deep background there. Why don't I exploit that?

With the tool turned to the right side, I really wanted that ridge raised up. It's going to look more classical. Already it gave me some shape, and that shape gives a beautiful shadow. The camera doesn't show what I see. A number 3 back bent, about a quarter inch (6 mm), blended the convex.

How did one leaf go under another?
Mostly with the narrow veiner, a flat gouge and a lot of care at the edges. First came a more pronounced separation in that section. The triangle there got a straight down cut with the 2 mm veiner, and I wanted some micro divisions too, straight down with that same tool. A quarter inch number 3 cleaned up. I don't worry about the mess inside. It's all just chips, and later on I'll blow it out and it will look good.
The next leaf overlaps, with a little thing hanging out of it. Same outline, then the number 3. There was plenty of depth, so I took it almost down. The triangle where they meet I call a junction. I'm not sure I can say it that way, but for me it is a junction, and it gives really good depth.
If you have a knife like mine, it is much easier to get into areas like that.

The center of this leaf bulges too, but it kind of wraps right underneath the molding. A really interesting movement. And remember, I cannot damage the edges. This edge cannot be touched, and that edge cannot be touched. Both concaves went in exactly as before, my flute at about one o'clock and then the opposite way, about 11 o'clock.
In the third video I relieved the separations with the same narrow number 11. It's supposed to look like it goes underneath. Not the easiest thing to do, but it's still possible, and you could already see it after just one cut.

The ridge had to look like it is rolling underneath. I used the back bent, but a back bent isn't required. Any flatter tool can start that motion. One more detail there is part of the molding, so I cannot go really deep. Just barely, barely.
Did my other volutes go the same way?
One sat on this same panel, and two were in my Venice Room course. In lesson 21, even on a small slope on one volute, I still had to recreate the concave, because there was one on the outside. I wanted that volute to start rounding from one point. Part of it didn't look too round, and I fixed that using a number 3. Then I needed a concave on the inside of the slope.
On a piece in workshop 87 of the Venice Room course the volute was the high spot. From there it goes much lower, but gradually, and up again. I drew a line about an inch away from that point, and that line marked the lowest spot. Looking from the side, I wanted a really nice, consistent movement. It does not have to be wavy.
In workshop 126 a volute was going to sit much, much lower. Straight down cuts with a number 7 came first, only so I would not lose the position of my lines, because once you slope it, everything changes. A big number 7, three inches (76 mm) wide, sloped everything after that. I did not lose the position of my volute, which is a big plus for me.
What did the corner look like at the end?
One part sat much higher and the other much lower, and the two blend really nicely. On another leaf one part was really high, so I could drop the whole thing closer to the background. Whether I should, I wasn't sure. Let me think, I said. Before deciding, I made the concave cuts, the same idea, with a convex in the center of that leaf and the wide number 11 again.
Some of it, I said, is better to attack from the opposite side. A bit later I was carving one part against the grain, because of the position of the camera. I didn't want to keep rotating it. Please forgive me.

No need to take too much of the material. I want to keep as much as possible. From above you can see one part is much higher and the other much lower, on the background, but it blends really, really nicely. Those concaves cast a shadow, and I really like it. I hope you do also.
It's not the final look yet, because the petals still need work. Earlier in that video I had said that next time I'm probably going to jump on the flower, though I didn't know yet.
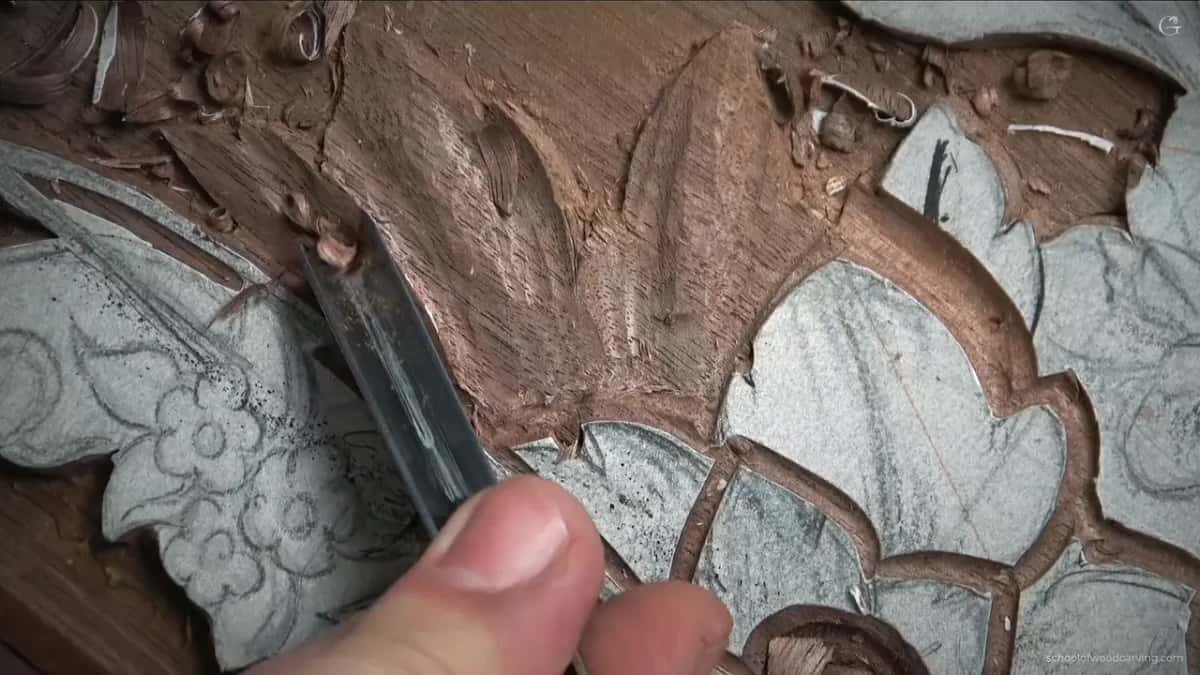
This lesson sits in Carving Furniture Panel, Part 3, after lesson 29 and before lesson 31. Every lesson of the course is open to you through Tuition.
Got a scroll at the tip of a molding and almost no wood under it? Tilt one cut, look at it from above, and keep the paper on the high spot.
How it's done
- Outline the volute. Go around it with a narrow number 11. Mine was 2 mm wide, and the background there was very shallow.
- Lower it with a flatter gouge. Use a number 3 about 3 mm wide, so the top stays slightly raised and the rest goes down slowly.
- Tilt the outline for shadow. Where you need more shadow, you can go slightly inward instead of flat, so one side sits a little deeper. The mallet helps here.
- Stop short of the old cut. Don't go as deep as the cut that is already there, so the two blend nicely. Use the number 3 to blend.
- Check the width and fix it. Redraw with a pencil where the shape looks wrong to you. If one area is too wide, take it back straight down with a number 7, almost to the background but without damaging it.
- Scrape off the paper. A thin blade from a utility knife takes off the paper and the glue under it, and it can blend the movement too.
Frequently asked questions
What is a classical volute in wood carving?
A scroll whose upper part rises slightly and then slopes down slowly, the way I described the one in lesson 30. Mine continued a molding and its movement. Wikipedia calls a volute a spiral, scroll-like ornament, found on the capital of the Ionic column.
How deep was the volute on this panel?
About a sixteenth of an inch at the most, a millimeter and a half. A cut from above beside it was about half a millimeter, on both sides. My walnut board is only 10 mm, or 3/8 inch, thick, so that small volute had very little room.
What tools carve a small volute?
On mine, a 2 mm number 11 veiner did the outline, and a flat number 3, one eighth of an inch, lowered and blended it. A spoon number 3 fixed one line. Then a number 7, and after it a bigger one, took back a part that was too wide.
What to carve next