

Alexander Grabovetskiy, woodcarver, School of Woodcarving · Published 2018
What is the law of progression in wood carving?
Quick answer: Progression is a design law where one element repeats and its size steps up each time, small, then bigger, then the biggest. The pipe returns on my Roman acanthus measure about 10 and 13 mm, then roughly 20, and the biggest pair sits low, near the heaviest elements of the leaf.
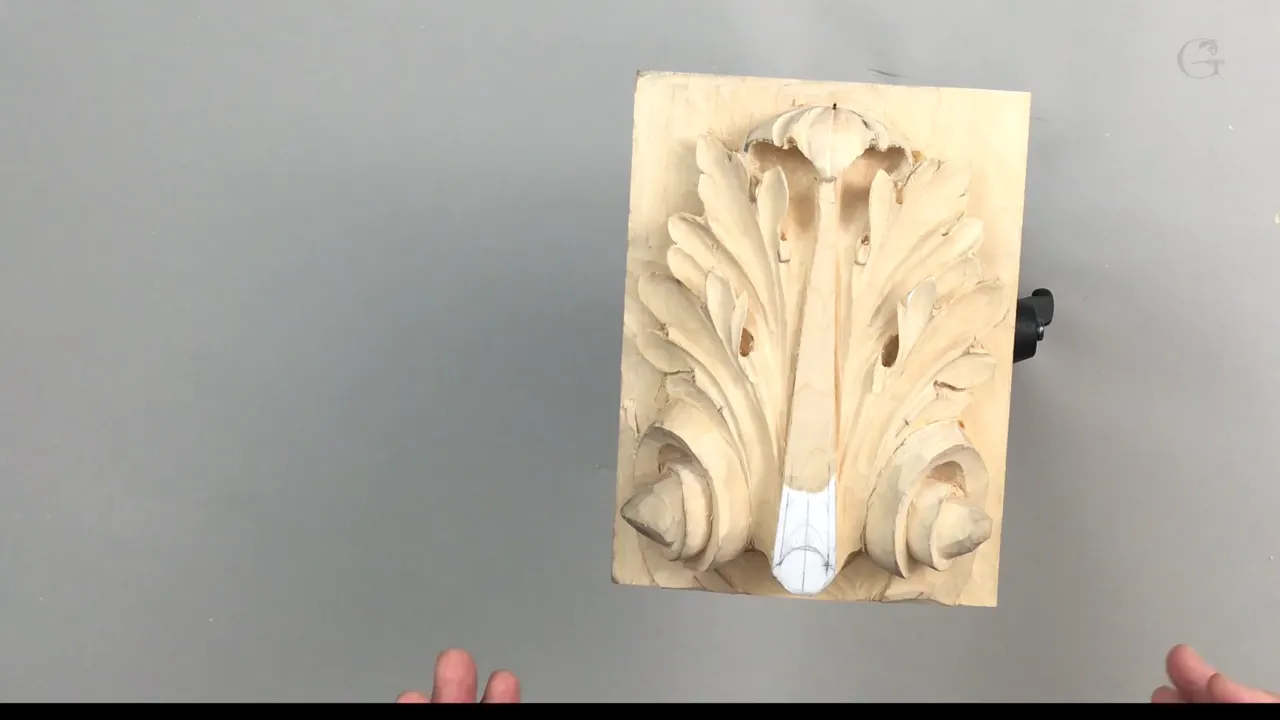
Progression in a carved design is the same element repeated with its size growing each time, small, bigger, biggest. On my Roman acanthus the returns on the pipes run about 10 mm (3/8 in) and about 13 mm (1/2 in), and the next pair gets about 20 mm (3/4 in), because the heaviest, most massive elements sit low on the leaf.

Can you hold a pencil? And could you look at two curls and tell which one is bigger? Then you have what this lesson asks for.
I'm going to be honest with you. Most of the tools in this lesson are an eighth of an inch wide or smaller, and the details are just as small. By the end you will know how I pick three sizes by eye, how I copy each one to the twin pipe on the other side, and why I don't clean the pipes right away.
Lesson 13 on one screen
One element repeats at three sizes here, about 10, 13 and 20 mm.
The biggest pair goes low, near the heaviest mass.
I eyeball the sizes, and a slip of paper moves a mark to the twin pipe.
The bigger return ends in a boat-front point, not round.
I hold off on cleaning the pipes and eyes, so I don't do double work.
Sharp tools matter here, because I press almost nothing into the wood.
What is progression in wood carving?
Early in this lesson I said it plainly. "There is such a thing as a law of progression or rhythm." You keep the same element, but the size of it keeps growing. On this leaf it grows this way, toward myself, because the biggest, most massive elements I've got are right on the bottom. So the smaller detail comes first, then the bigger detail, then the biggest one.
You remember the pipes from lesson 12. One return there is about half an inch, 13 mm, measured eye to edge. The other is about three-eighths, 10 mm. Now I move to the next pipe, or pipes, I should say, since they are symmetrical and there will be two equal ones. This one sits closer to that movement, and I wanted a bigger return back there.

So I made this one about three-quarters of an inch, 20 mm. I'm just eyeballing it. At least I think it will make more sense this way, and I think it will look nice. If it doesn't look nice, if it bugs me how it looks, I can always make it smaller. It's not a big deal.
Why does the biggest return sit near the bottom?
The biggest masses of this acanthus sit down low, and the returns grow as they get closer to them. Small first, bigger as they come down. Back in lesson 6 I named another law, the law of flow. Everything has to have a flow, on this axis and on that axis too, in a three-dimensional world.

Where else do I teach the law of rhythm?
I talk about it in my Principles of Design course, in lesson 4. Rhythm, I said there, is repetition of the detail, but it's not supposed to be the same size. I showed one long arc, then a smaller one, then an even smaller one. Say you want three flowers. They should not match in size either. One is the main, and the others are bigger or smaller than the main.
On that video I even used the same number as on this leaf, a 20 mm flower, three-quarters of an inch. One is 20 mm, another is smaller, another one is even smaller, and they never repeat the size. It creates depth. I put it like music there too. A musician repeats the same part but plays with the volume. To stand out, he presses harder, and to bring it down, he barely hits. We repeat the same idea in art, but we play with the size, not the volume. So it's the law of repetition, but you play with the size. That's the rhythm.
I also said that if you take calipers to it, this distance against that one falls about 60-40, on the golden ratio. I'm not saying you have to calculate all the time. Somehow you just get to that, naturally. A part earlier I walked one curve through its repeats, a second one, another, and another, and I called it five Fibonacci repetitions, pam, pam, pam, like music.
And I told that class what I believe. There is a Creator, and everything is created according to the laws. When you express yourself according to the law, you express the law of creation. Outside of the law, it's ego.
What happens when two details come out the same size?
I've caught that on camera. On the furniture panel I said I had a design problem. I think I did not follow rhythm. A detail is supposed to repeat itself, but never at the same size, and one volute had come out about the same size as the other one. That's not good.

The one placed a little closer to the center of the panel could be a little bigger, and the one farther away could be smaller. I said I could make that volute smaller, and that it would actually help me, because it gives a second slope that repeats. Design-wise, it would be more attractive.
When I designed the panel in the first part of that series, I put it in terms of music too. You can't just do straight repetition, pum, pum, pum, pum. It should have some music in it. One volute is the bigger one, and the next one can be much smaller. It still repeats. It's still a volute, just a smaller one.
How do I match the two sides by eye?
These are symmetrical pipes, so every size I set on one side has to show up on the other. Eyeballing is how I do it, but it's still a good idea to know another way. If you don't feel comfortable, take a piece of paper. Put your mark on it, move it to the other side, and the space is going to be equal.

What shape does the bigger return get?
The front end of a boat, more or less. I drew the boundary first, the border of this detail, and since this one is a bigger one, I wanted its end more like the front of a boat than round. Then I subdivide it in three, and for the distance I said maybe about 5/16 of an inch, close to 8 mm. You can do about a quarter inch (6 mm), and you will be safe.
On the other pipes, and on the rest of the leaf, wherever I can find a spot, I'll make those returns everywhere. We'll see if I subdivide those in three or not.
Why don't I clean the pipes and the eyes yet?
Once I set the smallest details, I will have to clean there anyway, and I don't want double work. And while I am not cleaning at the beginning, I still have some meat to work around, and I can fix mistakes if I made some.

Watch what happens when I lower those pipes. It looks like I've almost lost it. That's fine with me, because I know the main movement, so I can always bring it back. Later I take just a pencil and draw my pipes again, and that line is my high point.
How deep do the first passes go?
About 3/32 inch (2.4 mm), the same depth I took on the smaller returns. If I can do an eighth (3 mm), it wouldn't hurt. On those small ones I just took the gouge and poked it down. Here I wanted a preliminary pass with the V tool first, so I made a careful cross cut, 3/32 or so, then went a little deeper, maybe all the way to an eighth.
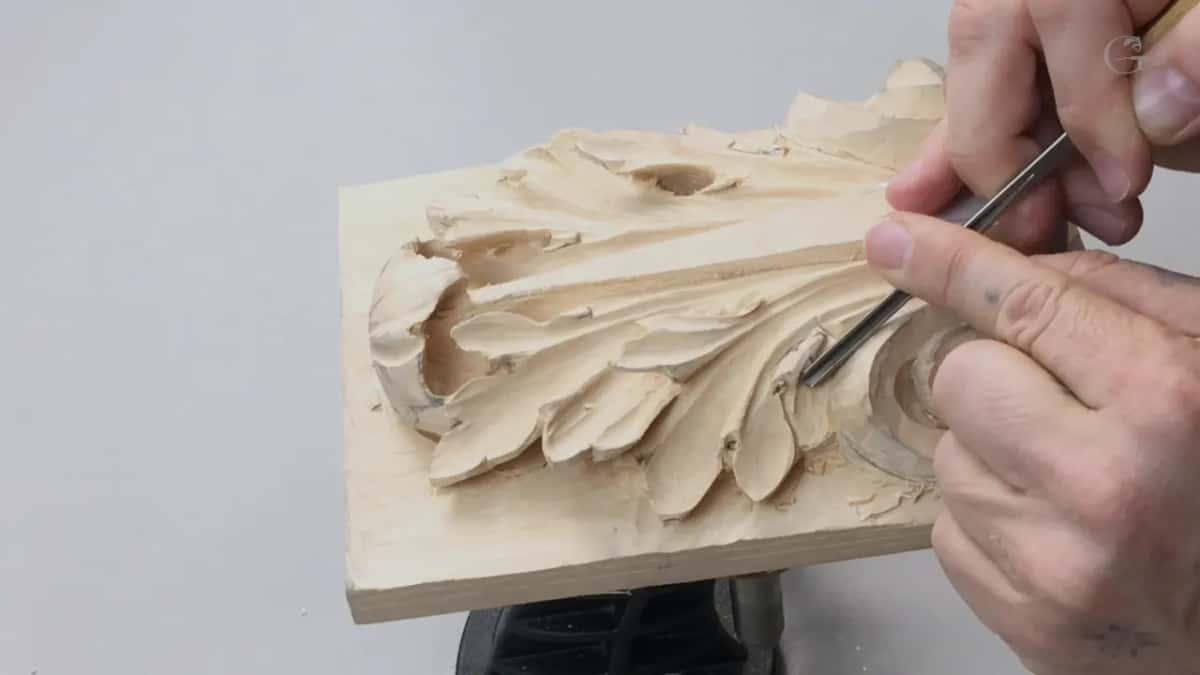
The same V tool can set my boundary all around. But be careful at the end. I won't destroy the main area of the eye right now, because I will have to refine it later. So I'm not going all the way yet, just escaping early, and then I do the same on the right-hand side.
Why does a micro tool work between two designs?
There's design on the right-hand side and design on the left, and neither one should get damaged. In a spot like that it's better to get smaller tools inside. On my bench I have a small micro tool, a number 3 by Ashley Iles, a Peter Benson tool, only about an eighth of an inch wide. It's a really handy tool to have for a spot like this. I lower both pipes with it, one side and then the right-hand side, down to an eighth.

Then the same number 3 marks my subdivisions. Later on, when I undercut, I'll make them more detailed, but right now it's just preliminary. Next comes a small 3/32 gouge. I start on the eye side and move toward myself, taking out the middle part, little by little, and that makes the return.

Believe me, those small details do matter. I attack each one from the right position, because my grain runs in that direction, and I make a smooth transition on the inside.
Why do the tools have to be so sharp here?
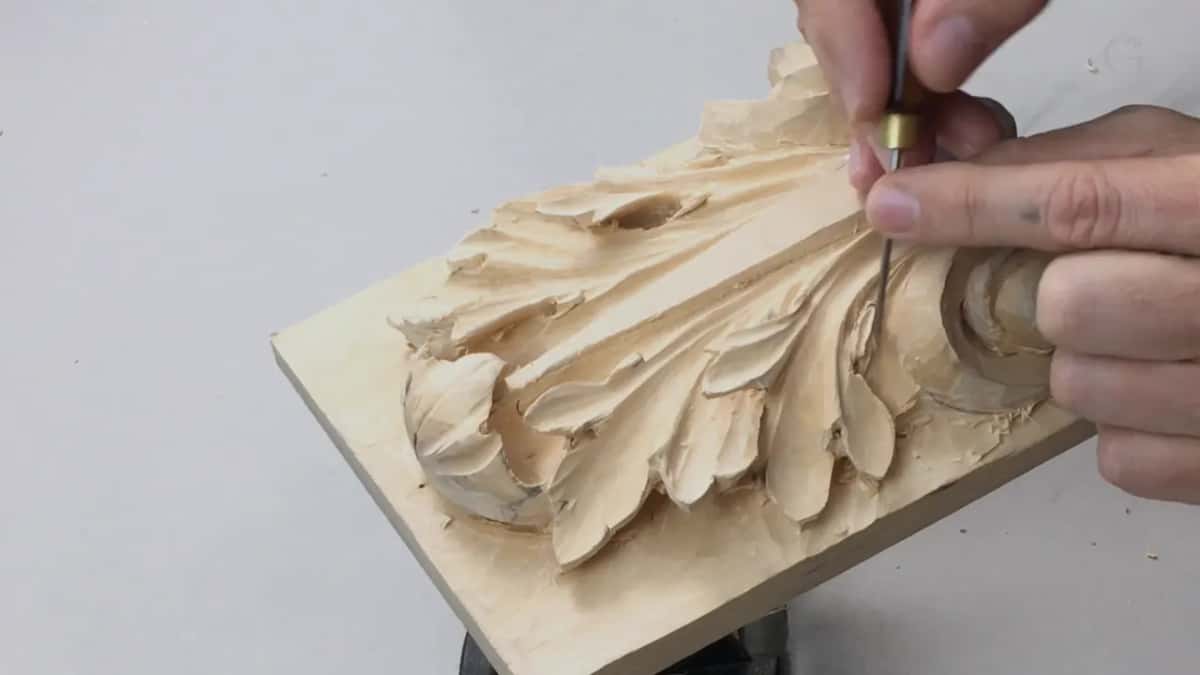
At this stage I put almost no pressure on the tool, and the fibers are so close together. If your tool is dull, it's going to smoosh those fibers together, and they won't look nice. Sharpening has a course of its own in the school. It looks a little messy right here.
I keep using the same small tool for a reason. I want those parts of the leaf to look like they go underneath this one. I called it an illusion, then took the word back. I shouldn't say illusion, because that's exactly what's going to happen. Later in the lesson I take some back material away under the leaf, a small undercut, so those sections really go a little underneath. Not too much.

Before that, a little bigger gouge, an eighth, a number 8, makes this leaf a little deeper. The shadow I just made is probably showing already. The camera doesn't show exactly what's going on, but I hope you can see it.
How do I keep both sides at the same depth?
First, there was too much material in one spot, so I lowered it on both sides with the same number 7, 4 mm, that I used before. After that I kept an eye on how low I go, because it's supposed to match.
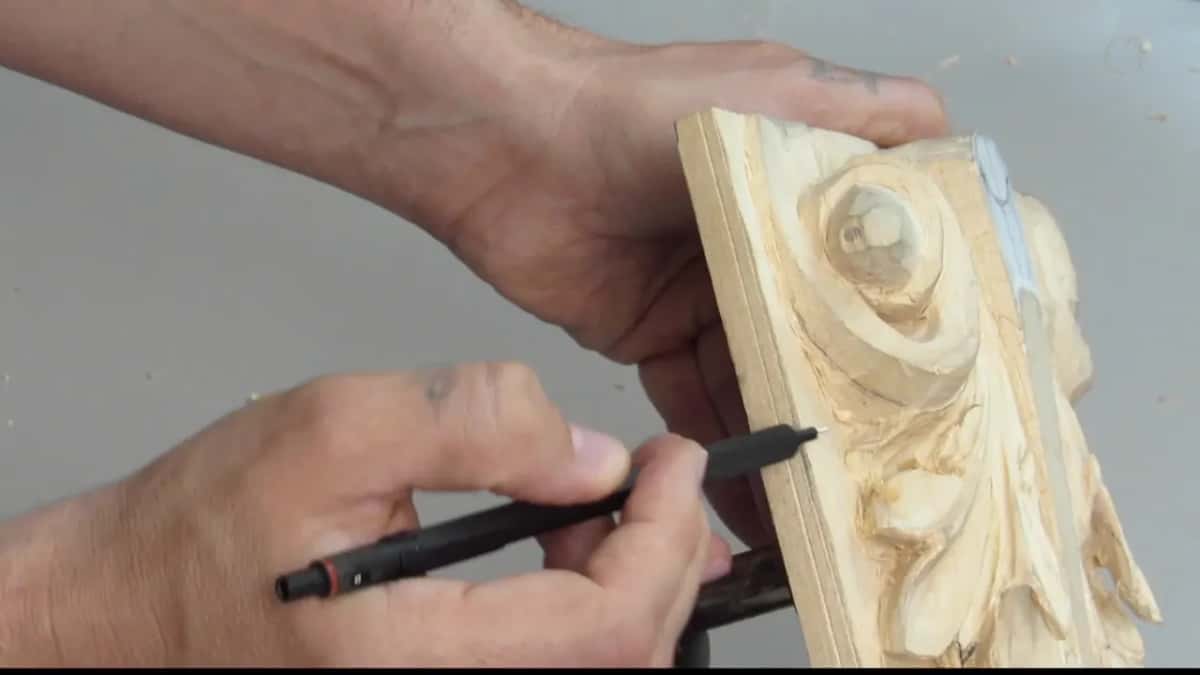
And there's a way to measure that. Watch your second line, how much material you've got above it, and where your high point is. In my case I had about a quarter inch (6 mm) on this side, and roughly the same on that side, so the space is about equal. I could go a little lower, maybe a 32nd of an inch (about 1 mm), but no more than that. So it's a good idea to check and recheck. Which part of the leaf stays highest is the subject of lesson 4.
Here are the carving tools from this lesson, in the order they first come up.
| Tool | Job | Part | Size |
|---|---|---|---|
| The V tool | Cross cut, then around the new boundary | First video | Roughly 3/32, then toward an eighth |
| Micro number three | Lowered both pipes between the two designs | Second video | An eighth, Ashley Iles, Peter Benson |
| Small 3/32 gouge | Hollowed each return, starting at the eye | Second video | Toward myself, slowly, bit by bit |
| Small number eight | Made the leaf deeper, later refined eyes | Third video | One eighth, the shadow showed up |
| The number seven | Lowered the extra material on both sides | Fourth video | Four millimeters, the one from before |
| Tiny number eight | Dug out where the eye goes deeper | Last video | One sixteenth, 1.5 mm on screen |
Why do I refuse to rush this part?
When I rush, I make a lot more mistakes, and I break, and then I have to glue it back, and that's not nice. I've made those mistakes when I rushed too much. On production work I have to be much quicker, because I can't waste time. But I'm more on the side of being careful.

It even shows in the last part of this lesson, where I am making mistakes when I just try to rush it. I don't want to overdo it, but I also don't want to underdo it.

For the eyes I first used the number 8, an eighth, then a tiny number 3, also an eighth. In the last part I keep changing my small gouges, an eighth, 3/32, and a really tiny one, about 1/16 inch. The card on screen calls it a #8, 1/16 inch (1.5 mm). With it I dig out right where the eye is deeper.

Who carved the smallest details in history?
Ornamental carvers did, the way I tell it near the end of this lesson. There were boat carvers, who carved for the big boats in the 17th, 18th and 19th centuries. Other carvers worked outside, carving for vehicles. And there were inside carvers, for the houses, and they were divided in two.

Inside, you find architectural carvers, who work more on architectural details. And you find ornamental carvers, like Grinling Gibbons, working with the really tiny, smallest details. Ornamental carving is actually the most difficult. Gibbons is one of my heroes in the wood carving world, and the school has a Grinling Gibbons class from Maine. Believe me, those small, tiny details make the biggest difference.

The return itself came back later. In part two I said this detail, where the acanthus leaf goes back and returns, was resurrected in Renaissance times, and on Rococo work you will see lots of those returns.
Even if this is a simple form of acanthus, I still want it to be a piece of art, not just a furniture detail, though you could use it on furniture. My goal is to make it look more unique, more ornamental. That's why I spend the time on those details, because I really want to see a beautiful end result. And then I make my transition downhill, and that is where the lesson ends.

Would you like to watch me choose these sizes with the pencil in my hand?
Lesson 13 sits in the Roman acanthus course, and tuition opens every lesson in it. In lesson 14 I reach for a micro veiner, maybe about half a millimeter.
How it's done
- Pick the next size by eye. Start from the returns you already have, about 10 mm and 13 mm, and give the next pair a bigger one, about 3/4 in, toward the heavy bottom of the leaf.
- Copy it across with paper. Mark the length on a piece of paper and move it to the twin pipe.
- Draw a boat front and divide it in three. Give the end a pointed boat shape, then subdivide it in three, using maybe 5/16 in (8 mm), or a safe 1/4 in (6 mm).
- Make a V tool cross cut. Go 3/32 in (2.4 mm) deep first, then on toward 1/8 in, and stop short of the eye so you can refine it later.
- Lower the pipes with a micro tool. A number 3 about 1/8 in wide fits between the two designs. Then hollow each return with the small gouge, starting at the eye and working toward you.
- Check both sides against the second line. With about 1/4 in above it on each side, go no more than 1/32 in lower.
Frequently asked questions
Do repeated carved details have to match in size?
Repeat them, but change the scale. In a group of flowers I never put them all at one size, and on the Roman leaf the returns come in three sizes, roughly 10, 13 and 20 mm. A musician plays one phrase louder or softer, and a carver plays one shape bigger or smaller.
How can I copy a length to the other side without a ruler?
Mark the length on a scrap of paper, lay that scrap on the opposite pipe, and mark again, and both spaces come out equal. On this symmetrical acanthus I sized the returns by eye, and the paper trick is for anyone who feels unsure about eyeballing yet.
When do you clean up the pipes on an acanthus leaf?
After the smallest details are set. Every little detail added later means going over that spot again, so tidying early doubles the labor. Leftover wood also leaves some meat around each part, and with it you can still repair a slip.
What to carve next