

Alexander Grabovetskiy, woodcarver, School of Woodcarving · Published 2022
How do you get a carving off the board it was glued to?
Quick answer: Taking a glued carving free of its board is slow work with a flat tool. I worked a bent gouge in under the paper, kept a mallet at hand, and never forced it. Where it fought, a second tool went under. And I listened for the paper coming out.
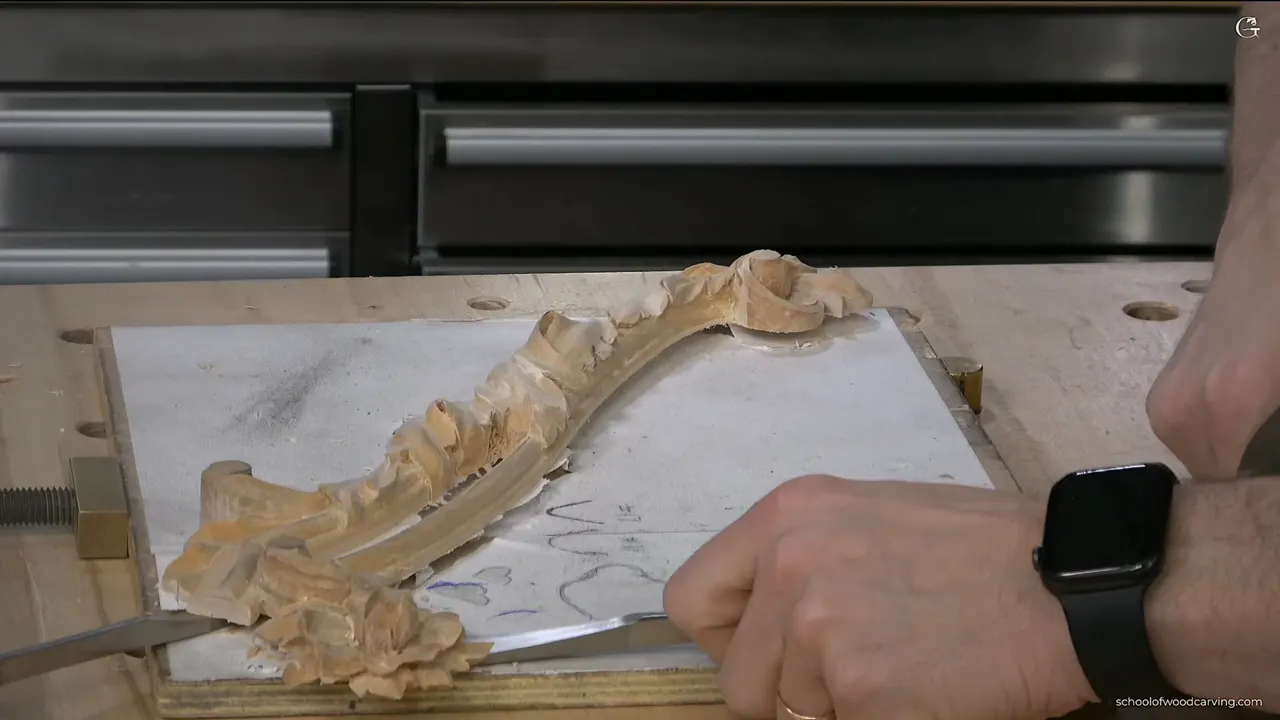
Getting a glued carving free of its board is slow work with a flat tool, a mallet and your ears. On this panel I went right under the paper with a slightly bent number 3 gouge, a mallet at hand, and went carefully. I did not force it. When the paper lets go, you can hear it.
You glued your carving down so it would stay put while you carved. It did. And now that same glue has to let go without one leaf snapping off.
So here is how this panel came off, what I put it on next, and what I did to the back. Before that, this lesson carved moldings and a shell, cleaned up the eyes and took off facets, and you will find those below the release, in the order I did them.
Getting a carving off the board, the short version
- A flat chisel or a spatula goes underneath, and here a gouge did it.
- Where it fights, add a second tool.
- Paper stuck to the back comes off with a little alcohol on cotton.
- Clear the bench first, then lay the piece on soundproofing foam.
- Everything on the back goes to the edge except the molding, which I only clean.
- If I sand at all, 180 grit is where I start.

How did this panel come free?
A flat tool, slid right underneath. You need some kind of chisel or spatula, and either one will work, but make sure it is flat. I used a gouge. That one is a number 3 with a slight bend in it, so not really flat, and I had a mallet with me too, used carefully, because I didn't want to break anything.

Then it started fighting me somewhere in one region. I could see my tool raising the paper there. That's absolutely okay. It is better to take time.
So I took a second tool and drove that one underneath as well, and I did not force it. I can hear the sound of the paper when it comes out.

Another area wanted to fight after that. This time it was just the paper holding, so I cut into the paper a little, went back to my first gouge and attacked from that side. That first tool doesn't have to be a gouge, by the way. A plain number 1 chisel would do the same job.
Why does a glued carving fight you?
The glue holds better than you would think. You'd be surprised. Under this one I used just a spray glue, and it still fought me in more than one place.
The flower needed the most care of all. It sits really close to the background, so I had to pay attention to how I came at it and take my time there. How the paper and glue went on in the first place is in lesson 1.
Once it was out, the back side was a mess of paper and glue. But it's okay. Should that paper give you a problem, use a little bit of alcohol. Spray it, or put some on a piece of cotton and lay that right on the paper, and that will be good.
I didn't need the board anymore after that. Not for this piece, anyway. I will need it for another project.
What do you put a carving on to work the back?
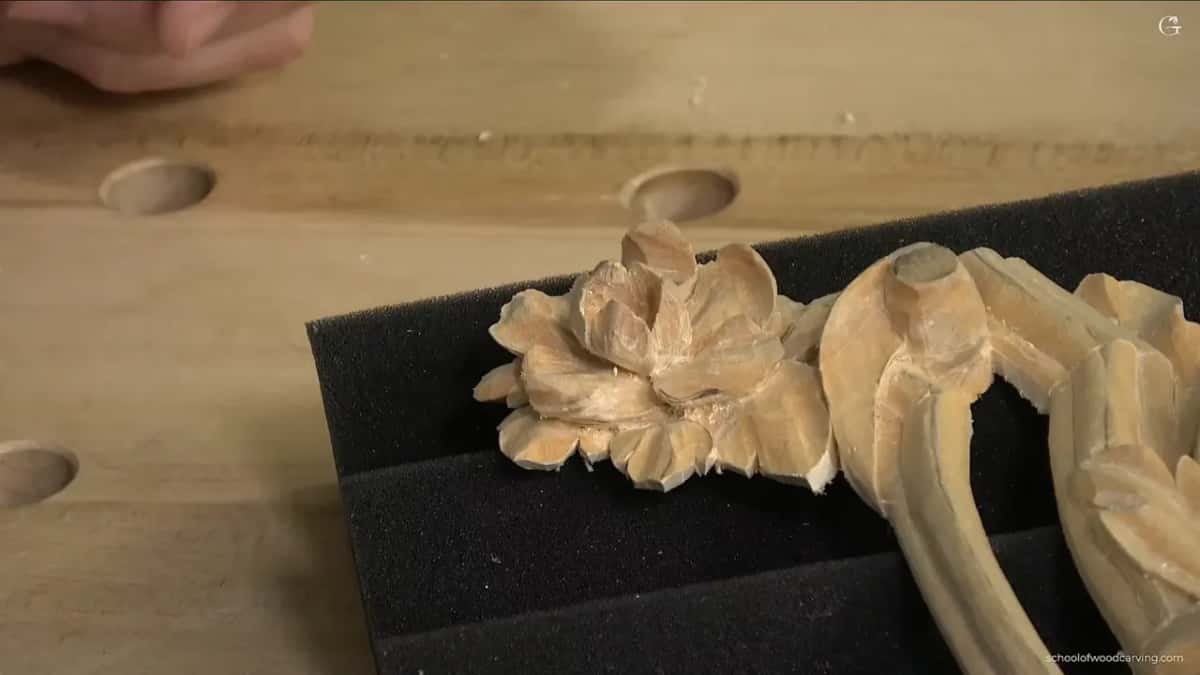
Mine was soundproofing foam. But before the foam came out, I took every object off the bench that could damage the carving. I wanted my bench clean, with nothing on it that can hurt the piece.

The foam is soft enough, and it has ribs. I know that if I press my piece into it, I am not going to break anything.

Press down and you create a pressure, and the foam takes the form of the carving. Now I can work from the back side.
What gets carved on the back of a relief like this?
Everything gets brought to the edge. Except, of course, the molding. The molding I am not going to undercut. I only clean it.
On the flowers I had already started my undercutting from the front. Now I wanted all of it right to the edge. I really want to see only the edge, so in all of those areas the wall has to be gone.
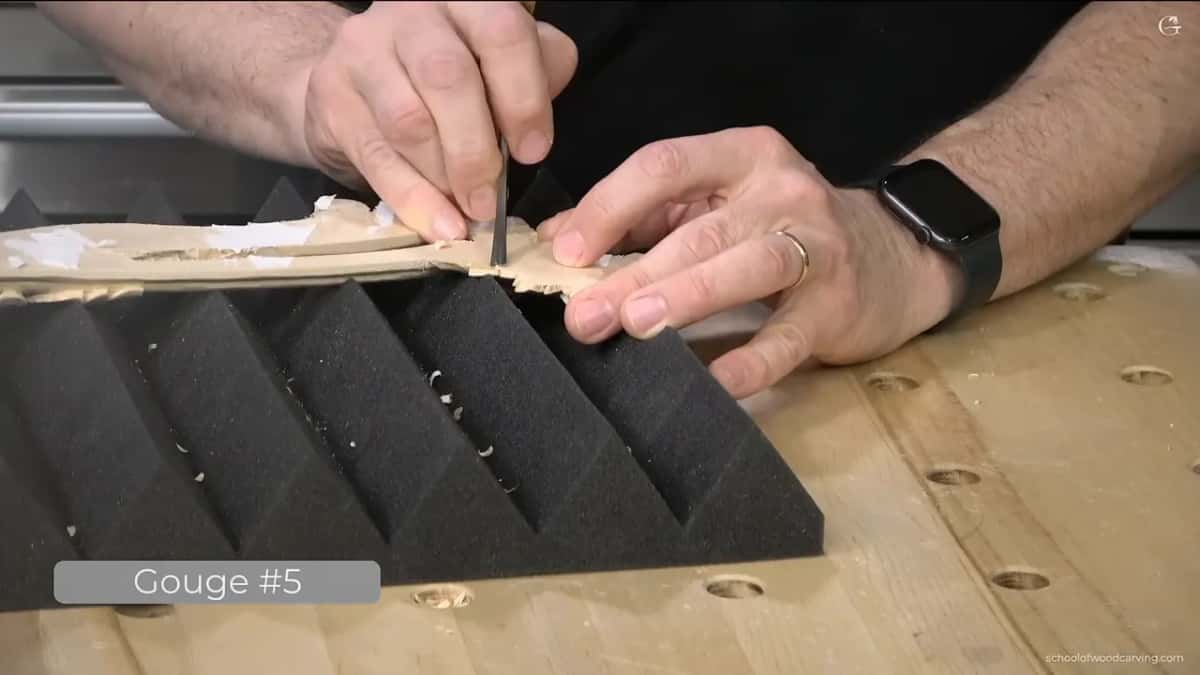
For that I took a small gouge, a number 5, a quarter inch (about 6 mm), and that is actually a good gouge for the job. A number 6 or a number 7 will work too. I started from this part and went out, and I'll go around the whole piece with that same technique.
The back is easier for some spots anyway. Once the piece is flipped and some undercutting gets done on the back side, it is always easier for me to get at an area like the volute. Lesson 5 is where the volute was kept as the high spot.
One of my earlier pieces was almost done on the back, so I showed it. I brought everything on it to the edge, and where a leaf goes underneath, I undercut a little better. I still need to take the paper off that one, and it isn't done completely. It gets ready for paint a little later. After that I laid them down on the table to show you how they will look together, all four of them.

How does a knife carve a molding?
First a middle line, right in the center. It doesn't have to be perfect, but try to be accurate. Then I take multiple chamfer cuts and adjust them until I get the final shape.
Both moldings get the same idea. The wider one looks about the same as the other: two rounded sides, and the upper part a full convex. These moldings are probably the easiest part of this composition. It's not a complicated composition, but I really like the idea, especially how practical it is. If you like mirrors and you want a molding with acanthus over it, this is a good one.

A small knife does a lot of it. You can even make one yourself out of a hacksaw blade and get really tiny tools from it, and that's not that hard at all. On purpose, I used the knife here to prove a point. You don't need special tools to get this done, and with just a knife I can make concaves and convexes.
In one tight spot I could not get some of my tools in. The knife could. It made a chamfer cut there and took that wood away.

What makes the acanthus look laid on top?
Undercutting right underneath it, all the way to the edge. I want it to feel like the acanthus is really lying on top of the molding. Like it was not carved from one piece, but there is a molding, and the rest is just applied right on top.

In my case that is really easy, and if you ask me why, it's because I have a specialty tool. A really tiny 1 millimeter number 9 with a really, really small hook. I'm not trying to brag. But it's just such a wonderful tool, and with it I get into those areas easily, with nothing in my way.

I could take that to the extreme, but I don't have to. So I took my knife, turned it upside down and brought my undercut out to the edge, blending the two together. That gives me a gorgeous shadow. Then the same small number 9 cleaned it up.

Why does the shell move against the acanthus?
Conflict in design. The acanthus is dominating in this case, and it just goes one direction. So my shell goes in opposition. Just like in politics, there are always multiple views. I told you about that idea before, and the design course is where design gets lessons of its own.
Before I carved it, I put my previous piece right beside this one, took a pencil and marked the high spots and the low spots. That way I knew approximately how it was supposed to go.

It goes really low. Measured from the surface, it's no more than 3 millimeters (about 1/8 in) at the lowest spots and about 5 millimeters (about 3/16 in) at the highest. So we're talking about only two millimeters of variation.
The first passes came from a bigger number 9, 3/8 of an inch, 10 millimeters. I had to come at it from the right position. I went down to the line I marked, about three millimeters from the background, then blended my convex with that small knife.

One spot was a really small area, so the big tool went in only for the start. After it came a number 5, only one eighth of an inch, 3 millimeters, to bring everything carefully to the molding. Take your time. And of course this part is not really fun.
What are the pipes on a carved shell?
The same idea as the pipes on my acanthus, which came in lesson 4, and I did exactly that here. A pipe is not just a straight line down to the point of an eye. It has a movement upward. Whether you should call them pipes on a shell, I'm not sure, but they sure look like pipes.

I don't want to lose my molding while I do it. And I shouldn't.
From above, one part looked okay. Seen from the side, it did not. It has to go downhill with a really nice flow, nice movement. That is why it is really important to look from different points of view, and if you're working in 3D, to look from the side.

Which specialty tools did the cleaning?
A skew number 7 gouge with a slight bend in it. I doubt you have one like it. For me it's really easy to work with, and it gives a really nice slicing stroke. I have the right and the left one, of course.
Another one is probably a number 8. This one is skewed and bent too, and when you look from above, the bend is really interesting. Tools like these you can make for yourself, and they give really nice results. More on tools in general sits in All About Tools for Wood Carving.
Here is what each tool did in this lesson.
| Tool | What I did with it on this panel | Where |
|---|---|---|
| Number 3 with a bend | Slid it in below the paper, with a mallet used carefully | The whole piece |
| Quarter inch number 5 | Took the walls away until only the edge was left | Back of the flowers |
| Tiny 1 mm #9 with a hook | Undercut right underneath so the ornament seems laid on | Over the molding |
| Bigger number 9, 10 mm | Made the first passes down to my pencil line | The shell |
| Small knife | Chamfer cuts, then blended the convex with the concave | Molding and shell |
| Half mm number 11 veiner | Dug out under the overlap, toward the edges and back in | The eyes |
| Number 3 or number 2 | Rode the ridges in a circular movement to take facets off | Wherever I cleaned |
What cleans up the eyes?
What helps a lot is a small number 11, and mine is half a millimeter. It's a veiner. Still a number 11, and one of my favorite tools. I go in two directions, one toward the edges and one toward the inside. Which you do first doesn't matter. You get the same result.

Pretty much all I do is excavate right underneath where the overlap happens. I'm careful not to do too much in that section, because I really want to see a sharp line going underneath the overlapping part.
Next I undercut underneath that part too, with my flute at about 11 o'clock at the beginning. You don't really have to. But I think it gives a more pronounced shadow, and I believe wood carving is all about the light and the shadows. You can go as deep as you wish. Be careful, though, and remember what type of finish you're going to put on. If there's no finish, you can go all the way.

I got about two millimeters deep. Hard to see, but you can see it becomes dark. Coming from the opposite direction, I go right underneath the pipe with my tool upside down and just scoop out. Not too deep on this one, because it gets paint.
Can facets come off without sandpaper?
I take a number 3. A number 2 does the job as well. I ride right over the facets with a circular movement, barely hitting the ridge. You could spend a lot longer on this than on the carving itself, and that is why I'm not filming all of it.
This panel is going to be painted, just a white color, so there's no reason to spend so much time cleaning. I don't use sandpaper a lot anyway. Lesson 7 talks about how paint changes the undercuts.
There is another option, which I started only a year ago, and I still don't use it all the time: rasps or files. Then you take a carving tool, a chisel or a gouge, and clean right after the rasp. For those of you who love really smooth results, it's a really good investment.
The one I showed is a French one, and I like those handmade rasps because the whole thing is hand stitched. The rasp doesn't take long, by the way. Sometimes it even shows you what needs to be fixed, the way it showed me right then that my piece is not perfect. But that's okay.
Where does sandpaper start on a carving like this?
At 180 grit. I won't go less than that, and there's no need for 100 grit or 120 grit before 180, because you'll just spend a lot more time cleaning after them. For me 180 is probably the starting point, and it takes out most of the facets. You could go higher, 220, 320, 400, if you want.
I would not use just any sandpaper, though, and the one I like is a mesh one from Finland. It's translucent, so on camera you can see my fingers through it. When you sand, all of the dust goes inside the mesh, and it just doesn't lift too many particles inside of the fibers, at least that brand. I'm not selling it. It gives me a really good result.

After that you can burnish it with any piece of wood, like a stick or rod. Wood against the wood, and don't use any metal. You just ride on top of the fibers and press them down. Compared with a surface straight off a tool, it gives you an absolutely different feel.
Go ahead and do it if you want to. Here I won't spend time on it, and off camera I'll probably just sand this one.
The panel has more going on underneath that I don't think I will film. It's the same techniques and about the same design. The whole course runs from the course page through lesson 2 and lesson 3 on to lesson 8, lesson 9 and the final assessment.
If finishing a relief panel one small pass at a time is how you want to work, come and carve with us.
Then the next course starts, and the one after it, and it goes on and on like that. Non-stop.
How it's done
- Pick a flat tool. I slide a flat tool in below the paper, and a gouge with a bit of bend worked for me.
- Use the mallet with care. Maybe a mallet too, with care, so the piece stays whole.
- Add a second tool where it fights. When I see the paper rising in one spot, a second tool goes under there and I take my time instead of forcing it.
- Listen to the paper. I can hear it coming out.
- Wet stubborn paper. Some alcohol on cotton, pressed onto the paper that won't let go.
- Clear the bench, then the foam. First a clear bench with nothing that can do harm, then soundproofing foam with ribs, so the piece presses in and the foam takes its form.
- Bring the back to the edge. Number 5, a small one, from this part going out, until the walls are gone.
- Leave the molding alone. I clean it and don't undercut it.
Frequently asked questions
What tool should I use to take a carving off its board?
I use a flat tool, and a chisel will work, or a spatula, as long as it is flat. Mine was a gouge, a number 3 that is a little bent, and maybe a mallet, with care. A plain number 1 chisel would do the same job.
What if paper stays stuck to the back of my carving?
A little alcohol takes care of it. I spray some on, or I wet some cotton and lay it right on the paper. My back side was a mess of paper and spray glue once the piece came free, and that was fine.
What should a finished carving lie on while I work the back?
Mine went on soundproofing foam with ribs. The foam is soft enough that pressing the piece in breaks nothing, and it takes the form of the carving. Before any of that, I cleared my bench of every object that could damage it.
What to carve next