

Alexander Grabovetskiy, woodcarver, School of Woodcarving · Published 2021
How do you pierce through an acanthus leaf without a drill?
Quick answer: Piercing an acanthus leaf by hand is a plug cut. A number 9 gouge goes into the center of the section, upright, and lifts the plug out, sometimes with a mallet behind it. Then I work toward the opening sideways, slicing every pass, and the bridge stays until the end.
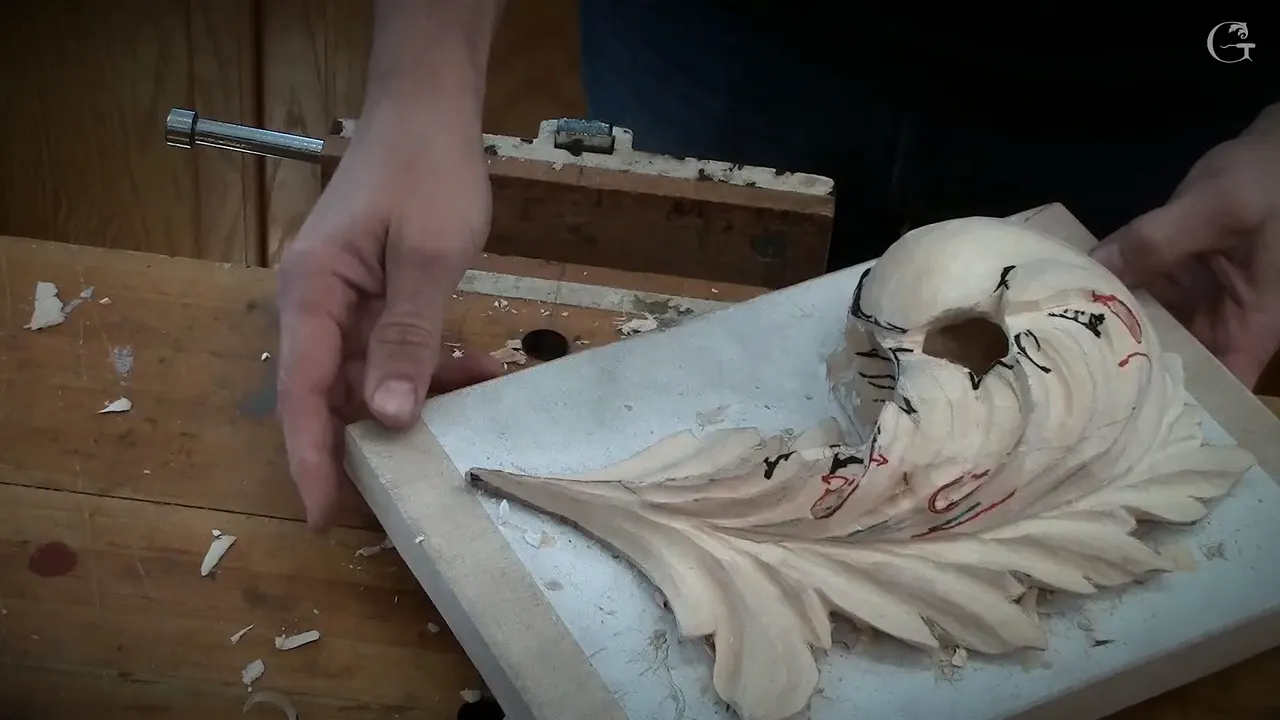
Opening a hole in an acanthus leaf without drilling is a plug cut. I stand a number 9 straight down in the middle of the section, take the plug out, and then attack toward that hole from the sides. That is how I showed it to the class on the Byzantine acanthus panel, a relief carved in layers. The acanthus leaf is old ornament, and this one is in its Byzantine form.
You look down at your board and see a bunch of lines. It's really confusing, I know. But there are only three eyes on it, and one gouge, a number 9, will open the wood between them. We did it in lesson 9, which is also where one student broke a piece, so you will hear about that too.
Lesson 9 in six lines
- Find the three eyes first, because each eye is a separation point between two leaves.
- Every leaf gets three separations.
- One part of each separation runs underneath. A plug cut straight down opens the section, sometimes with a mallet.
- Relief cuts go in first, wherever two leaves separate.
- Stay roughly 6 mm (1/4 in) back from the ridge while you undercut.
- Leave the bridge for last.
Why start with the eyes?
The eye is the starting point, and it always sits between leaves. So before any gouge goes near the board, look at my piece. One eye, two eyes, and three. Between those eyes there is a middle line, and that line is supposed to be convex, not really high like a huge ridge, but kind of smooth. I put it in with a pencil. You are going to clean it off later, and a pencil is much easier to clean than a marker like the one I use.
Every eye is supposed to look like a water drop. From each side of that drop the wood goes downhill this way and downhill that way, and that creates the illusion of the pipe. Lesson 3 covers the eye itself, and the pipes are in lesson 8, so here I only want you to see where they sit. Just concentrate on the eyes, and it's going to be easy.

How many separations does each leaf get?
Three separations in every leaf, the same thing we did on the first layer. One of them in each leaf goes underneath, and those parts are what we dig out. The big leaf gets exactly the same. Think back to the S curvature. It's supposed to support the overall movement, the arc, and I explained it on day number one for that reason. Now it's supposed to make sense.

Which gouge opens the hole without a drill?
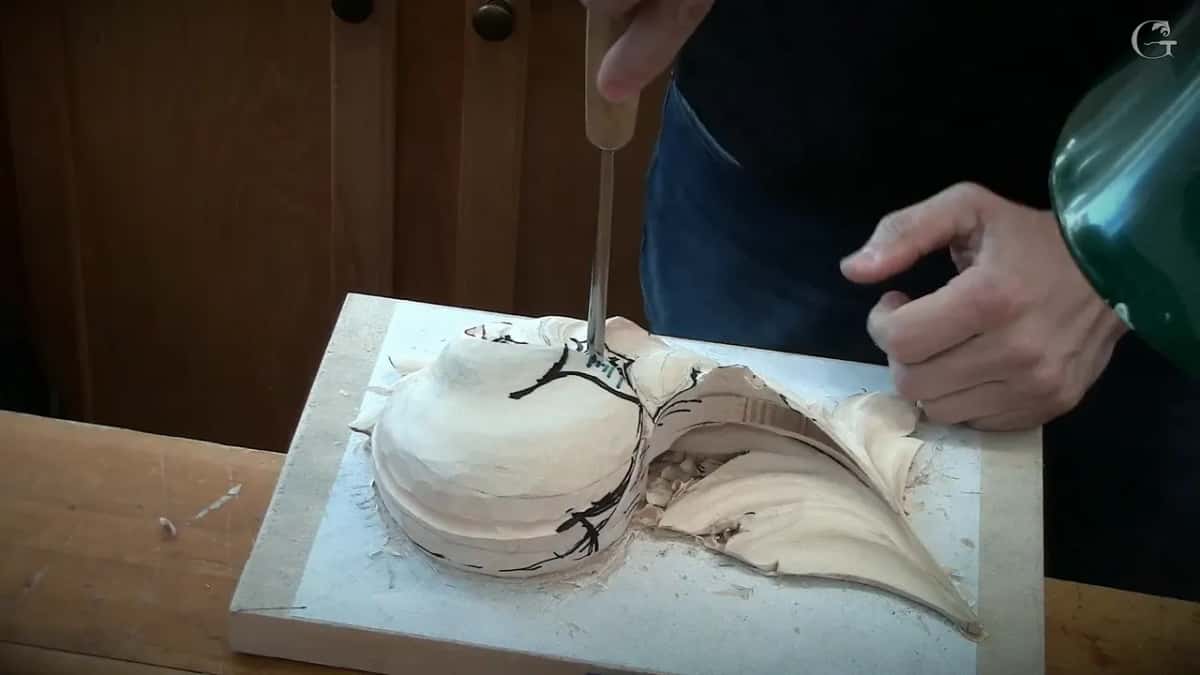
A number 9, three-quarters of an inch (about 19 mm) if you have one. Without one, a 10 or 12 millimeter number 9 (about 3/8 or 1/2 inch) will work. Whatever you have. You set the tool straight down, and we call it a plug cut, because you are really removing just the plug right in the middle of that section. Then we attack the hole from each side. And that's really quick, and sometimes a mallet helps, too. See? That's why it's called a plug cut. You're removing plugs.
Back on the Venice Room, in workshop 40, I said why a number 9 can rotate with no problem. Any number 9 has a true radius. It's not like a U shape, so if you place it and rotate, it's going to end at the same spot. Workshop 124 had me reach for a 10 millimeter one, then change my mind and take a bigger one, about half an inch. It popped out just like a plug. I said I can widen it a little. That lesson is workshop 124, and there is more on the plug cut itself in lesson 26 of the furniture panel.

Why does the first pass go straight down?
A straight cut down, as of now, is what gives likeness to the overall shape. Later on we create more details on that leaf, start undercutting and get an even better effect. But this part is a really important step. Wherever you see the separation between the leaves, you really have to do relief cuts, and you have to do them first. The same tool will do it, but carefully. In lesson 4 the relief cuts were stabs with a small number 11.
Then I made a mistake, right there on my own board. I was glad it would not change the shape too much, but be careful. I would probably use a smaller tool next time.

What opens the hole out once you're through?
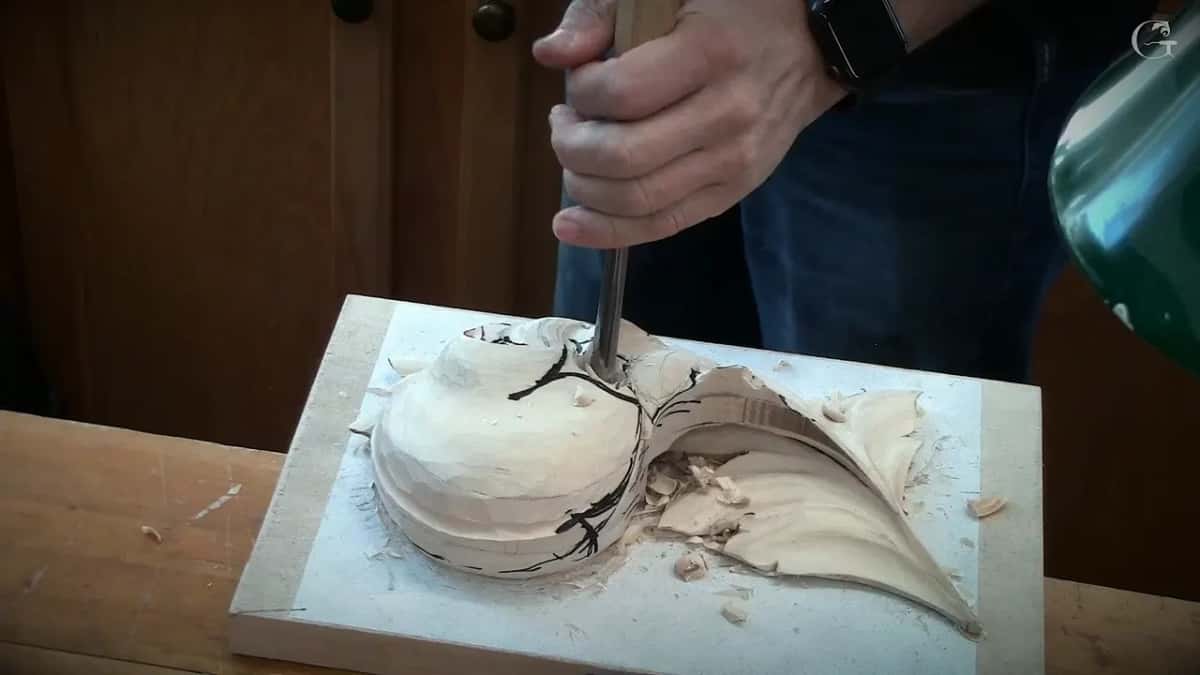
Undercutting does, carefully, from all sides, after the first straight down cut. Once you are through, you work from the sides, and now you can start undercutting. Point your tool toward that hole and don't forget the rotation movement, slicing. Every pass, just slice it. Undercut and undercut, pretty much the same tool, and go inside the hole from every side, but leave about a quarter inch (6 mm) between the ridge and the hole for now.
We have a lot of meat on this side, and some of you have really big chunks in that area. Undercutting from that side makes the final form a lot easier to establish.

How does the second layer blend into the first?
With the number 9, the big one. I attack from the side and make my rotation movement, in my case toward the left, and start digging in. My goal is a really, really smooth transition from the first layer to the second. Be careful not to break it, because right now it becomes fragile. We make it airy and light. But if you overdo it, you're going to break it. That's the blending, until we meet the first layer.
It matters right now because there is a lot less material to remove, and those shapes come easier. This is also when you start removing this wall and go toward that dome inside, and that way the leaf is a lot easier to work on.


What happens to the wall inside the leaf?
Whatever the wall is, we really have to dig in, but be careful how you do it. Make the rotations and don't destroy the lower layer. A mallet is fine, but even with the mallet you are still doing a slicing. If you feel that it fights you, get a smaller tool and attack with smaller chunks. The goal is to get to that first dome, and everything else there has to be gone, pretty much. That is sculpting, I guess.
After you get through, the final, final form comes much easier. Get as close as possible to the edge, but not too close, I would say maybe 5 or 6 millimeters, about a quarter inch. Later on we refine it, so if you made a mistake you still have some meat. Just careful. Don't hit that first layer.

The tools I named in lesson 9
| Lesson stage | The tool I named for that stage | What I said |
|---|---|---|
| The plug in the middle | Number 9 | Whatever you have, and sometimes a mallet helps. |
| Relief cuts | That same tool from the plug, used carefully | Relief first. |
| Blending the second layer down | Big number 9 | Turn it as you go, slicing. |
| Black line | Number 11 of 3 millimeters | Blend it together until it disappears. |
| The eye | Knife or other small tool | Like a water drop. |
Why keep the bridge until the end?
Keep that bridge to the end if you do have one. Once you start to undercut, you sometimes have a tendency to crank on it, so use the bridge as a leverage and try not to hit it. Remove it too soon and that spot becomes really weak, because the grain runs that direction. You can break it. Not that it's the end of the world.
Right then a student said "I broke it." You broke it, right? See? That's why I kept mine to the end. Whatever supports you could keep, keep those supports. A few minutes later I asked the class if they understood what I had just said, and said it again. Keep the bridge.
The same thinking is why we left that part thick at the beginning. I knew we were going to bang from the top, and we needed that support. Even when the piece is really light and airy, you need support if you want to bang with the mallet.
Can a knife shape the eye once the plug is out?
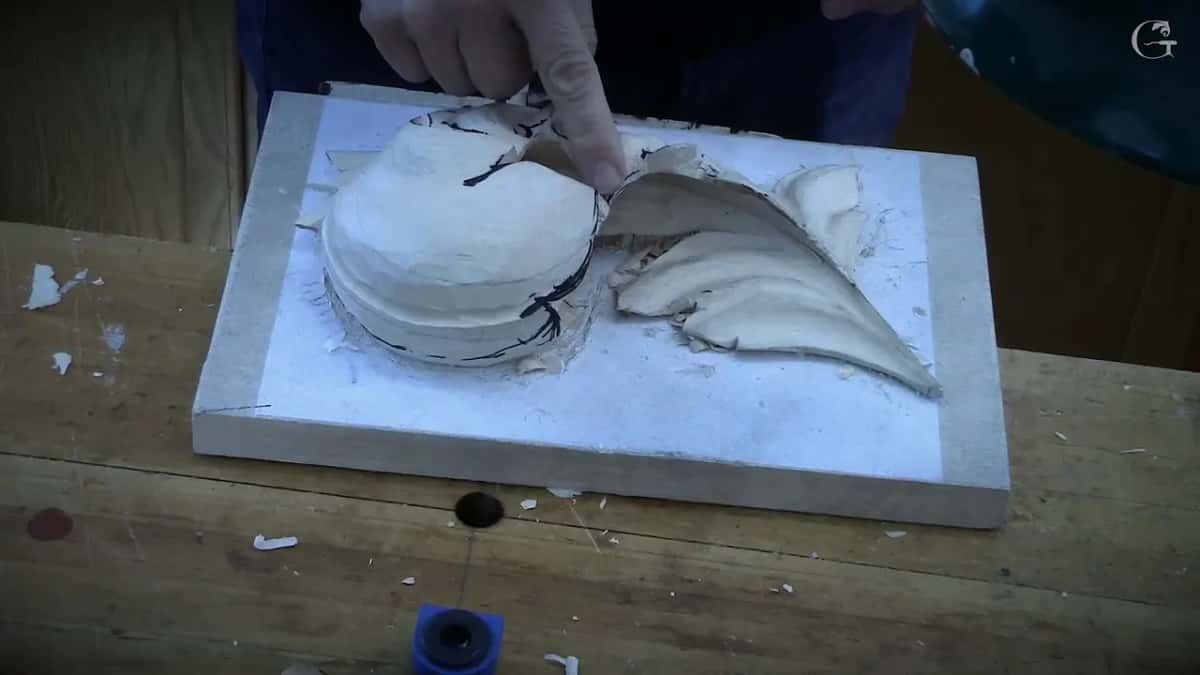
A knife or another small tool does it, in a water drop shape, right through the leaf. We used a 3 millimeter (1/8 in) tool, because there is no thickness left anymore and we can start digging inside. If you have small tools like I do, it's even easier. I didn't put them on the list because those tools are hard to get on the market. Plug cut, boom, and it's through. I can even undercut with that tool.
When you work on the inside, use the advantage of the bench dog and clamp the piece like that. Then you can clean it and remove that section later on.
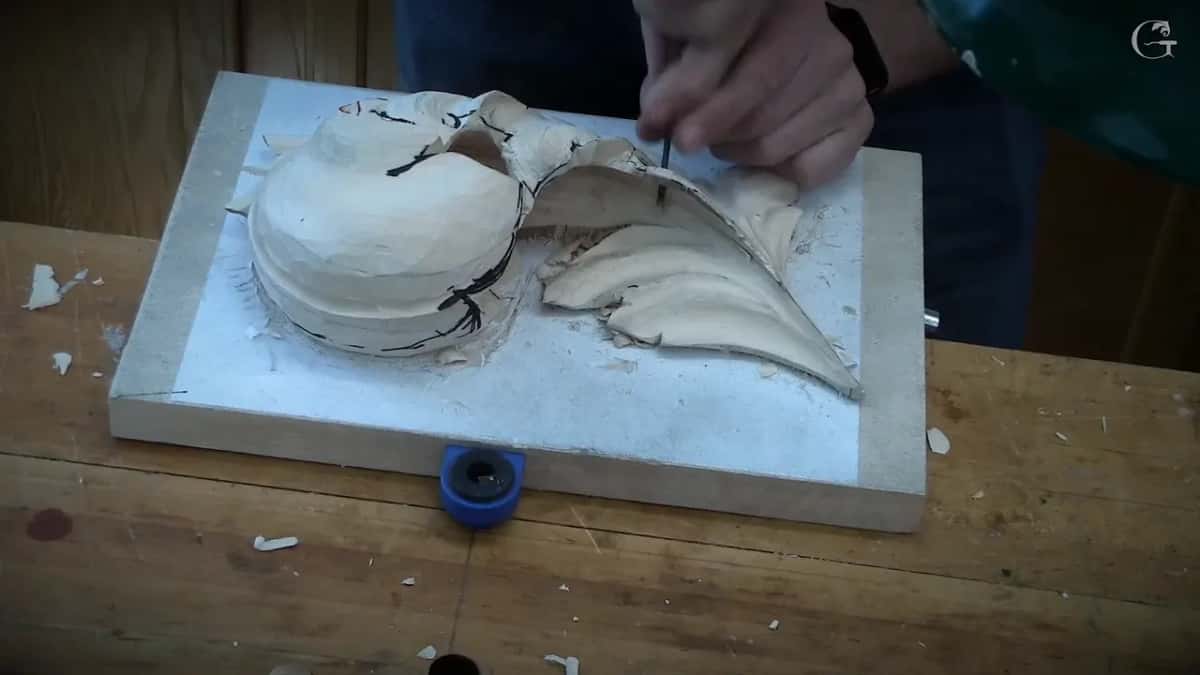
Does the hole have to go all the way through?
Really doesn't have to. Make it deeper instead, to create that shadow, even turn the tool upside down, get inside a little underneath the pipe and remove it with the same tool. It still creates the shadow, and small tools help even more there. It looks like a hole, yeah. But it's not. Where you do open it, the leaf looks even better with the hole, though you don't need to do it.
I made the same kind of choice on the Venice Room. There, in workshop 76, a 3 mm (1/8 in) number 9 made a plug cut on the inside, and it gave me a really beautiful and deep shadow. Later in that part I said why I did not go right through, which I could. It would look unnatural toward the ceiling, the overall movement, and you would still detect that something is just wrong. For that reason I didn't. If it were pierced work, going through would be okay.
A quarter inch (6 mm) number 9 did the plug cut in workshop 42, and carefully, because coming in that way is not like carving from above. The grain of the wood is different there. I could have used a smaller one, but I really like the idea of big shadow.
For the vase with grape leaves, in lesson 1, there were only 6 millimeters (1/4 in) there, so I went about a sixteenth of an inch (1.5 mm) deep. I did not want a problem I can't fix later, unless I make a pierced one later on, which is probably a good idea. But not as of now. In lesson 3 of that course I got about 5 millimeters (3/16 in) of undercut on the inside and made sure I did not pierce it, because there I really wanted the undercut.

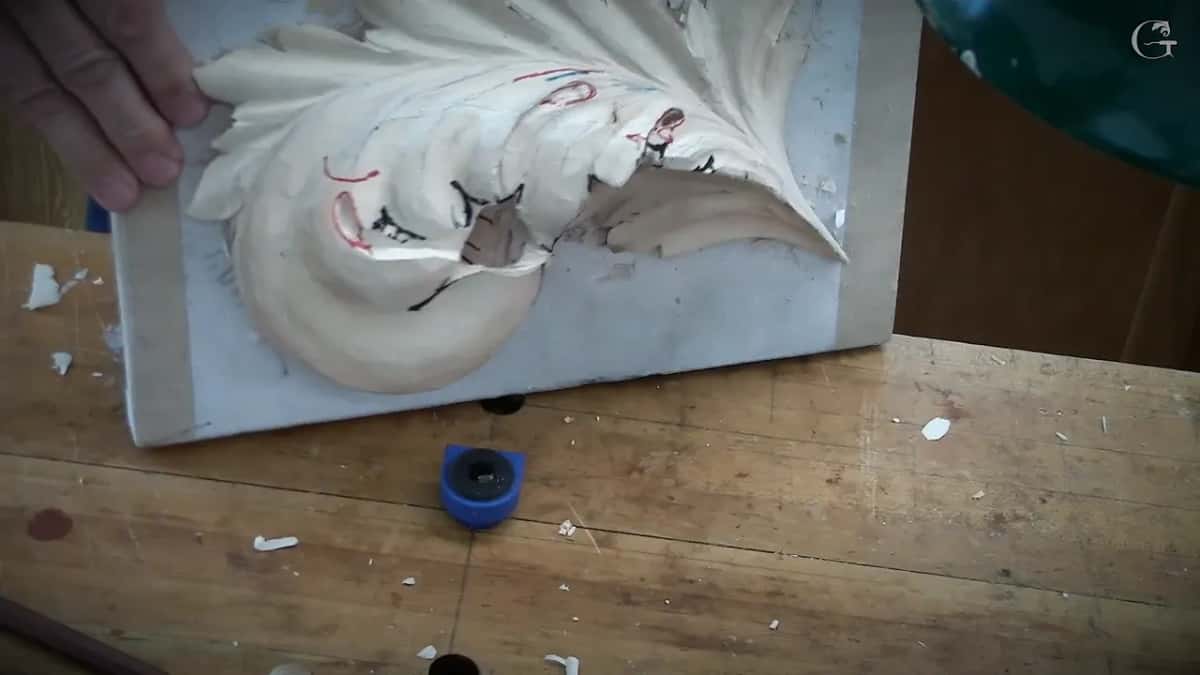
When would I still use a drill?
When it saves time. In this lesson I told the class they don't have to open the leaf right through, but it's a good idea, and then I showed how to do it without drilling. Over on the floral panel, in lesson 2, I forgot to pierce two spots and used a drill to save time, and I said there that a small number 9 does the same operation as a plug cut. It just takes a little longer.
In workshop 158 of the Venice Room I attacked a hole from both sides. A plug cut from one side, then that tool again from the other, holding the right direction, just toward the hole. Workshop 130 started with plug cuts, first of all, because then it was a lot easier for me to find their position a little later, and you can watch it in workshop 130. My Greek acanthus has a section pierced right through as well, in lesson 12 of that course, and on the Hashemi flowers I opened one with a V tool laid on its side, in lesson 20.
What did I change before the lesson was over?
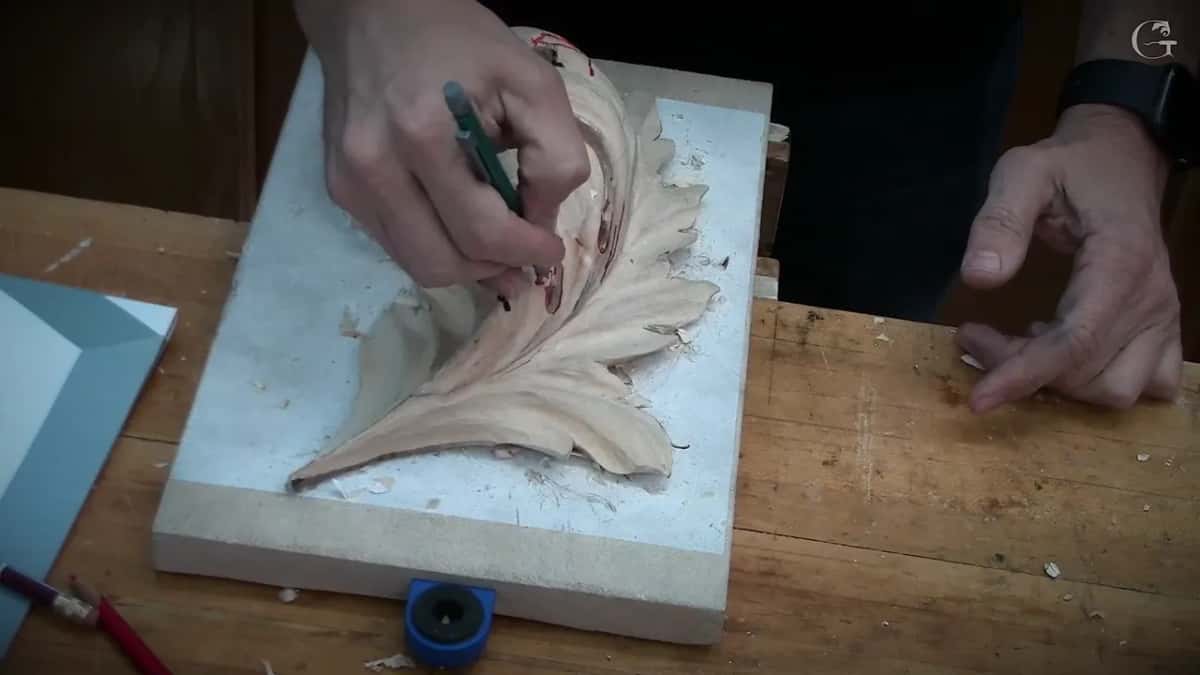
A spot I didn't like. That's what you get if you're online with me. If I don't like something, I change it. This little thingy just doesn't look really nice, and I'm after a nice and organic form, so I got rid of it and opened up the whole thing. Much more organic, because I still have one separation, and it's still in Fibonacci, so I'm not doing something off. The rest of it I'm okay with. But who knows? Maybe by the end of the day we change something else.
Before that came the black line I left inside. Same as on the outside, I took a number 11 of 3 millimeters and blended it until it disappeared, until it looked like it came from the solid piece. Inside there was one more line, and from it we carve an arch, and all that is going to be gone. You could even carve a signature or a bug into the first layer, from the solid, without putting anything on top. Then it would be really challenging for anybody to understand how in the world you did that.
Next comes lesson 10, and Access opens all ten lessons with the video of each one.
How it's done
- Find the three eyes. Each eye is a separation point between leaves. Draw the middle line between them in pencil, which cleans off much easier than marker.
- Mark three separations in every leaf. One part of each goes underneath, and those parts are what you dig out.
- Make the plug cut. Upright number 9 in the middle of the section. A mallet sometimes helps.
- Relief first. Wherever two leaves separate, the relief cuts go in before anything else, carefully, using that same tool.
- Undercut toward the hole from all sides. Rotation and slicing on every pass, with some wood left beside the ridge for now.
- Blend down to the first layer. The big number 9, turned as you go, gives a smooth transition. Stop about 5 or 6 mm from the edge, and don't hit the first layer.
- Blend the black line away. A 3 mm number 11 until the line disappears.
- Take the bridge off last. Until then it is your leverage when you crank on the piece. Keep every support you can.
Frequently asked questions
What size gouge works for a plug cut in acanthus?
I like a number 9 of three-quarters of an inch, about 19 mm. A 10 or 12 mm one does the job too. Any number 9 has a true radius, so when you set it down and rotate, the tool comes back to the same spot.
Why leave a bridge on a pierced acanthus leaf?
Undercutting makes you crank on the piece now and then, and the bridge is there to take that. Pull it too soon and the spot gets really weak, since the grain runs that direction. A student in my class broke one. I told everybody right then that's exactly why mine was still there.
Does every opening in the leaf need to go right through?
Not really. I can make it deeper to create the shadow, even flip it upside down and get a little underneath the pipe. Seen on the board, it looks like a hole, but it's not one. And where I do take it through, the leaf looks even better.
What to carve next