

Alexander Grabovetskiy, woodcarver, School of Woodcarving · Published 2026
What grit sandpaper should you use on a wood carving?
Quick answer: Sandpaper grit for a wood carving is, on my grape onlay, a 240 grit Abranet mesh or a purple 220 grit 3M roll, worked lightly over the tops of the grapes. I would not go lower than 120. One spot that stayed rough got that 120, and a Mirka sponge of 4000 added small shiny spots.
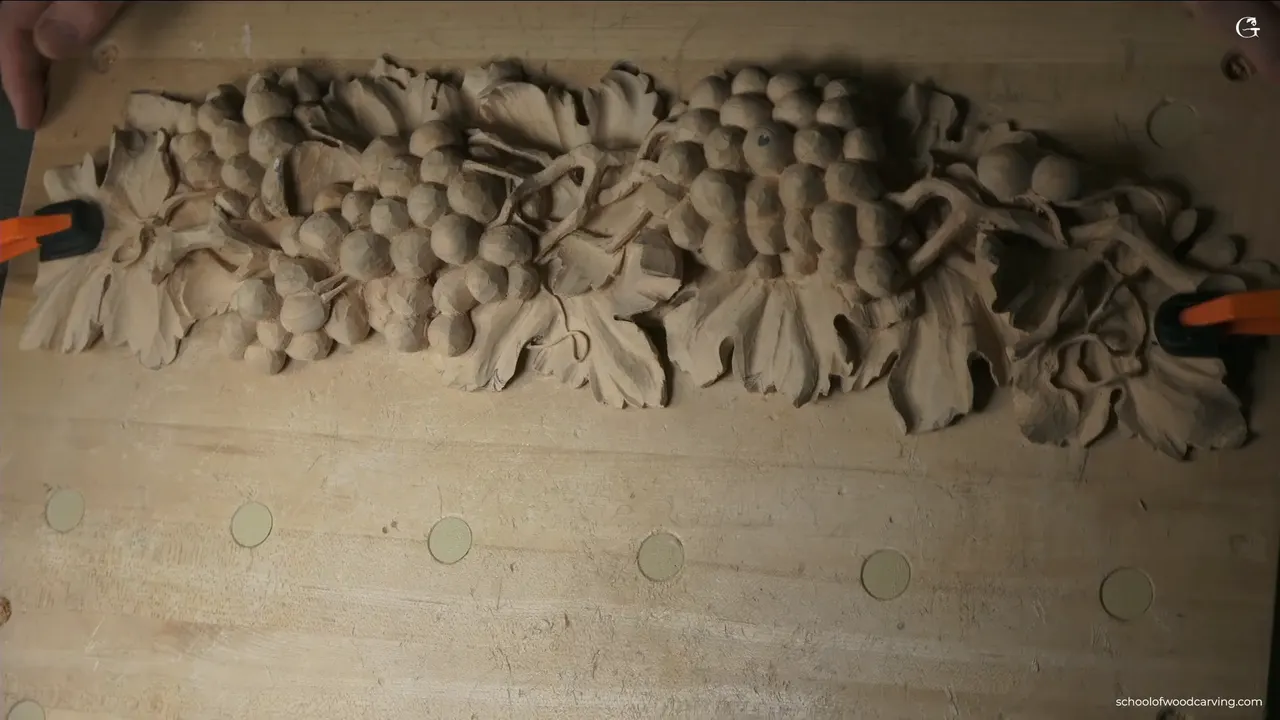
Sandpaper on a carving is, for the onlay in this lesson, a light pass of 240 or 220 over the tops of the grapes, and not much of it. My coarse limit here is 120. A 4000 sponge gave a little shine at the end. After that you take a photo for your certificate.

Have you looked at your onlay and seen tool marks all over it? Did somebody ask you to make it smoother? Then the only question left is which paper, and how far to go with it.
I get questions about how to finish it. I won't tell you that, because it depends on where you hang it. But I can show you the paper I like, the grits on this onlay, and the grits I named on two other carvings in the school.
Grits and spots on this onlay
- Abranet by Mirka at 240, or the purple 3M automotive roll at 220.
- Paper on the upper part of the grapes, lightly.
- 120 went on a single rough place, though a tool would do it better.
- My floor was 100 grit early in the video, and 120 when I repeated it.
- A 4000 grit sponge for small shiny spots.
- Leaves keep their tool marks, or get a light touch at the very end.
Should you sand a carved grape at all?
A little, if you like. Some people really want a smoother look, and you can see marks all over this onlay, so they ask: should I use sandpaper on it or not? Personally, I like those marks. They are just the nature of wood carving.
But look at the two grapes I point to in the video, both somewhat smooth at the top and rougher at the bottom. I think a grape would look nice if you sand it a little bit. That part is your choice, obviously. All the tool marks can stay on the leaves, or you knock a few of those down.
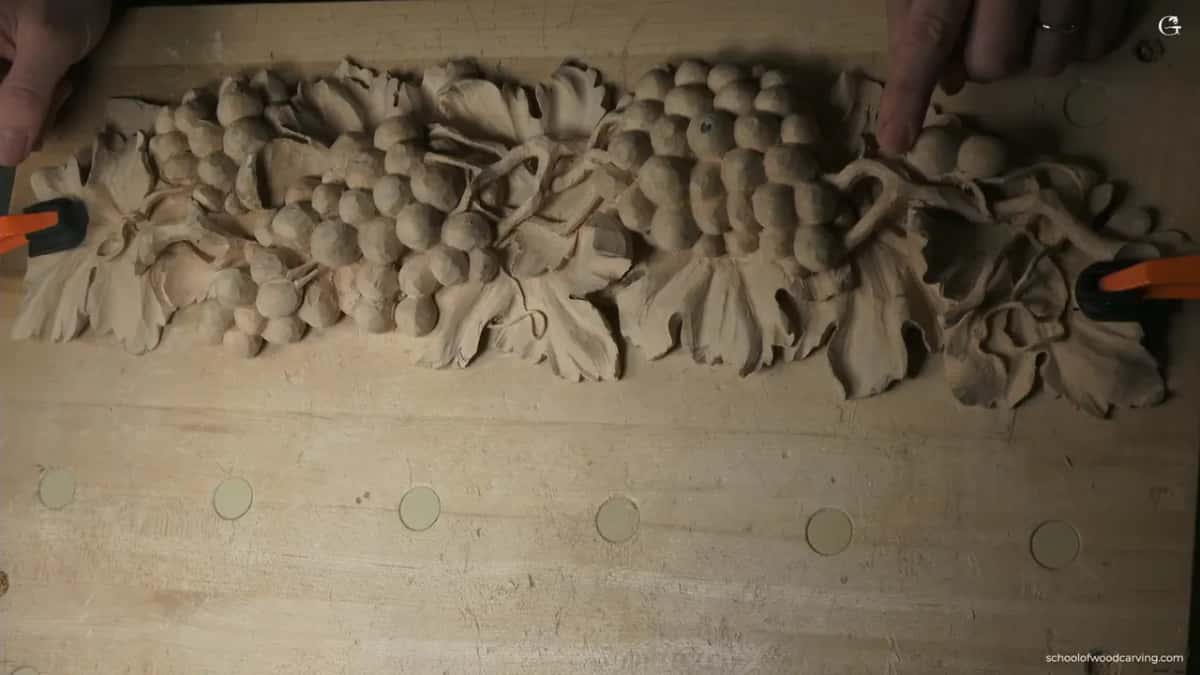
Customers pull both ways. In my Modern Acanthus lesson I told how it goes with people from different countries. If the customer is Italian, oh man, they love to sand it to death. It has to look like marble, not even one tool mark. Customers from England or Germany don't want anything touched with sandpaper, because they want to see all the marks. Both look authentic to me. Usually, before I sign a contract, I tell people that in my opinion it looks better without the sandpaper. And usually they don't read it and sign it anyway.
Over on the floral panel I said, even if you want to use a sandpaper, why not? A minute or so later I added that I'm not the biggest fan of sanding. My own habit is to leave the work with its facets, but a lot of furniture makers like it really smooth.

Which grit do I start with on a carving?
Here I would take 240, probably. As the beginning stage, it knocks down those facets really good. Near the end of the video I said that most of the time it is no lower than 240 or 220 grit, and that usually handles whatever is there.
The floor is where I gave two numbers, so you get both. Just past the four minute mark I said I would not go lower than 100 grit, since all those marks get hard to deal with later. Three minutes after that I said 120. Both came out of my mouth in one short video.
A different piece got a higher floor. On the Chamomile and Bow Rosette, a paint grade project, I recommended 180 grit, or 240, and not lower than that. Going down to 100 and 120 there would give you a really, really rough look. I said 240, or even 320, would be completely sufficient. In the first rosette lesson the Abranet I showed was 180, translucent, and the dust goes right between its holes.

Why do I like a mesh more than plain sandpaper?
I really like the Mirka brand. Theirs is called Abranet, and it's not even paper. Lately I also found a purple roll from 3M, the kind made for automotive work. You just tear the 3M off. The Mirka also comes on a roll, and that one I have to cut.
My reason for the mesh is simple enough, because it doesn't leave as much abrasive in the fibers of the wood. Not 100% clean, but better for the tools. Pick what you like, because any sandpaper will work.
Cheap paper is another story. In the Lily Box course I said please don't be cheap on a sandpaper. Cheap sandpaper leaves a lot of abrasive inside of the wood, and you're really going to dull your tools. Even a good one leaves some.
The Modern Acanthus lesson names a second problem, and it starts with the fibers. Plain sandpaper pushes them in. Anyone who finishes a piece later knows what happens after the first coat of stain or shellac, when the grain pops out and you have to sand it again. In a really complicated area that raised grain is almost impossible to fix. A clean slice doesn't smoosh anything, so the finish doesn't raise as much grain.

Where on the grape does the paper go?
Only on top. And not much, I wouldn't do too much. You may go as far as you wish and be as crazy as you wish. In my case I just knock down the upper parts a little, or should I say, the top of the grapes.
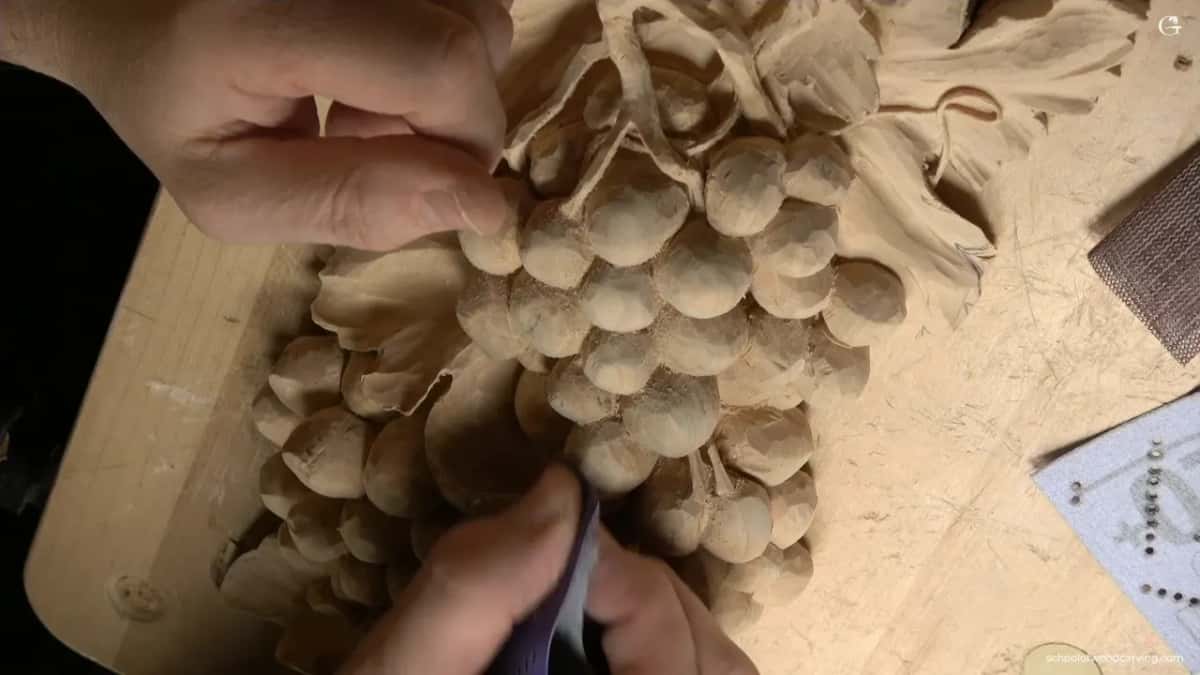
One spot was kind of rough, so I went a little lower, probably 120. Obviously the tool itself would do that job better. Even the sandpaper did fine there.
I still don't want to go crazy with it. I really like some rough spots, because otherwise it doesn't really show that you did that by hand, with the chisels. I like the chisel marks.
Below are the grits I named, here and on two other pieces.
| Piece | Words | Grit |
|---|---|---|
| Grape onlay, the tops | Abranet mesh, or the 3M purple roll, used lightly | 220 and 240 |
| That one rough place | A little lower grit, though the tool does better | just 120 |
| Last touch here | Mirka again, for shiny spots on the grapes | 4000 sponge |
| Chamomile rosette, paint grade | Not lower, since 100 or 120 looks really rough | 180 or 240 |
| Lily Box flower | Old Festool paper rolled like a tube, then automotive | 150, 220, 320, 500, 4000 |
What order do the grits go in when you sand more?
Low to high, a little at a time. On the lily box I wanted to pop a little more grain out. I don't like to sand either, but sometimes it just makes sense, especially on a beautiful wood like that, where I wanted the eye on the grain and the overall movements instead of the tool marks.
I thought I might start at 120, or maybe 150, then gradually move my way up. It was old Festool paper from my sander, rolled like a tube. At 150 I didn't think I needed anything lower. I would still see those tool marks, don't get me wrong. Then came 220 Festool, and one spot with too many scratch marks from the previous grit got hit again.

After that came automotive sandpaper, 320. Paint shops use that kind on cars when they sand Bondo. A painter's sponge of 500 grit went into the cavities, and I didn't worry if it hit the sides. Last came 4000 by Mirka, and it gave me almost a mirror polish. Just that piece, of course.
What does a 4000 grit sponge do to a carving?
It puts a shine on the grapes. After the sandpaper stage I would probably use a sponge, Mirka again, and in this case 4,000 grit. It gives me shiny spots right at the top. Be careful though, okay? Under it the wood just becomes really shiny, and I did only a little for the lesson.
The same grit comes up in my sandpaper Q&A video. When a piece gets gold leaf, the Mirka 4000 is my final step, and it gives a beautiful, shiny result. Gold ready. You have to be really careful doing it.
When does a carving have to be smooth all over?
When it is going to be gilded. Right now I'm working on a big project, and you see it behind me in the video. Those panels are for a pipe organ, all gold. For gold leaf the surface has to be smooth, so I have to sand it somehow, or finish it some other way.

Pipe organ shades come up again in lesson 10, and in lesson 13 I said they are headed to New York.
I recorded that Q&A while we were working on this grape onlay for the school. A lot of emails ask me whether to sand or not. My answer there was that it all depends on the finish that will be applied, and on the application. As much as I love a surface out of the chisel, for gilding I still do some sanding.
In that video I also said stable, air dried wood is hard to find nowadays, since most wood you buy is kiln dried and its puffiness creates a problem too. So before I sand, I like a light coat of sanding sealer.
The finish of your onlay depends on where it goes. Put it on a mantel that is painted, and you paint the onlay too.
Can a sharp tool do the job instead of sandpaper?
Better than paper, I said at that rough spot. In lesson 12 I showed how: a number 7 of 14 mm (about 9/16 in) turned upside down, moving in small circles right on top of each facet, barely removing anything. After a few micro passes it looked completely sanded. Not a quick process, at least for me, and maybe I'm doing it wrong.

Scrapers are another way. I found the ones in this video on Amazon, and they are really, really good, with multiple shapes. Lime wood or basswood is kind of soft, so it's not too good for scraping, but you're still able to scrape it. The scrapers lesson in the tools course is all about them.
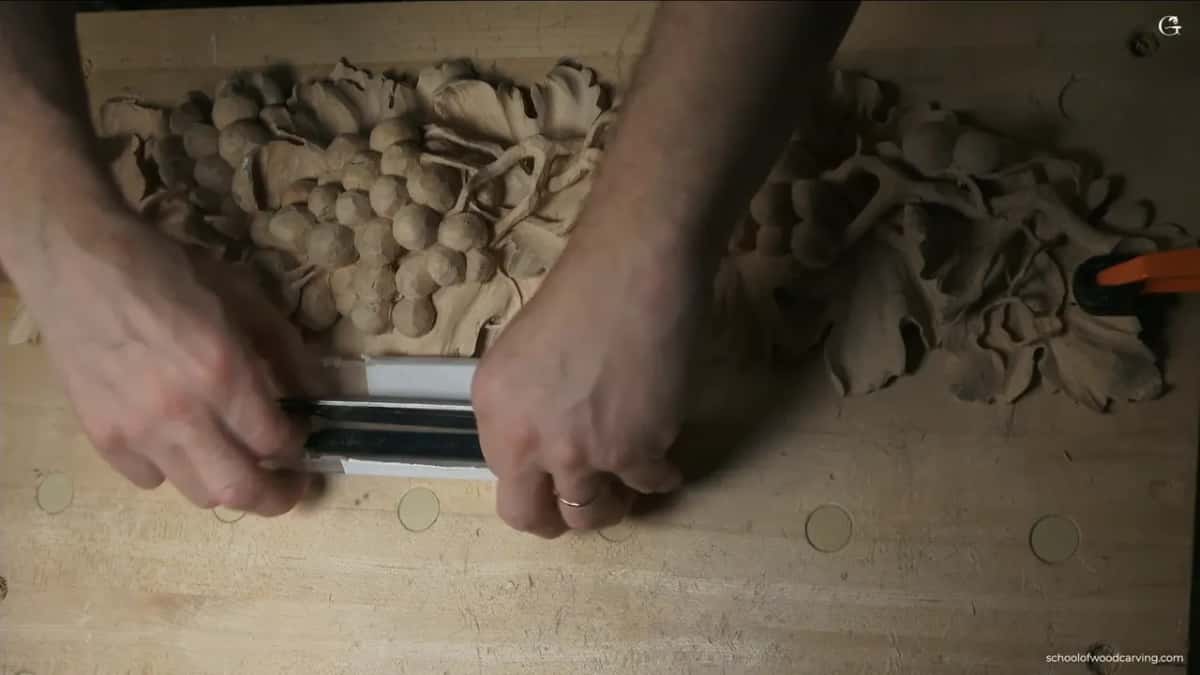
For the Q&A I scraped a whole surface with just a carving knife, and it gave a really good result. After scraping you could burnish it with the same species of wood. Mine there was American basswood, pretty much the same as European linden or lime wood. That makes it really shiny, and before gold leaf it has to be shiny, otherwise it won't look good.
Some people, in England for example, used reed rush before there was any sandpaper, as I said in that video. Music stores sell it. I put it at about 400 grit there, and again on the floral panel.
With the chamomile rosette I gave the plain choice. That project is paint grade, so if you don't like the idea of paper, just spend a little more time with the chisels and gouges, and blend it.
How far can you take a grape onlay?
As far as you like. Like I said before, there is no end to how far you can take it, and that is why this is the final video for this project. How it looks is only your call.

Then I showed the result, final, final, and I think it looks really good. I turned it both ways so you see it in 3D.

Even those leaves can take a light, light touch. Still really nice.
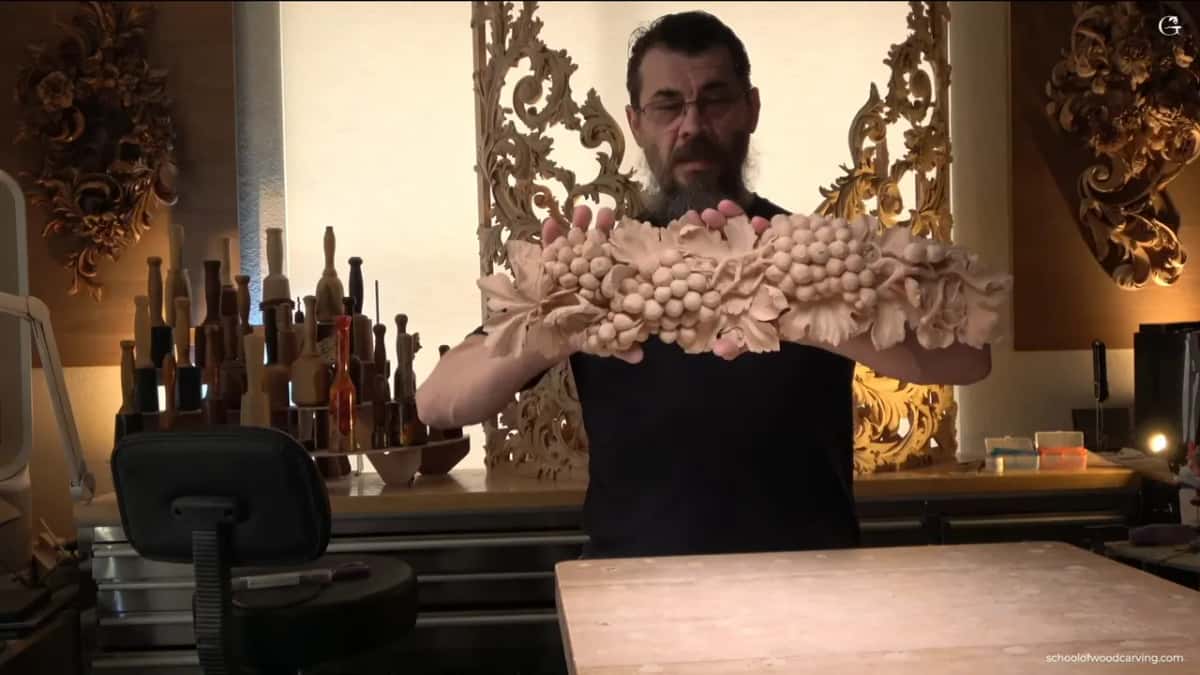
Now I have to take pictures of it and post them, so you can recreate it if you want to.
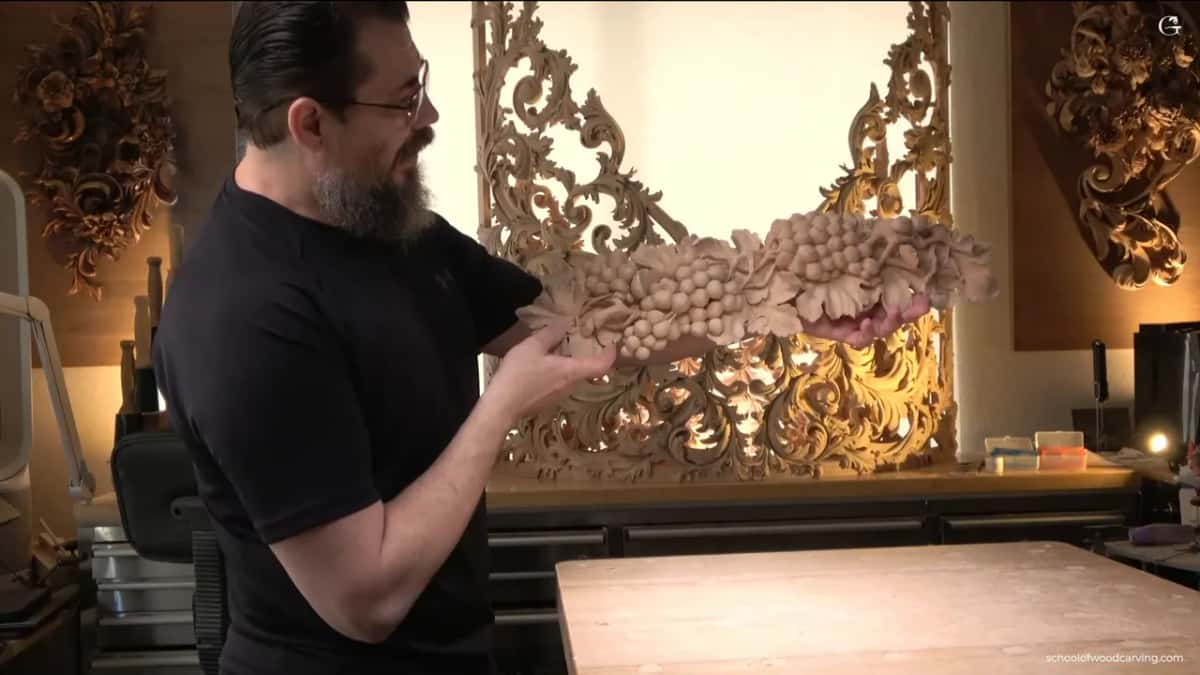
Where does a finished grape onlay go?
On a mantel, above a kitchen hood, wherever you like, and above the doors too, with the header.
Mine came out of a basswood board 24 inches long, about 61 cm. It was 6 inches wide, about 15 cm, and 8/4 thick, roughly 2 inches or 5 cm, though mine measured 1 7/8 inches, 4.76 cm. Basswood is lime wood, or linden, in Europe. Lesson 1 starts from that board.

How do you send your onlay for the certificate?
Upload a photo of your carving on this lesson page, as a jpg or png only. Do not use zip. Please reduce the file size first at TinyPNG before uploading, and I will look at your work and certify you based on what I see.
Make sure your picture is ready before you upload. You get one chance on this page, and the upload button disappears after you leave.
What comes after the grapes?
More carving, and harder. I'm planning a lot more complex stuff, like Grinling Gibbons, and simple stuff for beginners too. A Gibbons class from Maine already sits in the school, and the whole grape onlay course is listed on one page.
There were a lot of movements I showed, and I hope it was a good lesson. Thank you for being members of my school. Ask me any questions and I'll try to answer. Good questions, not the bad questions. But try.
Is your onlay done, with the photo shrunk and ready to go? Then send it in, and come carve the next one with me in the school.
How it's done
- Decide where it will hang. A painted mantel means the onlay gets painted with it. Gilding needs a smooth surface first. The finish itself is your pick.
- Choose the abrasive. I like Abranet at 240, or the purple 3M at 220. Don't be cheap on it.
- Knock down the tops. Work only the grape tops and stop early. The 240 takes those facets down really good.
- Treat one rough spot. Drop to 120 where a spot is still rough. A tool would handle it better.
- Go easy on the leaves. Keep the tool marks, or touch them very lightly at the very end.
- Add a little shine. Rub a 4000 grit Mirka sponge over the highest points, carefully.
- Photograph and upload. Shrink one jpg or png with TinyPNG and upload it on the final lesson page.
Frequently asked questions
Is 120 grit too coarse for a carving?
On my grape onlay I used 120 for one rough spot, and said that was as low as I would go. Earlier in that video I put my floor at 100. For the chamomile rosette, a paint grade piece, I called 100 and 120 a really rough look and stayed at 180 or 240.
Why use a mesh like Abranet instead of plain sandpaper?
Mirka makes it as a mesh, so it is not really paper at all. Less abrasive stays behind in the fibers, and my gouges like that when they come back to the same place. Even so, ordinary paper does the job on a carving too.
Should the leaves of a grape onlay be sanded?
Leave every tool mark on them if you like, or knock a few down a little bit. Near the end I said even those leaves can take a light, light touch and still look really nice. Just keep enough marks to show the work was done by hand with your chisels.
What to carve next