

Alexander Grabovetskiy, woodcarver, School of Woodcarving · Published 2023
How do you blend the ridges a gouge leaves behind?
Quick answer: Blending gouge ridges is taking down the sharp little lines your cuts leave until they blend in. On this walnut furniture panel I do it with the edge of a razor blade, a small number 3 spoon gouge or a knife, and I keep the high edges standing.
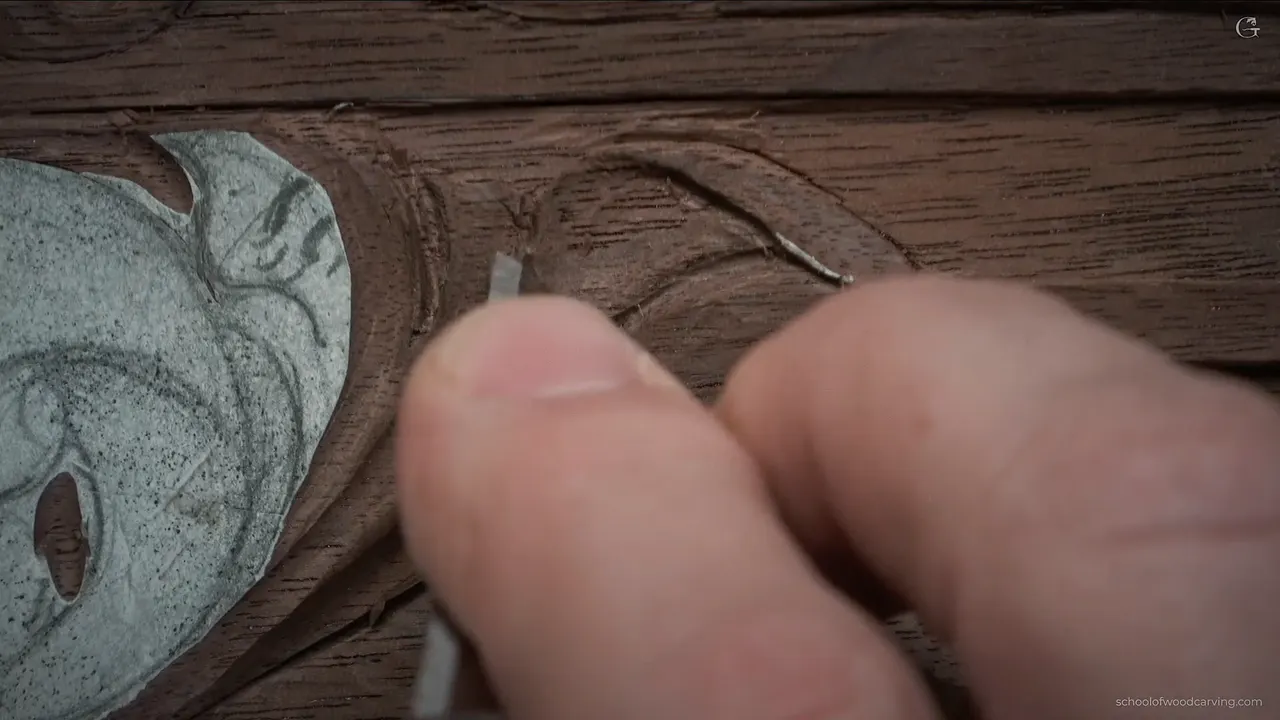
Blending the ridges is taking the sharp little lines between gouge passes down until they blend in, and on this walnut furniture panel the tool I like for it is the edge of a razor blade. You saw before how sharp some of those ridges were left. With just the edge I make small cuts and blend it really nicely, and it rounds up those pipes too.

Have you ever looked close at a carving and seen thin lines where one pass met the next? Is there a plain razor blade somewhere in your house? Then you already own the tool I picked up at the start of lesson 28 and again near its close. You'll see how I hold it, which gouges blend just as well, and the one edge I keep away from.
What lesson 28 shows about blending
- A razor blade, edge down, takes the ridges out with small cuts and rounds up the pipes.
- Gouges blend too, and often it's the one already in my hand, like the back bent or the little spoon.
- Each cut stays short, about 3 mm (1/8 in), so there is always room to go back.
- The edge meant to be a high spot, I leave alone.
- Leftover pattern paper comes off with the blade, or with the spoon.
- Finer cleanup waits for off camera, where I can get a little nearer and take my time.
How should the razor blade be held?
On its edge, with small cuts. Halfway through part three I grabbed what I call my 18th century scraper, just the razor blade, and got rid of that paper. I didn't need to carve anything in that spot. All I had to do was pretty much blend those cuts, and I could almost shave it.
I worked my way in until the edge was really blending in, then took a number 5 for the inside. It's really good on walnut and cherry, I said. My panel is the same purple walnut board from the design course, only 10 mm (3/8 in) thick.

In the last minute of the lesson one area sat lower than the rest. The razor blade came back out, it blends really nicely, and the last of the paper went with it.
I gave the same tip in workshop 28 of the Venice Room. One of the tricks, I told people there, is just a normal razor blade, the kind you buy at Home Depot or any local lumber yard if you're in the United States, and you scrape with that. You don't have to buy specialty tools for this, I said, and it gives you really nice results. Some furniture makers, even in the past, used techniques like that, scraping or something else, I said in the same workshop.

How long should each cut be before you blend?
About 3 mm, maybe 4 mm (5/32 in). The two concaves in part one came from a number 8 of about 1/8 inch, and I didn't make real long cuts. Little by little. When I need to, I can always go back and create an extra cut.
Nobody is rushing me.
For a while the surface looks rough, and I told you not to worry if it doesn't look perfect yet. Part three says the same thing, that I don't worry about how rough it looks as of now.

How the tool meets the wood matters too. If you look at the line and place the tool like 90 degrees, it won't be really good. Look for something like 45 degrees, and I'm talking about the angle right there, so it's more slicing and a lot easier to carve.
Right after saying that, I admitted I got a little deeper than I would like. It was okay. I'd take care of that a little later, because for now I needed the overall shape.

Which gouges blend the ridges as well as carve them?
Mostly number 3s, plus one number 5. The back bent came first. I planted the convex with a number 3 back bent, 6 mm, about a quarter inch, and the same tool could blend it as well.

A small, tiny spoon came next, a number 3 at 3 mm. I like it because it's shallow enough, and I can walk my details with it. I wanted the highest spot right there, even if I had to sacrifice some of the convex I made before. I can always blend that in. What I'm after is almost a water drop shape.
During part two the same spoon made multiple chamfer cuts until I was happy with the overall look, and later it blended the part that rolls. Wikipedia calls a chamfer a transitional edge between two faces of an object. A wider number 3 showed up in part three, a little less than half an inch, 12 mm, and blended one section slightly better. A number 5 at 1/8 inch then took off a few of the facets inside.

And yes, you can blend with just a knife too. Part two opens with what I like about one tool, as I've mentioned so many times. You can use just the side of it, so I lay it on its side and clean with it.
That Venice Room workshop put it plainly. Usually I just take it to the perfection with the gouges, blend everything, and work my way in.
| Tool | What it blended in lesson 28 | When |
|---|---|---|
| Razor blade, held on its edge | Small scraping cuts that took the ridges out and rounded up the pipes | Opening minute |
| Back bent number 3, 6 mm (1/4 in) | The convex it had just planted, with no tool change at all | First half of part one |
| Small spoon gouge, 3 mm | The water drop high spot, then the rolling part after the chamfer cuts | Parts one and two |
| Wider number 3, 12 mm (just under 1/2 in) | One section blended slightly better while I was rolling the movement over | Early in part three |
| Number 5, 1/8 in | A few facets on the inside, right after the blade did its work there | Halfway into part three |
| A plain knife | A small detail I cut under, and you can blend with it too | Last few minutes |
Which edge should you keep away from?
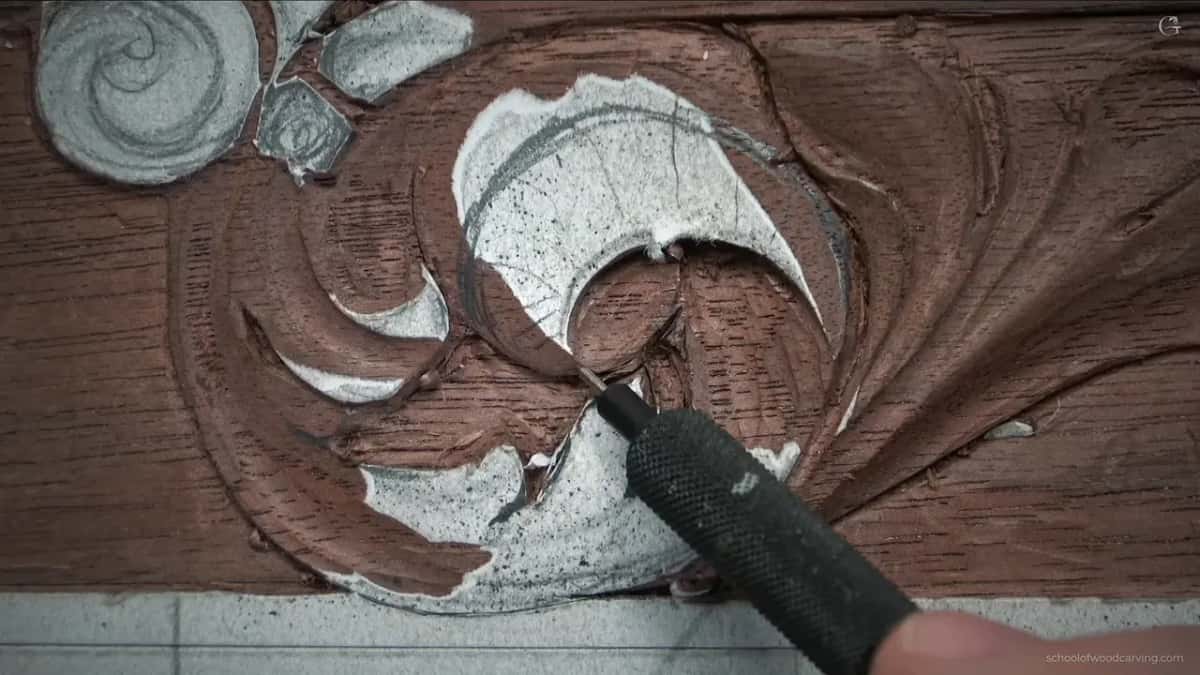
The one meant to stay a high spot, and part three has the clearest case. I took the 3 mm number 8, made a concave cut close to an edge, and said I'm not going to touch that edge, because that edge is supposed to be a high spot.
That concave dies right underneath there, and it gives me really beautiful shadow play.

Later, blending leftover paper with the number 3, I said it again. I don't want to destroy the edge. It's got to be higher.
Earlier the worry was a ridge between two concaves. Going too low would lose it, and it has to sit above the surface where you can still detect it, so the deepest spot inside that concave was probably no more than half a millimeter (about 0.02 in).
Some edges sit on top of a future molding. Those I don't want to damage either. I call those pieces molding, though they're almost like pieces of a mullion, and I'm not sure if that's correct. Let me know, please. Wikipedia describes a mullion as the element that divides the units of a window or screen, or one used for decoration.
A nick from the corner of a tool is a different story. Catch an edge and damage it a little at this stage, and I don't really worry about it, since I can always go back and fix it. Lesson 22 covers why furniture carving stays away from too sharp edges.

What makes the pipe you end up blending?
Two concaves, one on each side, and the part between them becomes the convex. To create that convex, you have to create two concaves. Every movement is supposed to have two concaves and one convex right in the middle, and I stuck to the same idea I used on an earlier spot of this panel.
The first outline, with a 2 mm (about 5/64 in) number 11, went no deeper than 0.5 mm. I still want to see my pipe there, and it still has to be like a convex.
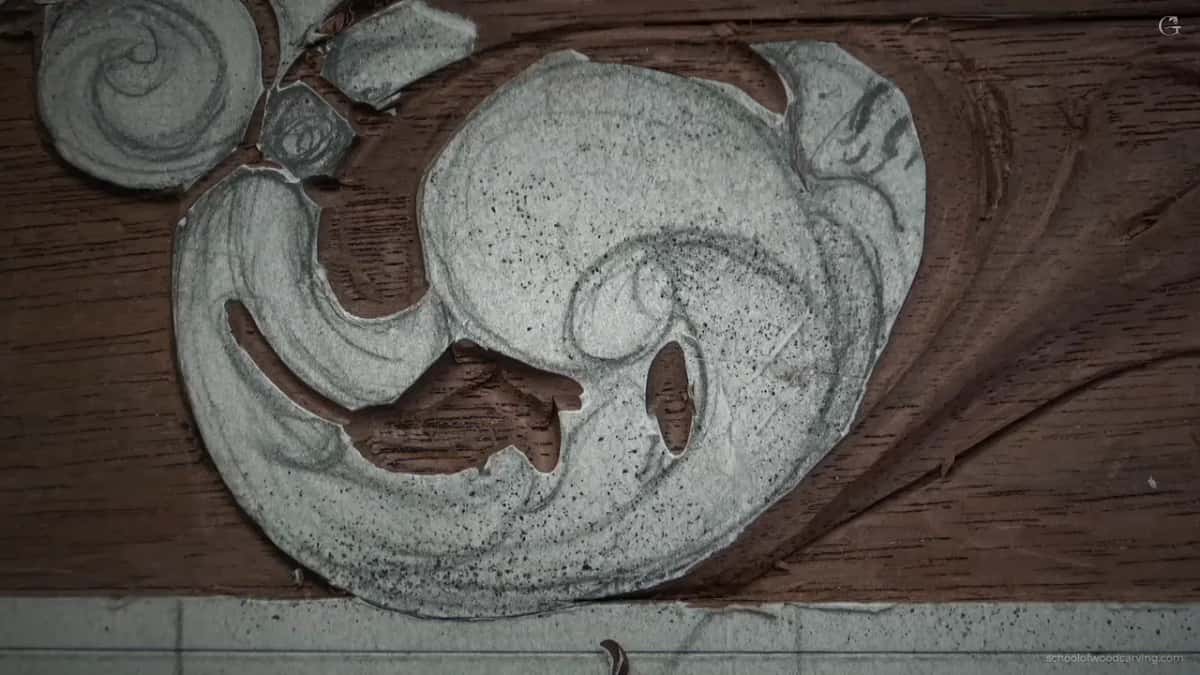
I'm looking for the tapering here. Take one spot and it becomes wider, wider, wider, and then tapers backward and becomes narrow. I was after that tapering in part one too, and I guess I achieved that.
Later in part three there was an eye and another eye, and if I have an eye there's supposed to be a pipe, so two pipes were left to do. Every time you do a pipe, you have to create two concave cuts right on the side. Like I said before, you can always blend those ridges in, and it's going to become like a pipe. The tiny eyes and pipes of lesson 21 were done on this same board.
Where do the undercuts go before you blend?
Under whatever has to look like it grows out from below. Part two shows it, when I went under a line and started undercutting so that part would look like it is growing from underneath.
Two parts met in part one, and I didn't want to see the channel going all the way through. One part had to overlap the other. If I overlapped this part, the design would go underneath and I would lose the overall shape. The other way gave me a lot more possibility to create a more beautiful shape, so I lowered one side slightly and brought everything underneath of that line.

Undercutting with the flute at about 2 o'clock, I said it had to go much deeper, otherwise there would not be any effect. So I switched to a half millimeter number 11. What I'm after is shadow. Right here it's almost no cut, and it gets much deeper right underneath.
The same half millimeter tool already did a job in part one. I just kind of wiggled it, flute up at 12 o'clock to create a deep spot, then flipped to 6 o'clock to go a little further inside and remove the rest.

How deep can I go? Excavating inside one section in part two, I said I cannot go deeper than whatever the background is here. That would be a big mistake.
That excavation ended up about 2 mm, maybe 2.5 mm (roughly 3/32 in), and there's no need to measure, it's just approximately. A smaller Dockyard number 8 went in next, a little over 1 mm (just over 1/32 in), with no markings on it. I can go deeper, but I cannot go lower. Lesson 36 takes up the rule for the floor, and lesson 19 is the one about undercutting for extra shadow.

Where do straight-down cuts fit in?
Chopping waste on the line, and clearing a triangle. First I set where the eyes would be in part three and chopped the waste with straight-down cuts, right on the line, multiple cuts. I know it looks messy. It's okay as long as I'm not too deep.
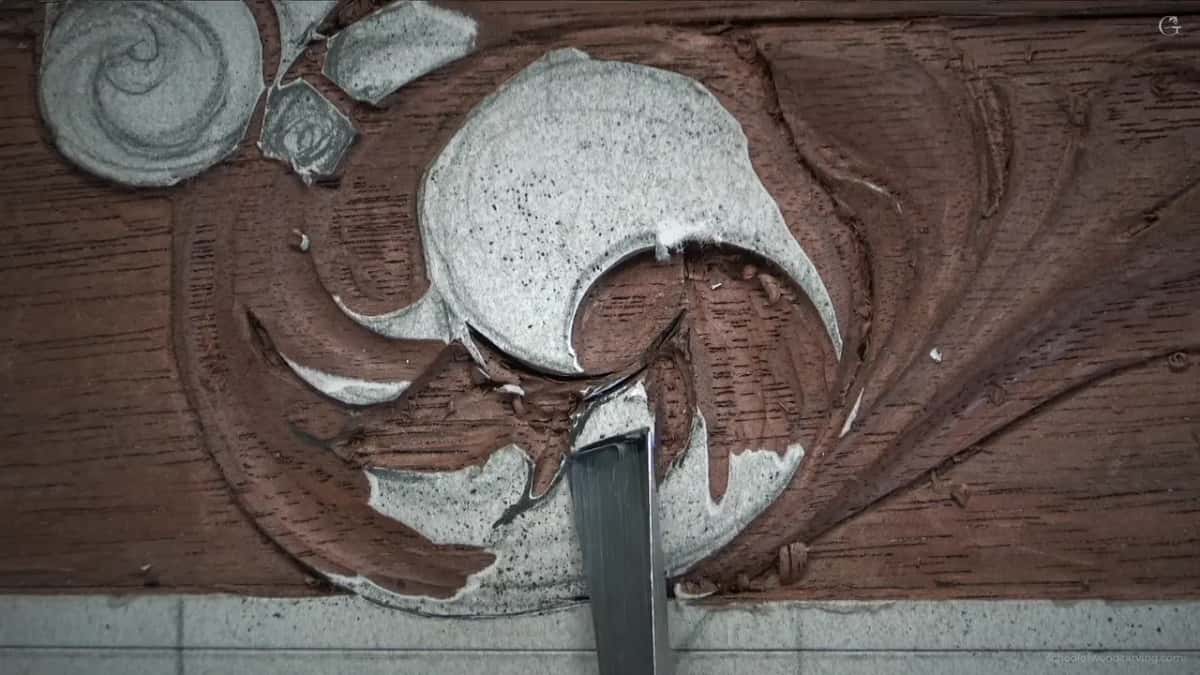
A quarter inch number 3 went on the line next, straight down, all the way around. I flipped it this way and that way. As you remember, I really like to see some kind of letter S movement, which is not pronounced.
Some of you ask why I don't just outline everything with stab cuts at the beginning. Think about the stress on the fibers. It's going to break that stuff. The whole question gets its own page in lesson 39, near the end of this course.
Back in part one there was a triangle to remove with a 2 mm number 11. With older tools you almost can't find 2 mm. You can use 3 mm, you can use 1 mm, but make sure you really relieve it, because if you don't, you'll have a big problem. And the plug cut, my favorite technique, is just a straight down cut, and lesson 26 is all about it.

What do you do when the drawing disappears?
Draw it back in. Late in part one I got the shape I wanted, but I lost a detail. There should be a separation, and that is absolutely no problem. I grabbed my pencil and drew it right there, then switched to a marker so you could see it much better.

A second marker came out in part two, because the first one was a little too fine. All the waste around a small eye got excavated too, so I could see much better what is going on. Otherwise it's just a little too messy.
Paper is the other thing that blends away. At one knife cut I took very little, because I didn't want to mess up and get rid of that paper. Half a minute later I mentioned the last piece of paper on each side and said you can kind of blend that too.
Can a card scraper or a utility blade do the same?
On lesson 38 of this same panel I named both of them, and I said you don't have to use a knife to scrape. You could use just the normal card scraper if you want, or utility blades, and you can really make it shiny and nice.
Wikipedia calls the card scraper a woodworking shaping and finishing tool that takes off small amounts of material. I have a tendency to scrape with the blade itself at an angle. That way I can hit those small sections, since it's kind of hard to scrape without some angle.
The tools course has a whole lesson on scrapers, and the Venice Room has a page on what blending means. In the Venice Room workshop with the razor blade I also said I still feel guilty every time I grab rasps or sandpaper.
When does the real cleanup happen?
Off camera, a little closer to the work, where I can see much better. I could do a lot more extreme, nicer job, let's say, but I can always take my time off camera and clean everything, and you can see how it blends. As far as the detail itself, I think it looks really nice.
I also broke some of the rules on camera. Don't worry about me breaking rules if you don't feel comfortable, I said, and in my case it's almost impossible sometimes because of the camera position.
As long as you understand the concaves and convexes of that detail, you should be fine. The lesson ends with one area I still need to round up, next time. It's three parts inside Carving Furniture Panel, Part 3, right after lesson 27, and the carving stage before it lives in Part 2. Access to all three parts is on the Tuition page.
Got a razor blade in a drawer? Then the last step of this lesson is already in your hands.
How it's done
- Keep each cut short. Make every cut 3 or 4 mm long and go little by little. An extra cut can always come later.
- Lean the tool in. Bring the tool to the line at something like 45 degrees, not square at 90. The pass slices and carves a lot easier.
- Carve two concaves for each convex. Use a number 8 near 3 mm for one hollow on each side of the pipe, no deeper than 0.5 mm, so the ridge between them stays up.
- Blend with the gouge in your hand. The back bent or the little spoon can blend the shape it just made, with no tool change.
- Leave the high edge alone. Come close to an edge that must remain high, but do not touch it.
- Finish with a razor blade. Hold the blade up on edge and make small scraping cuts. The ridges blend in, the pipes round up, and the leftover paper comes off too.
Frequently asked questions
Can you blend carving ridges with a razor blade?
Yes, held up on edge. Small scraping passes took the ridges out on my walnut panel and rounded the pipes up at the same moment. Late in lesson 28 the same blade also lifted the last bits of paper pattern off the wood.
What tools besides a razor blade blend gouge marks?
Mostly number 3s, in lesson 28. A back bent at 6 mm blended the convex it had planted, a tiny 3 mm spoon walked the details, and a wider 12 mm one helped a rolling section. One number 5 took facets off, and a plain knife works too.
How deep should the concaves beside a pipe be?
Shallow on this panel. The deepest spot inside each concave was probably no more than half a millimeter (about 0.02 in), because the ridge between the pair still had to sit above the surface and stay easy to see, and going too low would lose it.
What to carve next