

Alexander Grabovetskiy, woodcarver, School of Woodcarving · Published 2023
What shape should a carved acanthus leaf be in cross section?
Quick answer: A carved acanthus leaf cross section is, on my walnut furniture panel, a concave, then a convex, then another concave, so the middle of the lobe stands up between two shallow hollows. I took that logic from old work of the 17th to the 19th century, where most European leaves have the middle part raised up.
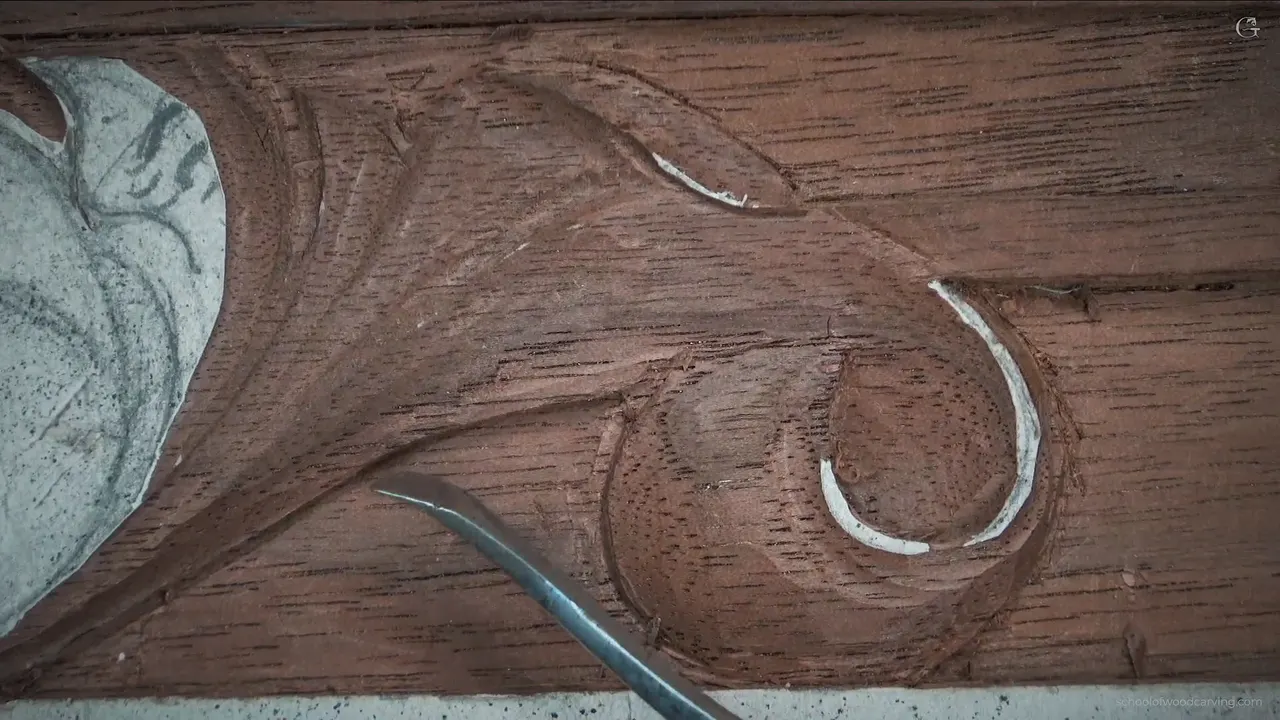
The section of an acanthus lobe on my walnut panel is concave, convex, concave, so the middle stands up between two shallow hollows. In lesson 27 of Carving Furniture Panel, Part 3 I took acanthus movements I had only rounded the time before and carved that section into them, one lobe at a time.
Ever looked at an old carved leaf and noticed how its middle stands up? Would you like yours to throw shadow that way, even on a thin board? Then the section is where it starts. Below are the tools and depths I used, plus the spots where I kept only one hollow.
What lesson 27 shows about the acanthus section
- Before this lesson the lobes were only rounded, and I said you could leave them that way.
- A small number 5 made the first hollow.
- Every eye is a separation, so every eye gets a pipe, and on this panel that pipe stands up as a convex.
- Even a strip left under paper became a micro pipe.
- Near the molding I kept a millimeter or so away, and over it almost nothing came off.
- The warning I repeated most was about the depth of the background.
What does concave, convex, concave mean on an acanthus lobe?
A slice across the lobe would show a hollow, then a raised middle, then another hollow. When this lesson began, the inside of that movement was only rounded, from lesson 26, with a few small movements carved inside. The panel looked like that overall. You could leave it like it is, I said, or take it to the next step and bring in a couple of concave cuts.

One of those I wanted for sure. The other one? Maybe yes, maybe no, but this one definitely. Inside the movement the logic was only round, and I wanted to bring in concave, convex and concave instead, so that a section cut through it shows exactly that. I hope it makes sense.
Why should the middle of an acanthus leaf be raised?
I'm after the logic of what carvers did before, in the 17th, 18th and 19th centuries. Study the pictures of that old work online, or in books about the acanthus leaf, or just go to a museum and look. You'll see that most of those European leaves have the middle part raised up, Northern European as well as Southern, I said, and Italian also.
The furniture collection of the Victoria and Albert Museum in London is one place to look online. Wikipedia calls the acanthus one of the most common plant forms used for foliage ornament in the tradition that came from Greece and Rome.
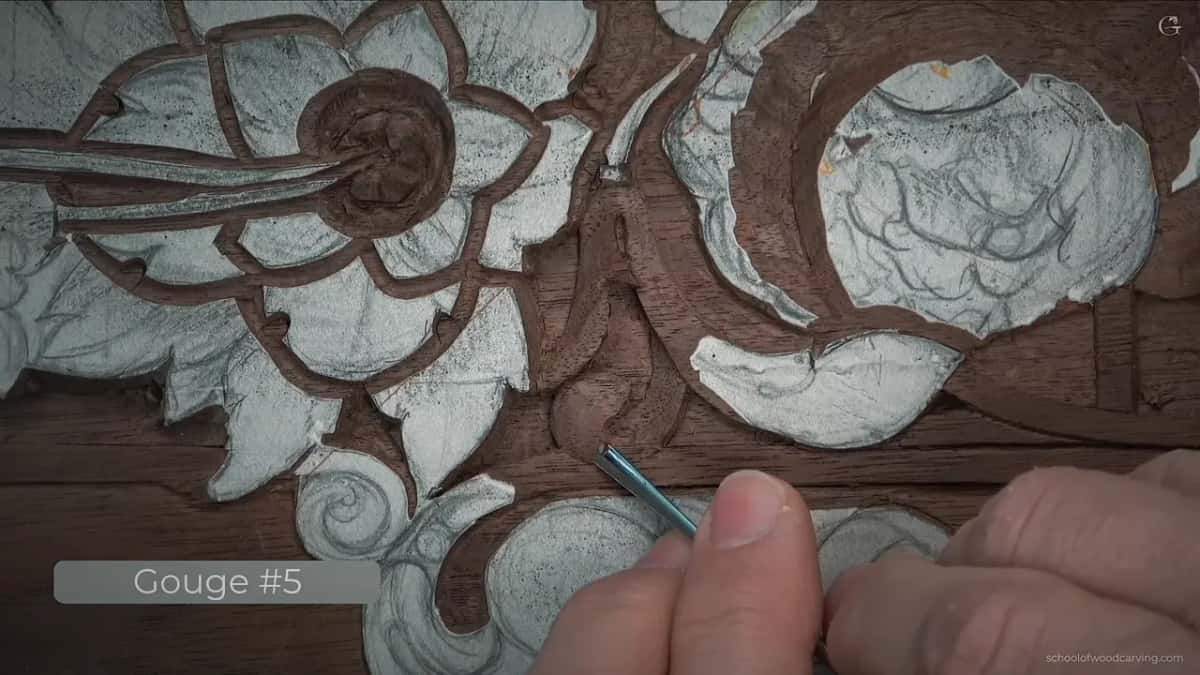
I came back to it later on this same panel. For the petals of an acanthus flower in lesson 33 I drew the section on my iPad, and it was the same idea, concave, then convex right in the middle, then concave again. Everything in the 18th century was highly stylized, I said there, not what you see in real life, and I really want to be authentic to that century in this panel.
Not every period carved it that way. The oldest acanthus in my Greek acanthus course has a V cut inside the leaf, and the Roman acanthus has a hollow there. So this page is about the late 18th century style of this panel, not every acanthus ever carved.
A petal in Acanthus over Moldings 7 follows the same anatomy. Its middle part gets raised up, I said while carving it, and then it has a concave on each side.
How shallow can the hollows be on a thin panel?
Very shallow. I didn't need a big concave, so I grabbed a small tool, a number 5 at one eighth of an inch, about three millimeters. It's a small concave, but it's going to give me some shadow. Not really deep. I wanted this ridge up, raised slightly.
My board is only 10 mm (3/8 in) thick, the same walnut I glued up in Designing Furniture Panel 1, so this low relief has little wood to spare. The difficulty of that type of carving, I said in part three, is that it's so shallow and you still want all the concaves and convexes without digging too deep. One area I judged at about three millimeters deep, and the next section went to that same depth.
Which tool blends the hollow into the raised middle?
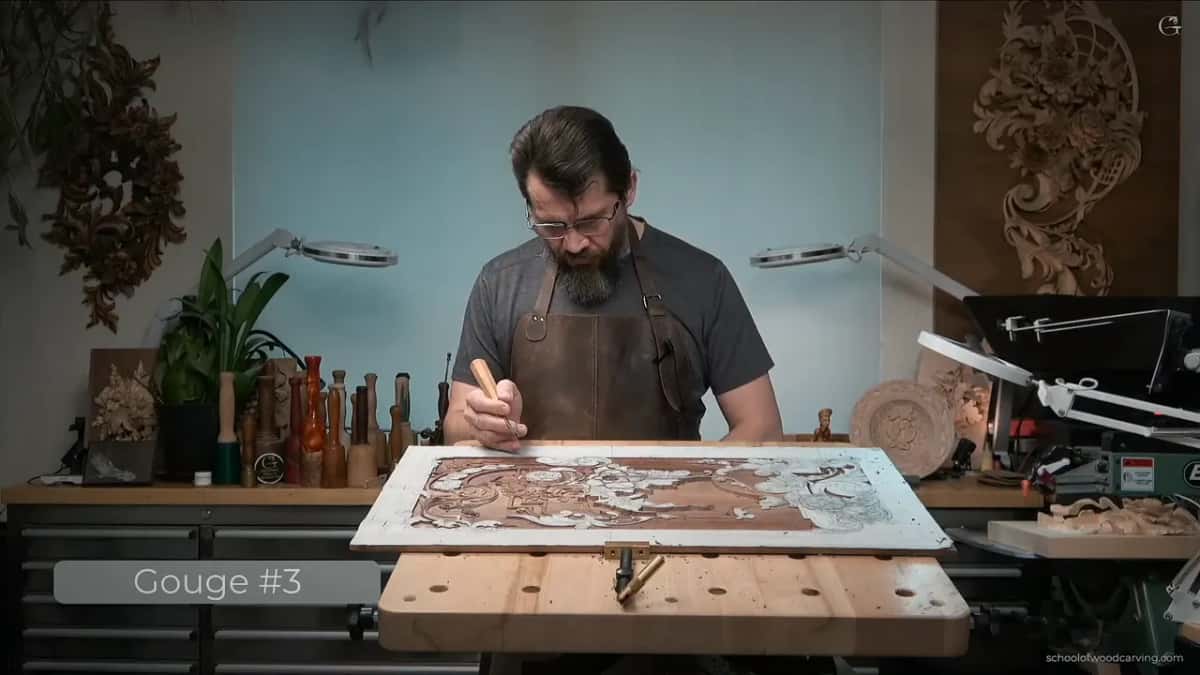
A back bent. My ridge was up, but I also had a ridge I didn't want to see. Any flat gouge will do, but I still had a back bent, a number 3, and with it I took care of that area. That detail I was happy with. On the next lobe the same 6 mm (1/4 in) back bent blended the convex again, though it doesn't have to be exactly the same tool.
Where do the eye and the pipe go on an acanthus leaf?
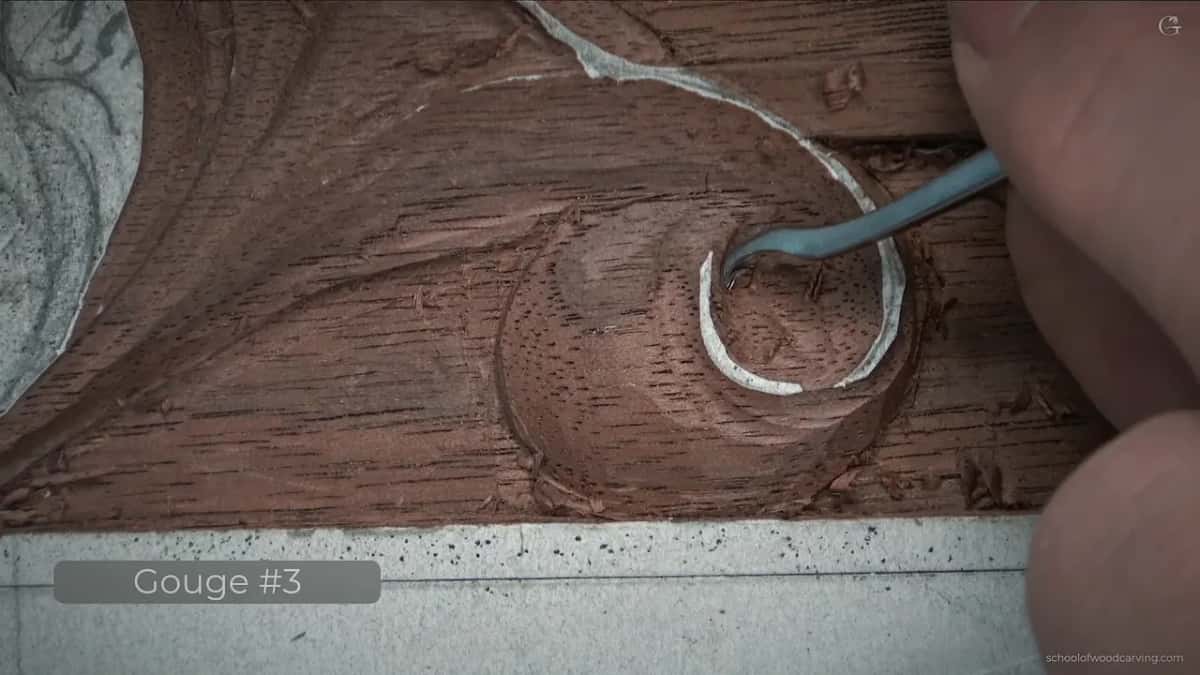
The eye comes first, and the pipe grows out of it. My next movement continued the same acanthus, curling down underneath another part, and its starting point was the eye. It's supposed to look like the shape of a water drop. From there the pipe goes all the way and blends in, so it won't be visible.
Either a number 8 or a 9 will do for the eye, and I took a small one by Dockyard. I thought it was one millimeter, but it looks like one and a half (1/16 in). Obviously I could use a number 11 like I usually do, and I don't know why I grabbed this one. Number 11 is always better. So I switched to a 1 mm eleven (about 1/25 in) and got that shadow going.

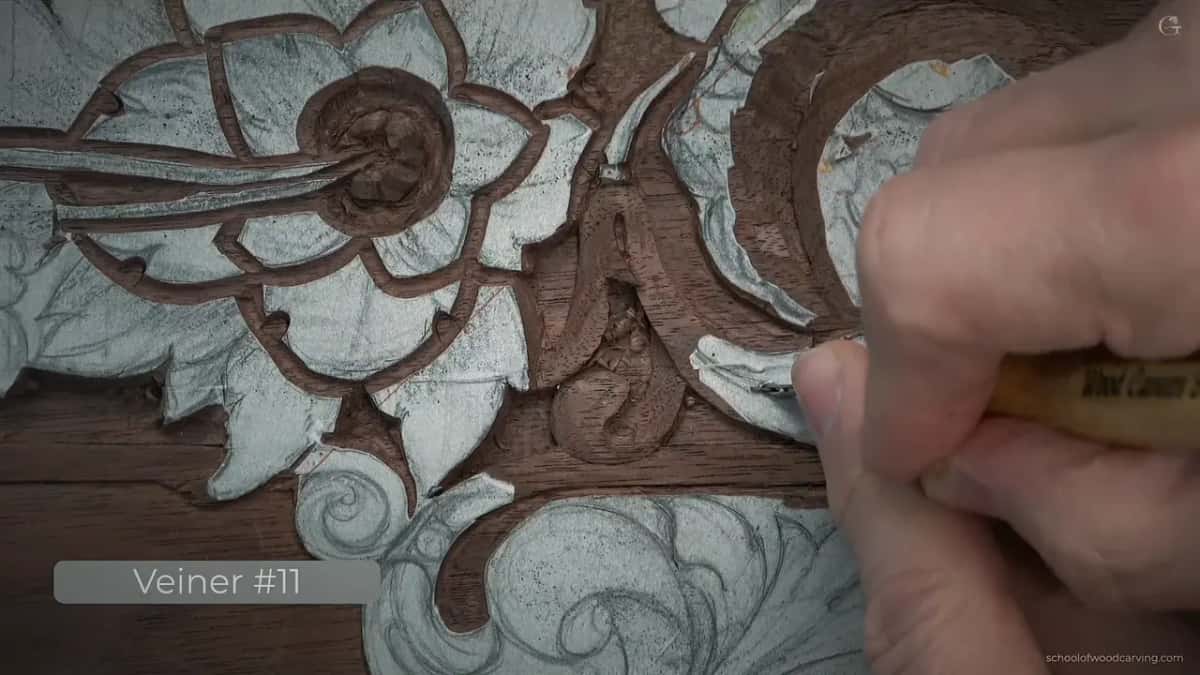
Two concaves make the pipe, one on each side, and mine came from a number 9. You probably noticed I wasn't pushing all the way. No long passes. I took it little by little. And I really wanted to see this pipe exaggerated.
Part two puts it this way. Every time I see an eye on an acanthus, that is a separation, which means I'm always going to have a pipe, and the pipe is always raised up, so it's convex. If eyes and pipes are new to you, Greek acanthus lesson 4 carves them on a whole leaf, and in lesson 21 of this panel even the tiny acanthus movements got their eyes.

What is a micro pipe on an acanthus leaf?
A micro pipe is a small raised strip, the same idea at a smaller size. Between two parts of one movement I had left a strip of white paper, and that strip was going to stand up too. Not big, but a micro pipe. That is a really important micro pipe movement, I said.
The other side of that movement got its concave next, and I said it again. Remember, the middle part has to stay up. This part concave, that part concave, and that one convex. Then I had another pipe going, and the third video opened on a pipe, another pipe, and another pipe.

Does every lobe get a hollow on both sides?
Some get one. Where the movement rolls under the molding I did one concave, and on the next movement I was able to do two concaves on the sides and a convex right in the middle. First I had to figure out my center, the line the main movement follows.
Later I got my pencil and drew approximately how it goes, center line first. Sometimes it's a good idea not to do the concave on the other side, I said, because it's going to feel like it's rolling. So my first concave went right underneath that line, with a 5 mm eleven, 3/16 inch, coming from underneath and then going downhill.

Can an acanthus leaf look like it flips over?
It can. On this panel I got it by taking the part beside it down. For one pipe I needed to drop the whole section, and I took that side even lower, almost to the background. I know I lost the feel of the flipping motion, I said, but it's okay. I'll fix that. You're still going to feel it.
Back in part one a movement had to roll right underneath the molding. The same 3 mm number 5 opened it, but it can't be deep there, since I was taking less than half a millimeter (under 1/50 in) in that area. I still wanted it to feel like it wraps. So a flatter tool, a double bevel number 1, started a rolling motion with chamfer cuts.

Sadly the camera zoom didn't let you see it well. One more tiny pass with the number 5, almost invisible, had to connect with the one before it, so it feels like it crosses underneath, and then I undercut it slightly. I do understand some limitations. But it already feels like it's rolling. Lesson 22 is where I said a furniture carving shouldn't have too sharp ridges.
How close can you carve to the molding?
A millimeter or so away. I stay away because I don't know what the grain does in there. If I catch that grain and it splits, I can create a big problem. A small split on this side I can hide by changing the design, but whatever the molding is, it's impossible for me to change anything. Then I went a little closer anyway. Don't worry about that, I said. I'm breaking all the rules, and in this case I don't really think it's a big deal.

Over the molding itself I barely take any material down. My flute turned nearly to three o'clock there, because I can't go below the molding. Whatever overlaps it stays slightly above. Those passes are almost just a paper. On the left side of the flute I could go much deeper, nearly to the background.

Which tools cleared the ground around the leaf?
A router plane came first. I set a different blade, maybe 3/16 of an inch, about five millimeters, and showed why I love this router plane by Veritas. Changing the blade takes seconds, a couple of seconds, and I'm ready. After that the previous blade went back in. Wikipedia says Lee Valley Tools, a Canadian company, started its own Veritas line of tools in 1982.
The outline went in with a 2 mm (about 5/64 in) veiner at the same depth. To remove the mass I took an antique gouge, probably a number 8, the kind I really like lately, and went across the grain. It's always safer to go across. Going deeper than the other side would be a big mistake, so I kept an eye on it.

One straight line needed a number 1 chisel. I used a huge one, about 40 millimeters, roughly an inch and a half, set it right on the line and grabbed a mallet. It gave me a really good line. A number 3 cleaned up after it. Then the router plane came back to get a little closer to the final destination.

| Spot | What I did there on the panel | Tool and size |
|---|---|---|
| First small concave | Barely went in, only enough to raise the ridge up slightly | Number 5, 3 mm |
| Ridge I didn't want | Took it off and blended it into the convex | Back bent number 3, 6 mm |
| Eye of the movement | A water drop shape, after a small Dockyard gouge | Tiny eleven, 1 mm |
| Both sides of the pipe | Two concaves, short passes, so the pipe stood up | Gouge number 9 |
| Roll under the molding | Chamfer cuts to make it feel like it wraps underneath | Double bevel number 1 |
| Over the molding | Almost nothing came off, paper thin | Five millimeter veiner, flute near three o'clock |
| Undercut beneath the overlap | Went around it, then a number 1 blended it | Half millimeter veiner |
| Rolling the surface over | Rolled it slightly and stopped right before the background | Wide number 3, 12 mm |
How do you undercut the overlap without losing the background?
Carefully, using a small tool, and always above the background. Early in the lesson one part was supposed to overlap, so I undercut slightly under it with a number 11 at half a millimeter (about 1/50 in), went around like this, and blended it in with the number 1. Some of the small stuff I finish off camera under a magnifier lamp, where it's a lot easier for me to see.
Under another edge I used a number 9 spoon. A really tiny, small spoon. You can find them sometimes on eBay. The new manufacturers don't make them, but it was a common tool in the 19th century, with a small tiny hook like this. A beautiful tool for that kind of operation. A straight tool still gets you that undercut, like the 2 mm veiner I was also using. But those spoon ones are just excellent.

I just broke the edge, which means I was pressing too much. That's all right.
Another overlap had a problem. That part lies right on this edge, but I don't have too much material, so the overlap can't be too visible. The half millimeter eleven, with my flute at about nine o'clock, well, actually ten o'clock, made that undercut. The line goes right underneath, almost invisible, but it still goes underneath.
Without one that small, use a V tool or parting tool with its flute laid almost flat on the left wing for that undercut. Carefully. That is also legit. For this operation I still love the tiny eleven, though, flute to the right in my case, and lesson 19 on this panel is all about undercutting.

How deep is too deep next to the background?
Anything below the background. When I rolled a surface over with a number 3 at 12 millimeters, a little less than half an inch, I warned you about it. With a big tool like that, make sure you don't dig too deep into the background, or you're going to damage it. It's always better to stop right before.
Later a number 7 at about 12 mm cleaned one area, and I warned you again to keep an eye that you don't go deeper than the background. It's really important, really, really, really important not to make that mistake. The undercut can go as deep as I want, just not so deep that I lose the background depth. A spot that got a little too deep just needs blending, and a small number 3 can do it. It's already casting the shadow. That's what I'm after.
Why leave paper on the high spots?
Paper marks my highest spots, so I don't take them out yet. Later I will need to undercut there, and I need to see that line. On light wood that's okay, but on darker wood it's not always, and this walnut is dark. I kept a little bit of paper just for me to see.

Do you need a V tool for this?
You can use one, but you don't have to. I thought about a number 16 for undercutting one spot and then said I probably shouldn't, because I'm talking about the V tool. Even nowadays not every carver uses it, and in the 18th and 19th centuries some people didn't even have one, I said, because it wasn't the common tool back then. But you could.
Was the panel finished in lesson 27?
Not yet. That was it for that day. We are moving little by little, but you can see it's already developing. It's all about techniques, pretty much, and once you've got the idea of the techniques you can probably move somewhere else if you want to.
Some of you sent me a picture of a finished panel before we finished. Don't get me wrong, it was useful, I should say. But it isn't too authentic to the period, the late 18th and early 19th century.
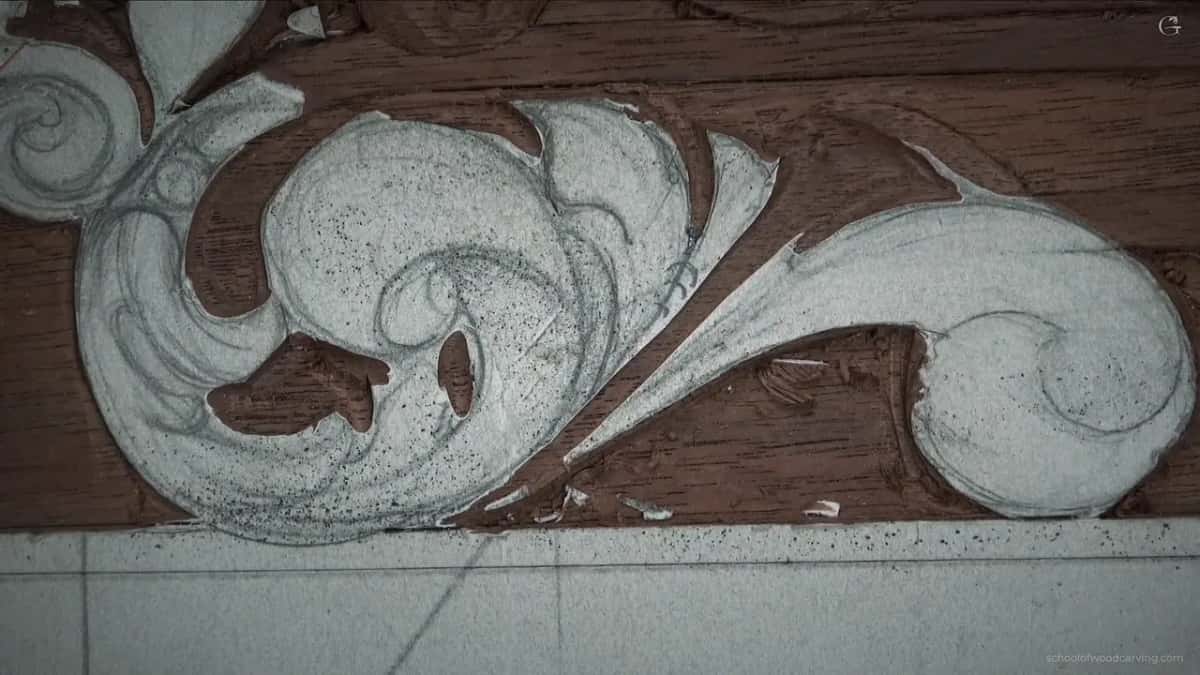
Lesson 27 sits in Carving Furniture Panel, Part 3 after lesson 26 and before lesson 28. The whole drawing comes from Designing Furniture Panel.
Every lesson of it is open to you through Tuition, the same as this one.
Got a lobe on your bench that is only rounded? Want the middle up and a little shadow on each side? Take a small number 5, give it one shallow concave, and then decide if it needs the second.
How it's done
- Find the center of the movement. Work out where the middle runs before any hollow goes in. On a new lobe I drew it in pencil first.
- Carve one small, shallow concave. A 3 mm (1/8 in) number 5 is plenty, and it only goes in far enough to lift the ridge a little.
- Blend off the ridge you don't want. A back bent number 3 at 6 mm does it, or any flat gouge.
- Open the eye. Shape it like a water drop with a tiny number 11 of about 1 mm, where the leaf separates in two.
- Leave the pipe standing. Hollow each side using a number 9, a little at a time, so the strip between them stays up as a convex.
- Undercut the overlap last. Go around it with the smallest veiner, a half mm one, let a number 1 blend it, and stay above the background.
Frequently asked questions
Must every acanthus lobe get two hollows?
No, a rounded lobe can stay the way it is, and I said so when lesson 27 began. One concave was a must here. The second was maybe yes, maybe no. Where a movement rolls under, one hollow can be enough, because then it reads as a roll.
Which gouge opens the eye of an acanthus leaf?
My usual choice is a number 11, and I called it always better. That day a tiny Dockyard gouge, an 8 or a 9 of about 1.5 mm (1/16 in), was in my hand first. After that a 1 mm eleven took over, and the shadow got going.
What can you use if you have no half millimeter veiner?
A V tool works. Lay its flute almost flat on the left wing and go carefully, and you get a legit undercut. A straight 2 mm eleven also reaches under an edge, and an old number 9 spoon gouge is excellent for it, though new makers don't make those spoons.
What to carve next
- Carving Furniture Panel, Part 3
- Carving Furniture Panel 26, the lesson before
- Carving Furniture Panel 28, the next lesson
- Carving Furniture Panel 33, the same section on an acanthus flower
- Carving Greek Acanthus Leaf 7, the V cut inside the oldest leaf
- Acanthus over Moldings 7, a petal with its middle raised